For my new 27" iMac (late 2013) I purchased a 32GB memory upgrade. Apple supports installing third-party memory – I bought the upgrade from Crucial.com and one of the things I wanted to do was thoroughly test the memory.
Not to be alarmist, but fair warning: what I describe here can break your Mac’s boot process, so you’d better not do it unless you’re an advanced hacker.
Introduction
That’s where MemTest86 comes in – a fantastic program for testing memory. Ideally you run it natively right after boot, without entering the operating system, but that’s not so easy on a Mac. Let’s see how to do it without needing to boot from a DVD or USB. The process is relatively simple: install a Boot Manager (rEFInd Boot Manager) different from the one the Mac comes with, add MemTest86 (EFI version) among its options, and during the next boot select it to run the memory tests – easy, right?
Oh, there’s an alternative to all this: running memtest from MacOSX, although it’s not as “native”. The program is called Rember, a GUI that uses memtest86 from within the operating system.
Installing rEFInd
Let’s go with the “risky :-)” option… Download rEFInd, specifically the “binary zip file”, which is compatible with the 27" iMac (late 2013, also tested on mid 2011). Once you have it, navigate into the refind-bin-0.7.5 subdirectory

Open Terminal.app and run “install.sh” (WARNING!! it’s going to “touch” your Mac’s firmware – here’s my disclaimer again, I take no responsibility for any possible disaster. If you don’t know what this is about, don’t even think about continuing…)
asterix:~ luis$ cd Downloads/refind-bin-0.7.5/
asterix:refind-bin-0.7.5 luis$ ./install.sh
Not running as root; attempting to elevate privileges via sudo....
Password:
Installing rEFInd on OS X....
Installing rEFInd to the partition mounted at //
Copied rEFInd binary files
Copying sample configuration file as refind.conf; edit this file to configure
rEFInd.

WARNING: If you have an Advanced Format disk, *DO NOT* attempt to check the
bless status with 'bless --info', since this is known to cause disk corruption
on some systems!!

Installation has completed successfully.
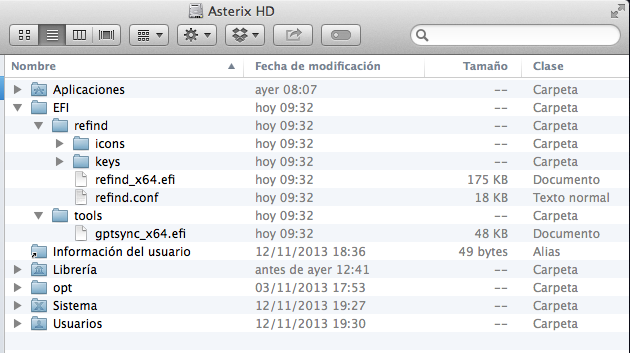
It installs in the /EFI directory of your machine and “touches” the firmware, as I warned :-). The next time you boot you’ll use the new rEFInd Boot Manager, but wait – before rebooting you need to install MemTest86…
Installing MemTest86
The next step is to add MemTest86 to the /EFI/tools directory. First, download the “5.0 UEFI” version, specifically the USB image for Linux (Image for creating boot-able USB Drive). Ignore the USB part – what we want is that package to extract a few files, specifically the 64-bit EFI version of the MemTest86 program.
So after downloading, access it using Finder and you should see the “memtest86-usb.tar” file. Double-click on it, look for the “memtest86-pro-usb.img” image, double-click on it again – it will mount a disk called “Untitled” and inside you’ll find a subdirectory called “EFI”. If you keep navigating you’ll reach what we’re looking for…
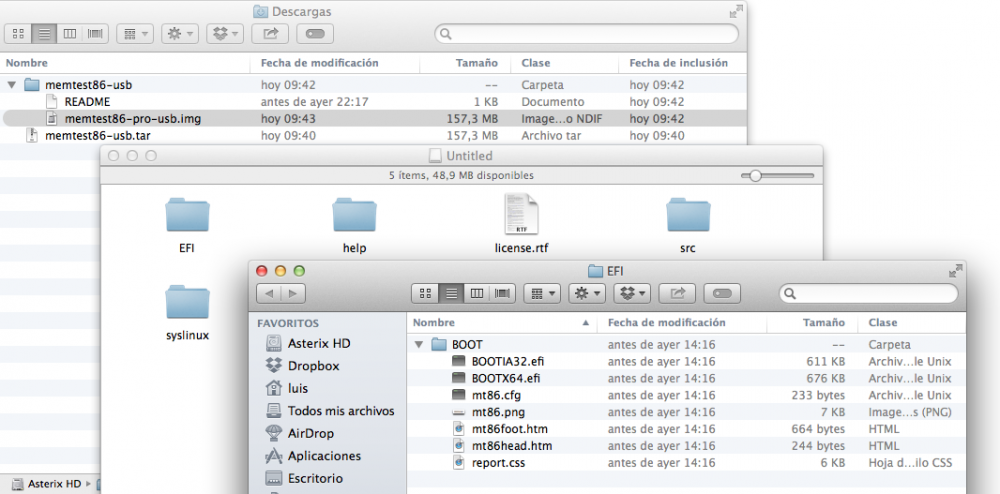
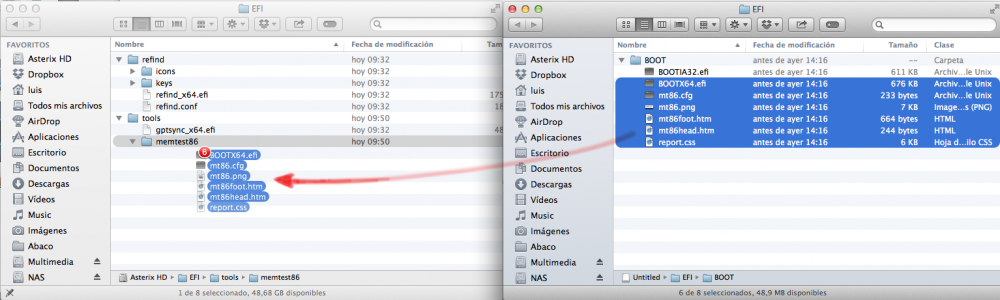
Create the /EFI/tools/memtest86 directory and copy the contents of the EFI/BOOT directory from the image. Be careful!! Don’t copy the BOOTIA32.efi file, since it’s not needed – in fact, it should NOT be copied.
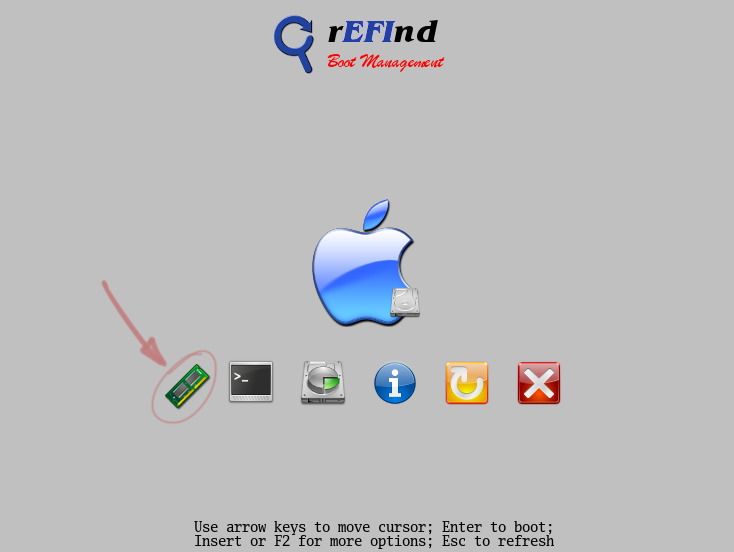
Now you just need to restart the Mac. Right after the startup chime you’ll see the rEFInd screen, from which you can run MemTest86.
I’ve successfully tested this process on both an iMac 27" mid 2011 and an iMac 27" late 2013, both running Mavericks, and it worked correctly. The goal is not to have multiple operating systems on the Mac (which rEFInd allows), but simply to perform thorough memory testing.
Removing rEFInd
If you want to remove rEFInd from your Mac, it’s as simple as going to Apple Menu -> System Preferences -> Startup Disk. Select the hard drive (even though it’s already selected) and click “Restart”. After verifying it boots correctly, you can delete the /EFI directory from your hard drive.
