In this post I describe how to provide a file sharing service over the network with SMB2 (Samba). It’s a very simple example, with a Linux machine as the server and a Mac OSX as the client. I have another post about SMB and QNAP that is very similar.
SMB (Server Message Block) is a network “Protocol” that, among other things, enables file and printer sharing between nodes on a network. It was invented by IBM, but the one who modified it, brought it to fame, and today maintains and continues expanding it is Microsoft. CIFS (Common Internet File System) is a “Dialect” of SMB. A dialect is a set of “messages” that define a particular version of the SMB protocol. Microsoft implements SMB on their machines and added multiple improvements in their CIFS dialect. Samba is a free implementation of the SMB protocol (or call it CIFS if you prefer) that is available on GNU/Linux platforms (for example QNAP), Mac OS X, or Unix.
- SAMBA 3.5.2 uses SMB1 (stable and widely implemented)
- SAMBA >= 3.6.0 uses SMB2 (entered the scene in 2014 on QNAP, MacOSX, …)
- SAMBA >= 4.0.0 uses SMB3 (around 2014 it was “in development”, stable but not widely implemented)
Apple’s native protocol has always been AFP, but since OSX Mavericks it includes and recommends SMB2, making it the default protocol. In this PDF OSX Mavericks Core Technology Overview, page 21, you’ll find more information.
Server Installation
This is a Linux machine with Gentoo where I install Samba (version 3.6.x // SMB2)
# emerge -v samba
[ebuild  N     ] net-fs/samba-3.6.25::gentoo  USE="acl aio client cups fam ldap netapi pam readline server smbclient winbind -addns -ads -avahi -caps -cluster -debug -dmapi -doc -examples -ldb -quota (-selinux) -smbsharemodes -swat -syslog" ABI_X86="(64) -32 (-x32)" 33.323 KiB
:
Configuration
I prepare the smb.conf file. In this example I’m going to share a single directory called /cloud
 # cd /etc/samba/
 # confcat smb.conf
[global]
   workgroup = WORKGROUP
   server string = Cloud Server
   security = user
   hosts allow = 192.168.1. 127.
   log file = /var/log/samba/log.%m
   max log size = 50
   passdb backend = tdbsam
   local master = no
   domain master = auto
   preferred master = no
   dns proxy = no
   max protocol = SMB2_10
   display charset = UTF8
   max xmit = 65535
   socket options = TCP_NODELAY IPTOS_LOWDELAY SO_SNDBUF=65535 SO_RCVBUF=65535 SO_KEEPALIVE
   read raw = yes
   write raw = yes
   max connections = 65535
   max open files = 65535
[Cloud]
comment = Cloud Disk
path = /cloud
browsable = yes
oplocks = yes
ftp write only = no
recycle bin = no
recycle bin administrators only = no
public = yes
invalid users = "nobody"
read list =
write list = "luis"
valid users = "root","luis"
inherit permissions = yes
smb encrypt = disabled
mangled names = yes
Starting the Service
I start the service and configure it to start automatically on the next boot
# systemctl start smbd
# systemctl enable smbd
tdbsam
The backend for storing the Samba user name/password can be: smbpasswd, tdbsam, or ldapsam. For simple (home) environments the recommended one is tdbsam, TDB format (trivial database). The two related lines in the [global] section of the configuration are:
   security = user
   passdb backend = tdbsam
The next step is to create the accounts in Samba, in this example I create only one:
# pdbedit -a luis
Unix username:        luis
NT username:
Account Flags:        [U          ]
User SID:             S-1-5-21-1234567-123456789-1234567890-1011
Primary Group SID:    S-1-5-21-1234567-123456789-1234567890-523
Full Name:
Home Directory:       \\server\luis
HomeDir Drive:
Logon Script:
Profile Path:         \\server\luis\profile
Domain:               SERVER
Account desc:
Workstations:
Munged dial:
Logon time:           0
Logoff time:          mié, 06 feb 2036 16:06:39 CET
Kickoff time:         mié, 06 feb 2036 16:06:39 CET
Password last set:    dom, 06 mar 2015 10:47:22 CET
Password can change:  dom, 06 mar 2015 10:47:22 CET
Password must change: never
Last bad password   : 0
Bad password count  : 0
Logon hours         : FFFFFFFFFFFFFFFFFFFFFFFFFFFFFFFFFFFFFFFFFF
Just in case you need it, take a look at the pdbedit command. You can delete accounts with pdbedit -x user or view the details of a created account with pdbedit -Lv user.
OSX Client
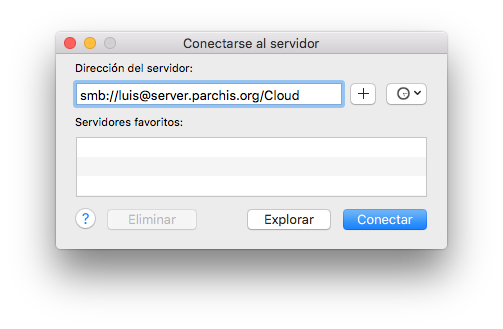
From Finder I connect to the service. It’s as simple as pressing CMD+K in Finder and typing the appropriate notation
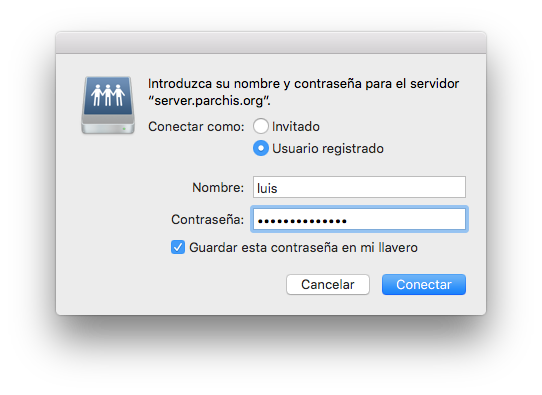
It will ask for the user password, which I can save in the Keychain so it won’t be requested next time