In this post I describe how I managed, from a MacOS, to correctly convert Jupyter Lab exercises to PDF in different environments. Converting Jupyter Lab notebooks to PDF is not easy due to the multiple variants (images, links) they can contain. I’ve tried intermediate exports, pandoc, apps, without much success.
Converting notebooks to PDF
What I describe here was tested with a notebook using neo4J and py2neo while working on Einstein’s riddle: who owns the fish?. In theory it should work with any other type of notebook, including those with embedded images for example.
The process in summary:
| 1 | JupyterLabs > export to HTML locally on my Mac | | 2 | JupyterLabs > export additional files referenced from the HTML | | 3 | On the Mac > “Chrome” > Print to PDF with custom paper size | | 4 | On the Mac > Preview > Crop the PDF to remove excess blank space |
Step 1 - Export to HTML
Although it’s not strictly necessary, I recommend using Chrome for this step. In some cases you’ll need to download several additional files (images) from JupyterLabs and Chrome makes it quite convenient.
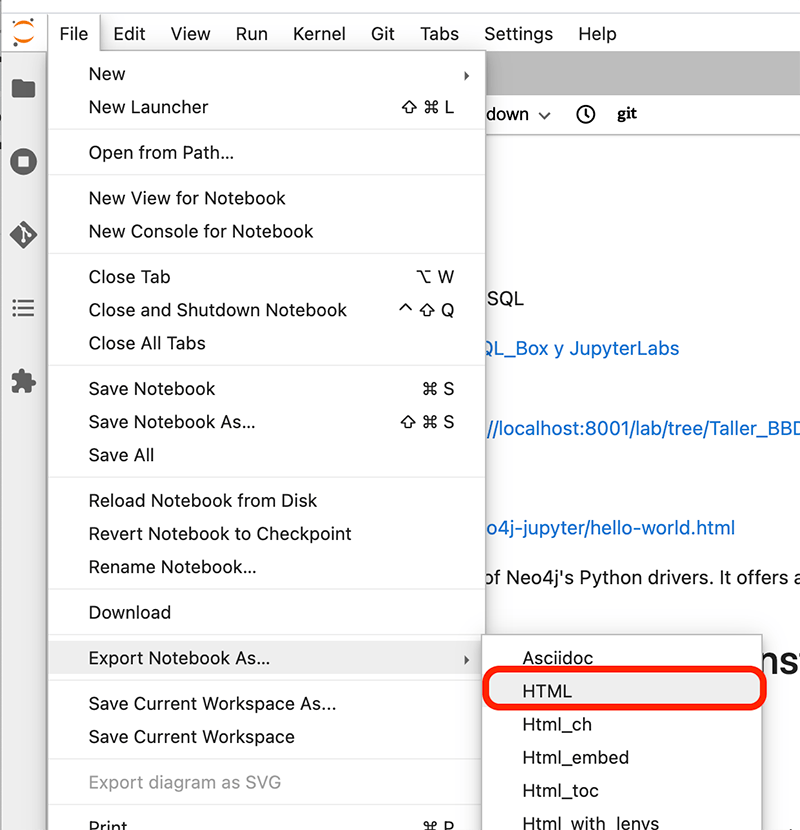
From Jupyter Labs we’ll export the notebook to HTML:
- File > “export notebook as HTML >
/Users/luis/Downloads”
Step 2 - Export additional files (OPTIONAL)
I only do this if your notebook references additional files like images or other HTML files that for example contain scripts. In the notebook in question I use a submodule that creates several graph*.html files under the figures directory containing embedded javascript to display the graphs.
I download the
graph*.htmlfiles. I enterfigures, select all, Right click > Download >/Users/luis/DownloadsLocally, in my
Downloadsdirectory I create a sub directoryfiguresand move the files.

Step 3 - Print local HTML to PDF
I already have the HTML on my computer (along with supporting files).
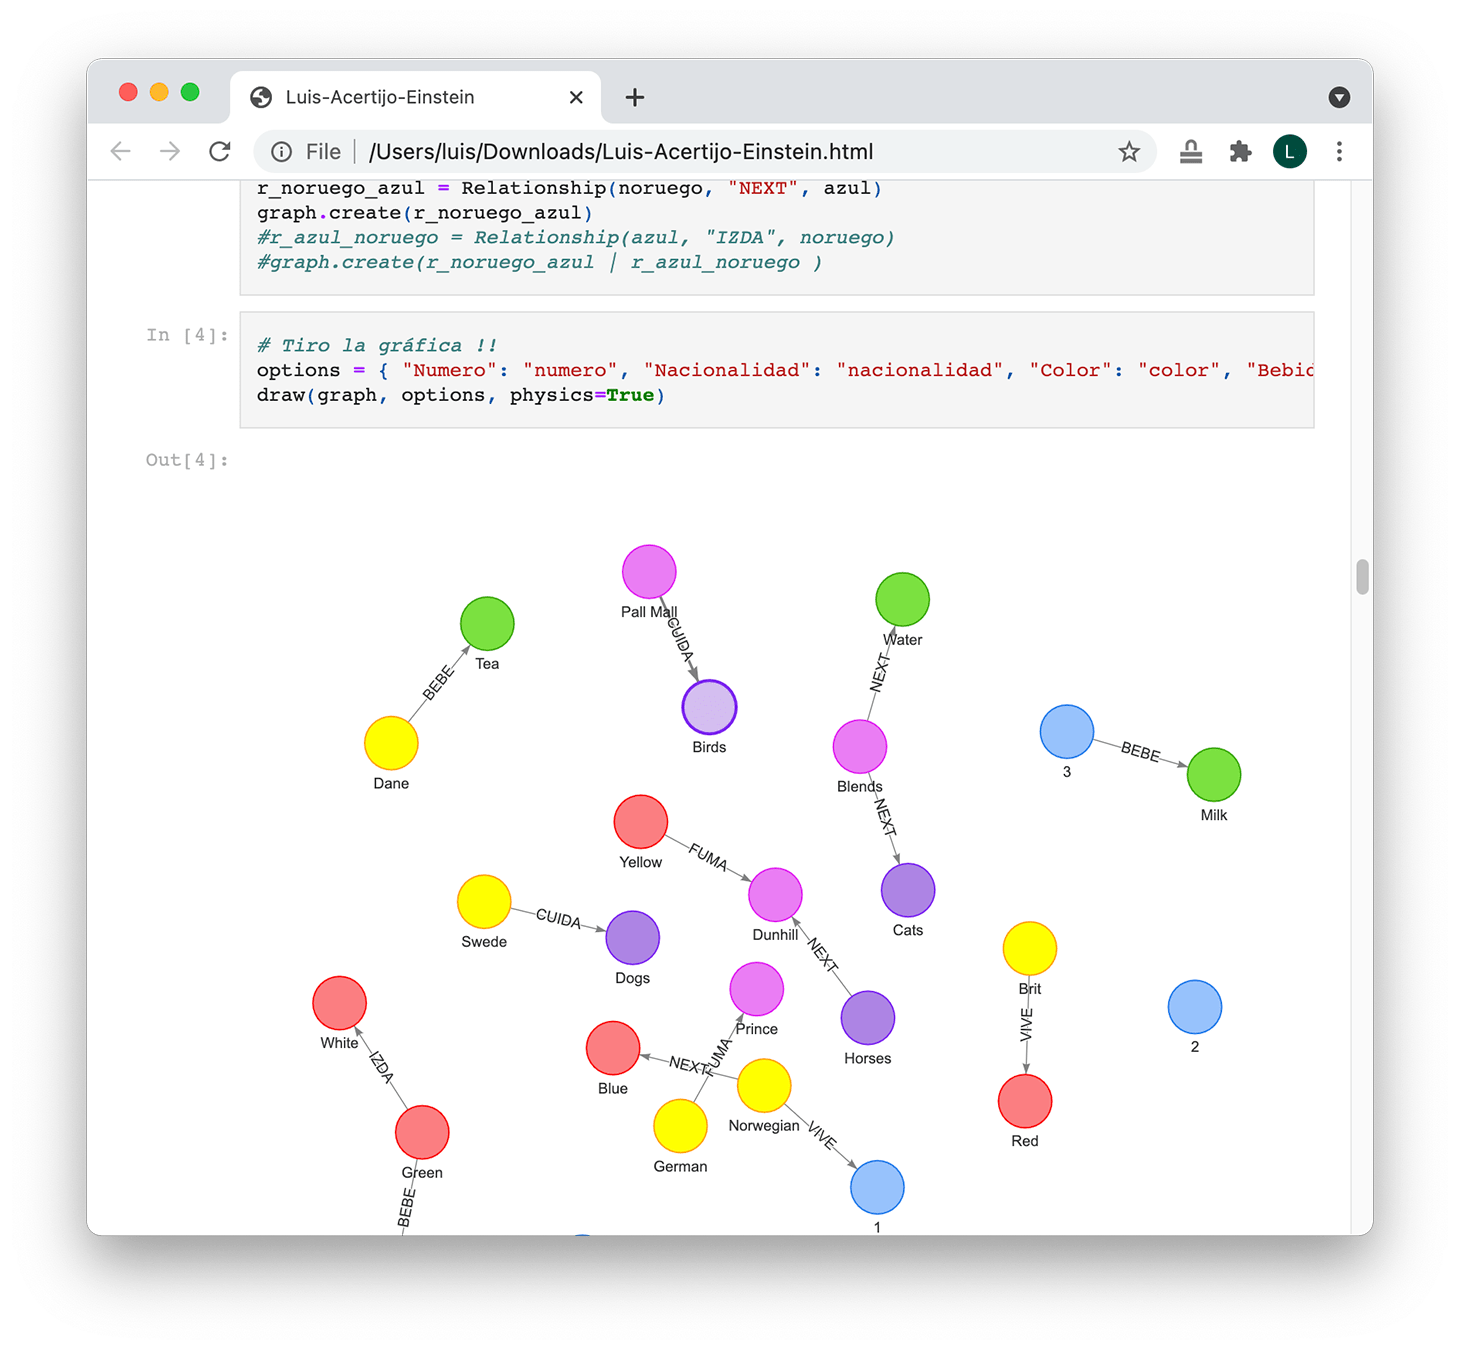
- I open with Chrome (now it is important to use it), the file
Luis-Acertijo-Einstein.html. I scroll through the document to the end (in my case this is mandatory so that all scripts load and the images appear in the PDF)
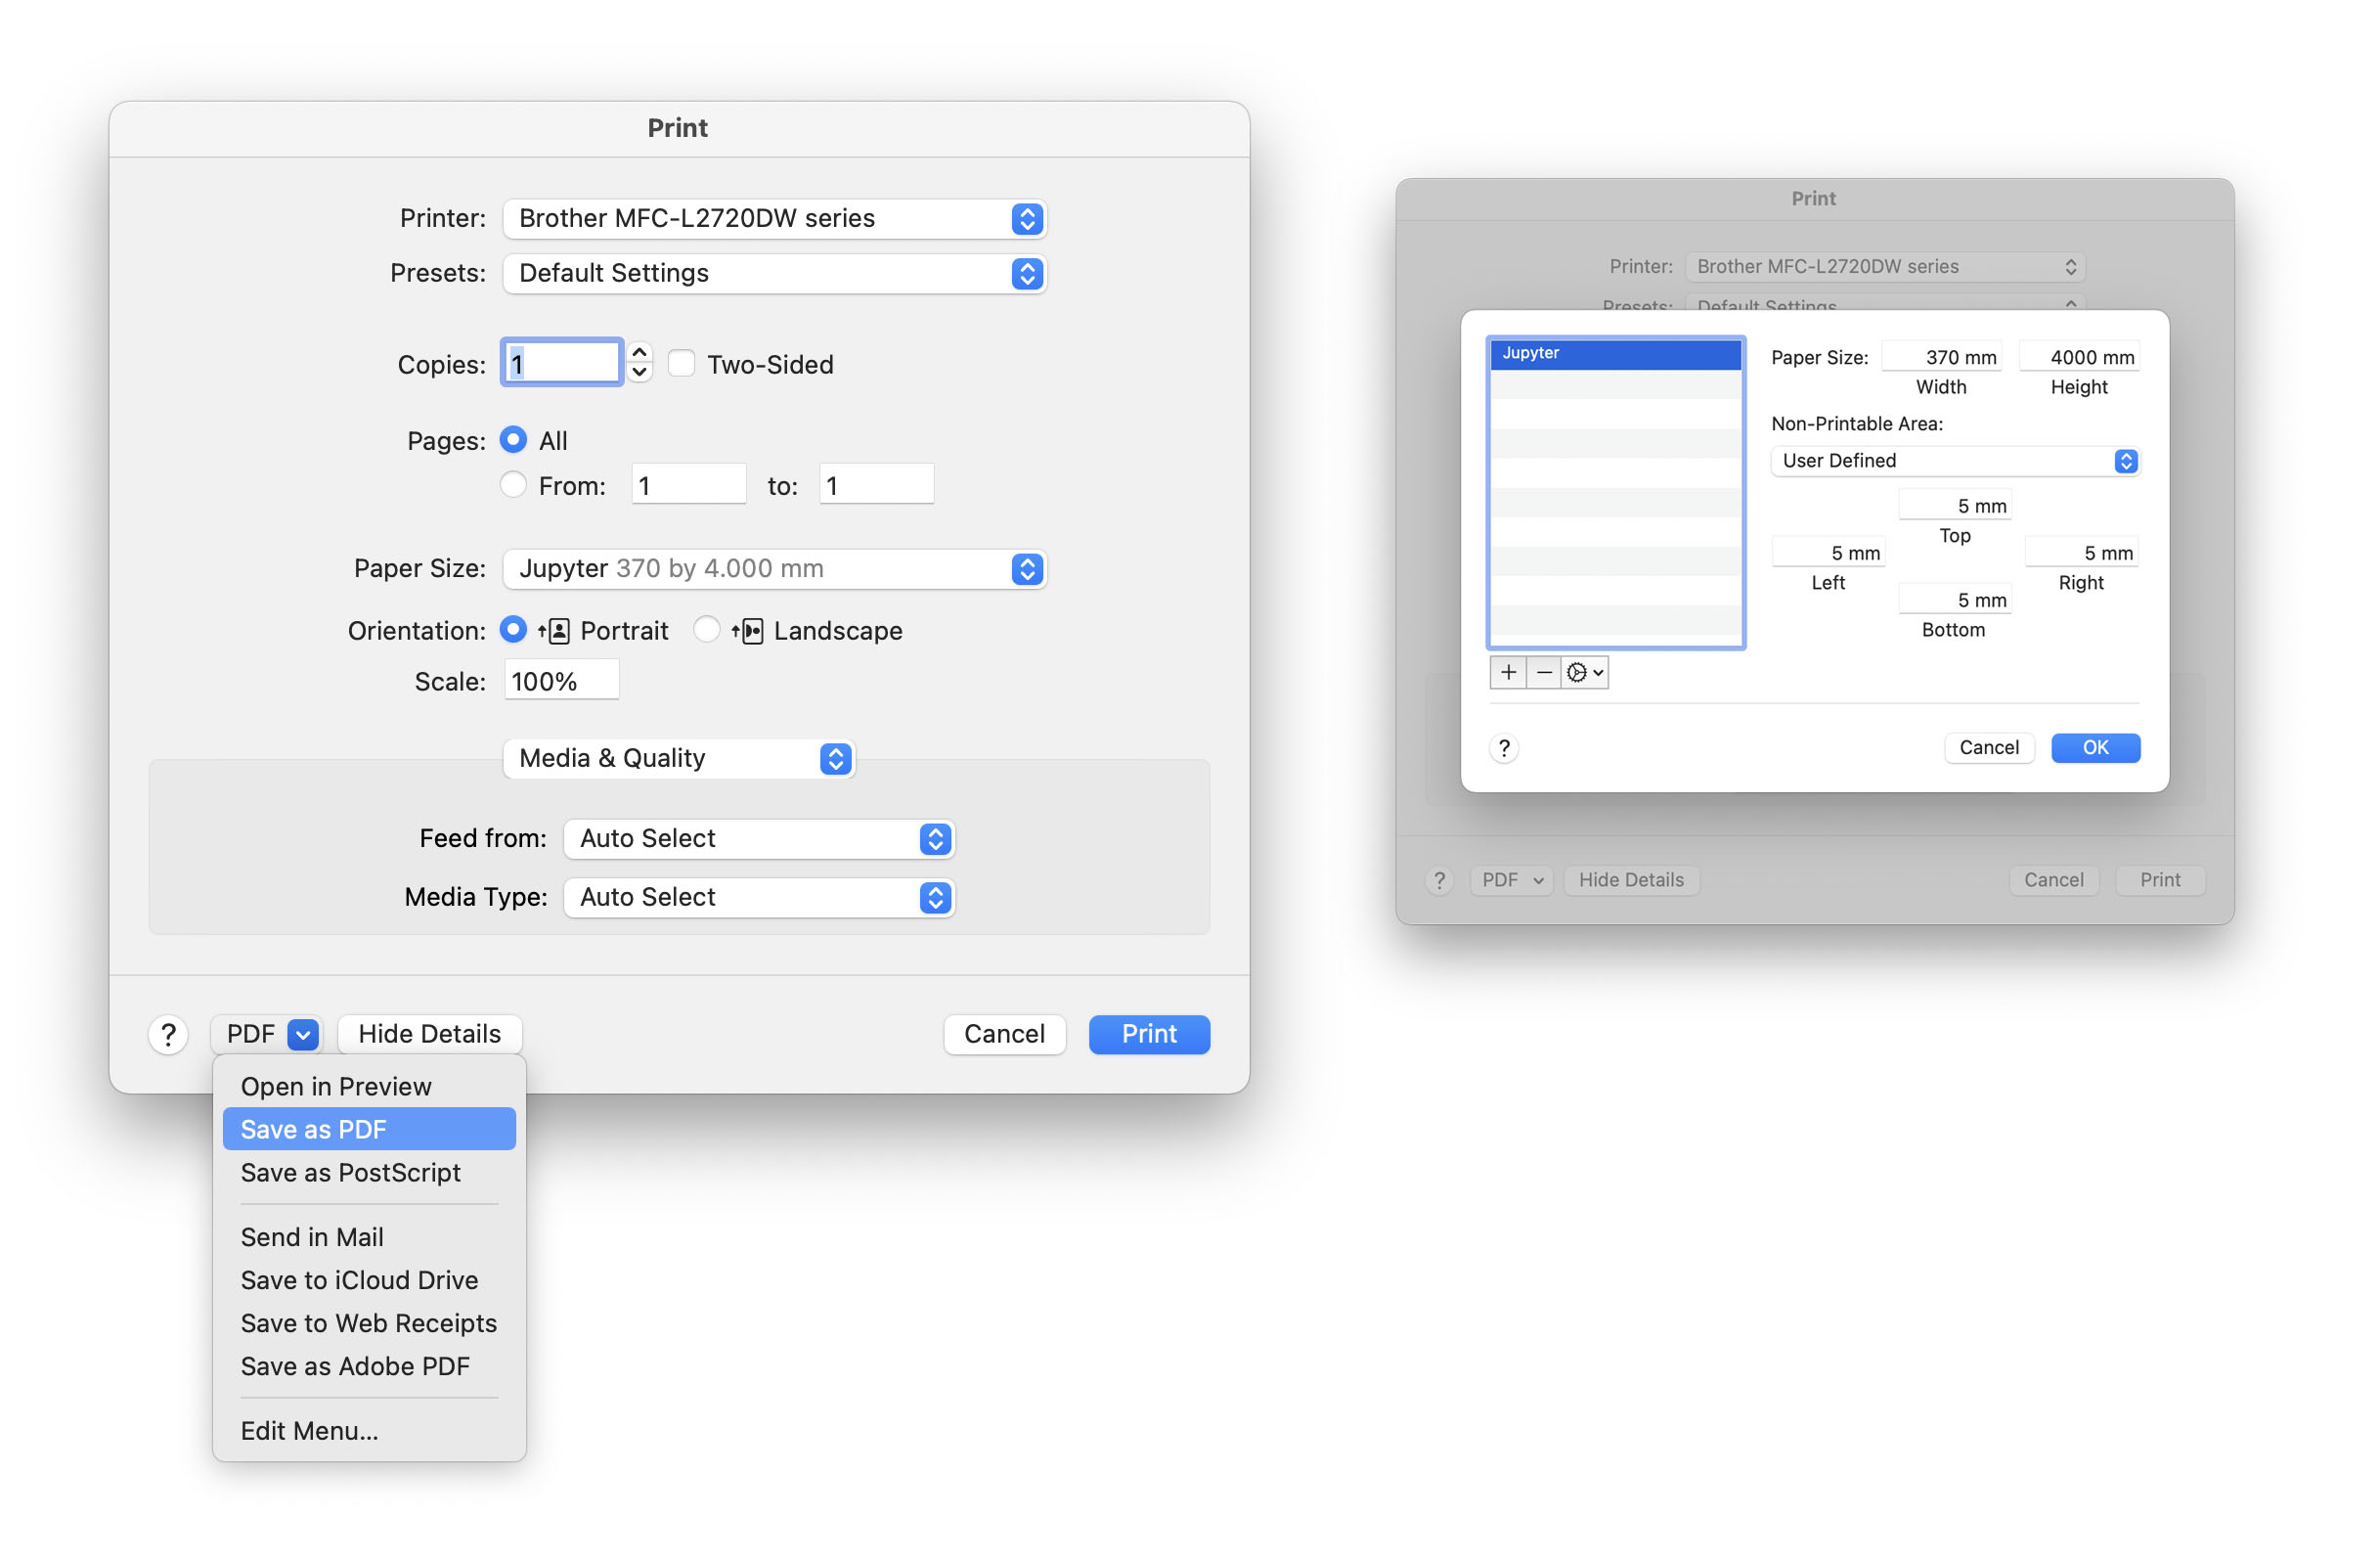
| Note: When printing to PDF it adds very annoying page breaks. The trick to remove them (something I always do) is to set a very long custom paper size, in this example “portrait” with width 370mm by 4000mm tall. Perhaps too much, but it looks pretty good (for this notebook), in your case adjust as needed. |
I print to PDF from Chrome using the
System's Dialog- CMD-ALT-P: (or CMD-P > More Settings > Print Using System Dialog)
 Show Details -> Pager Size > Manage Custom Sizes > Create new one with:
  Paper Size: Width 370mm, Height 4000mm
  Non Printable: User Defined. Top, Left, Right, Bottom > all with 5mm
 Leave everything else at default: Orientation: Portrait. Copies: 1. Pages: All. Scale: 100%, ...

      PDF > Save as PDF
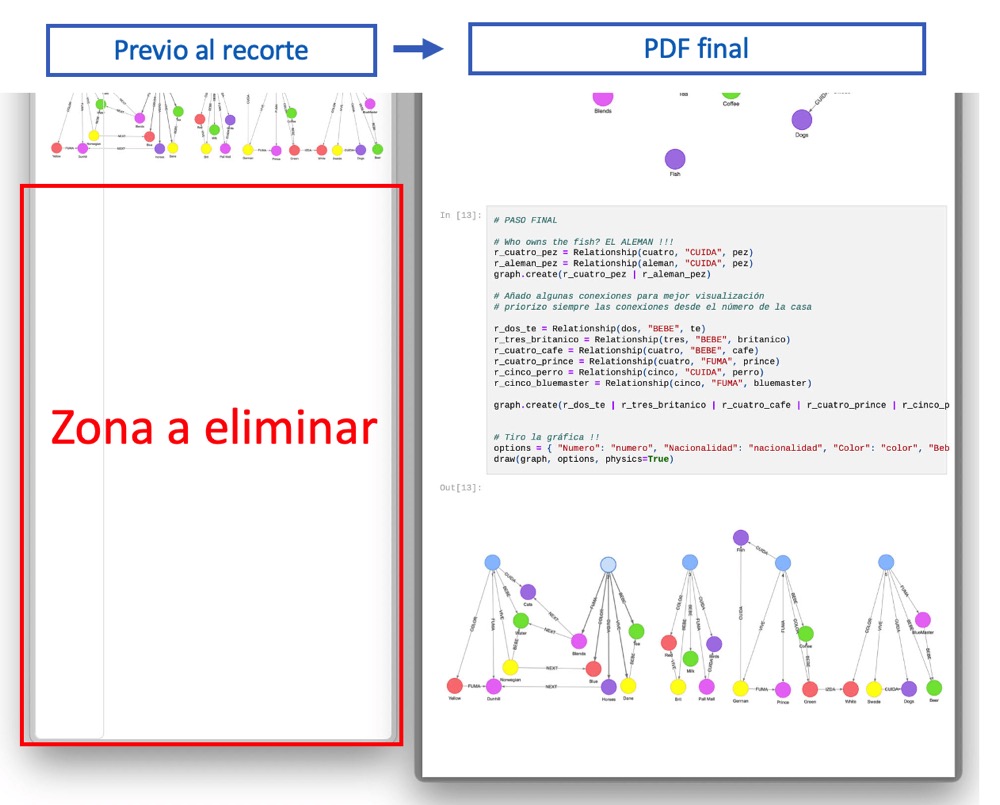
Step 4 - Crop the PDF
As I mentioned, in this example I used a page size of “portrait” 370mm wide x 4000mm tall, so there will be a lot of extra blank space at the end. Well, here’s the last trick to remove it.
- I open the PDF with Preview (available on the Mac)
- View > Single Page (CMD-2)
- Tools > Rectangular Selection
- I select the rectangle I want to keep (excluding blank areas at the end)
- I select Tools > Crop (CMD-K)
- I select File > Save (CMD-S)