Node-RED is a programming tool that allows you to connect hardware devices, APIs, and cloud services through creative workflows. Everything is done from the browser, and it supports dozens of built-in and third-party nodes.
Here I’ll explain the installation process, on a virtual machine with Alpine and Docker underneath. If you’re interested, I have another post describing how I integrate it with my Home Assistant.
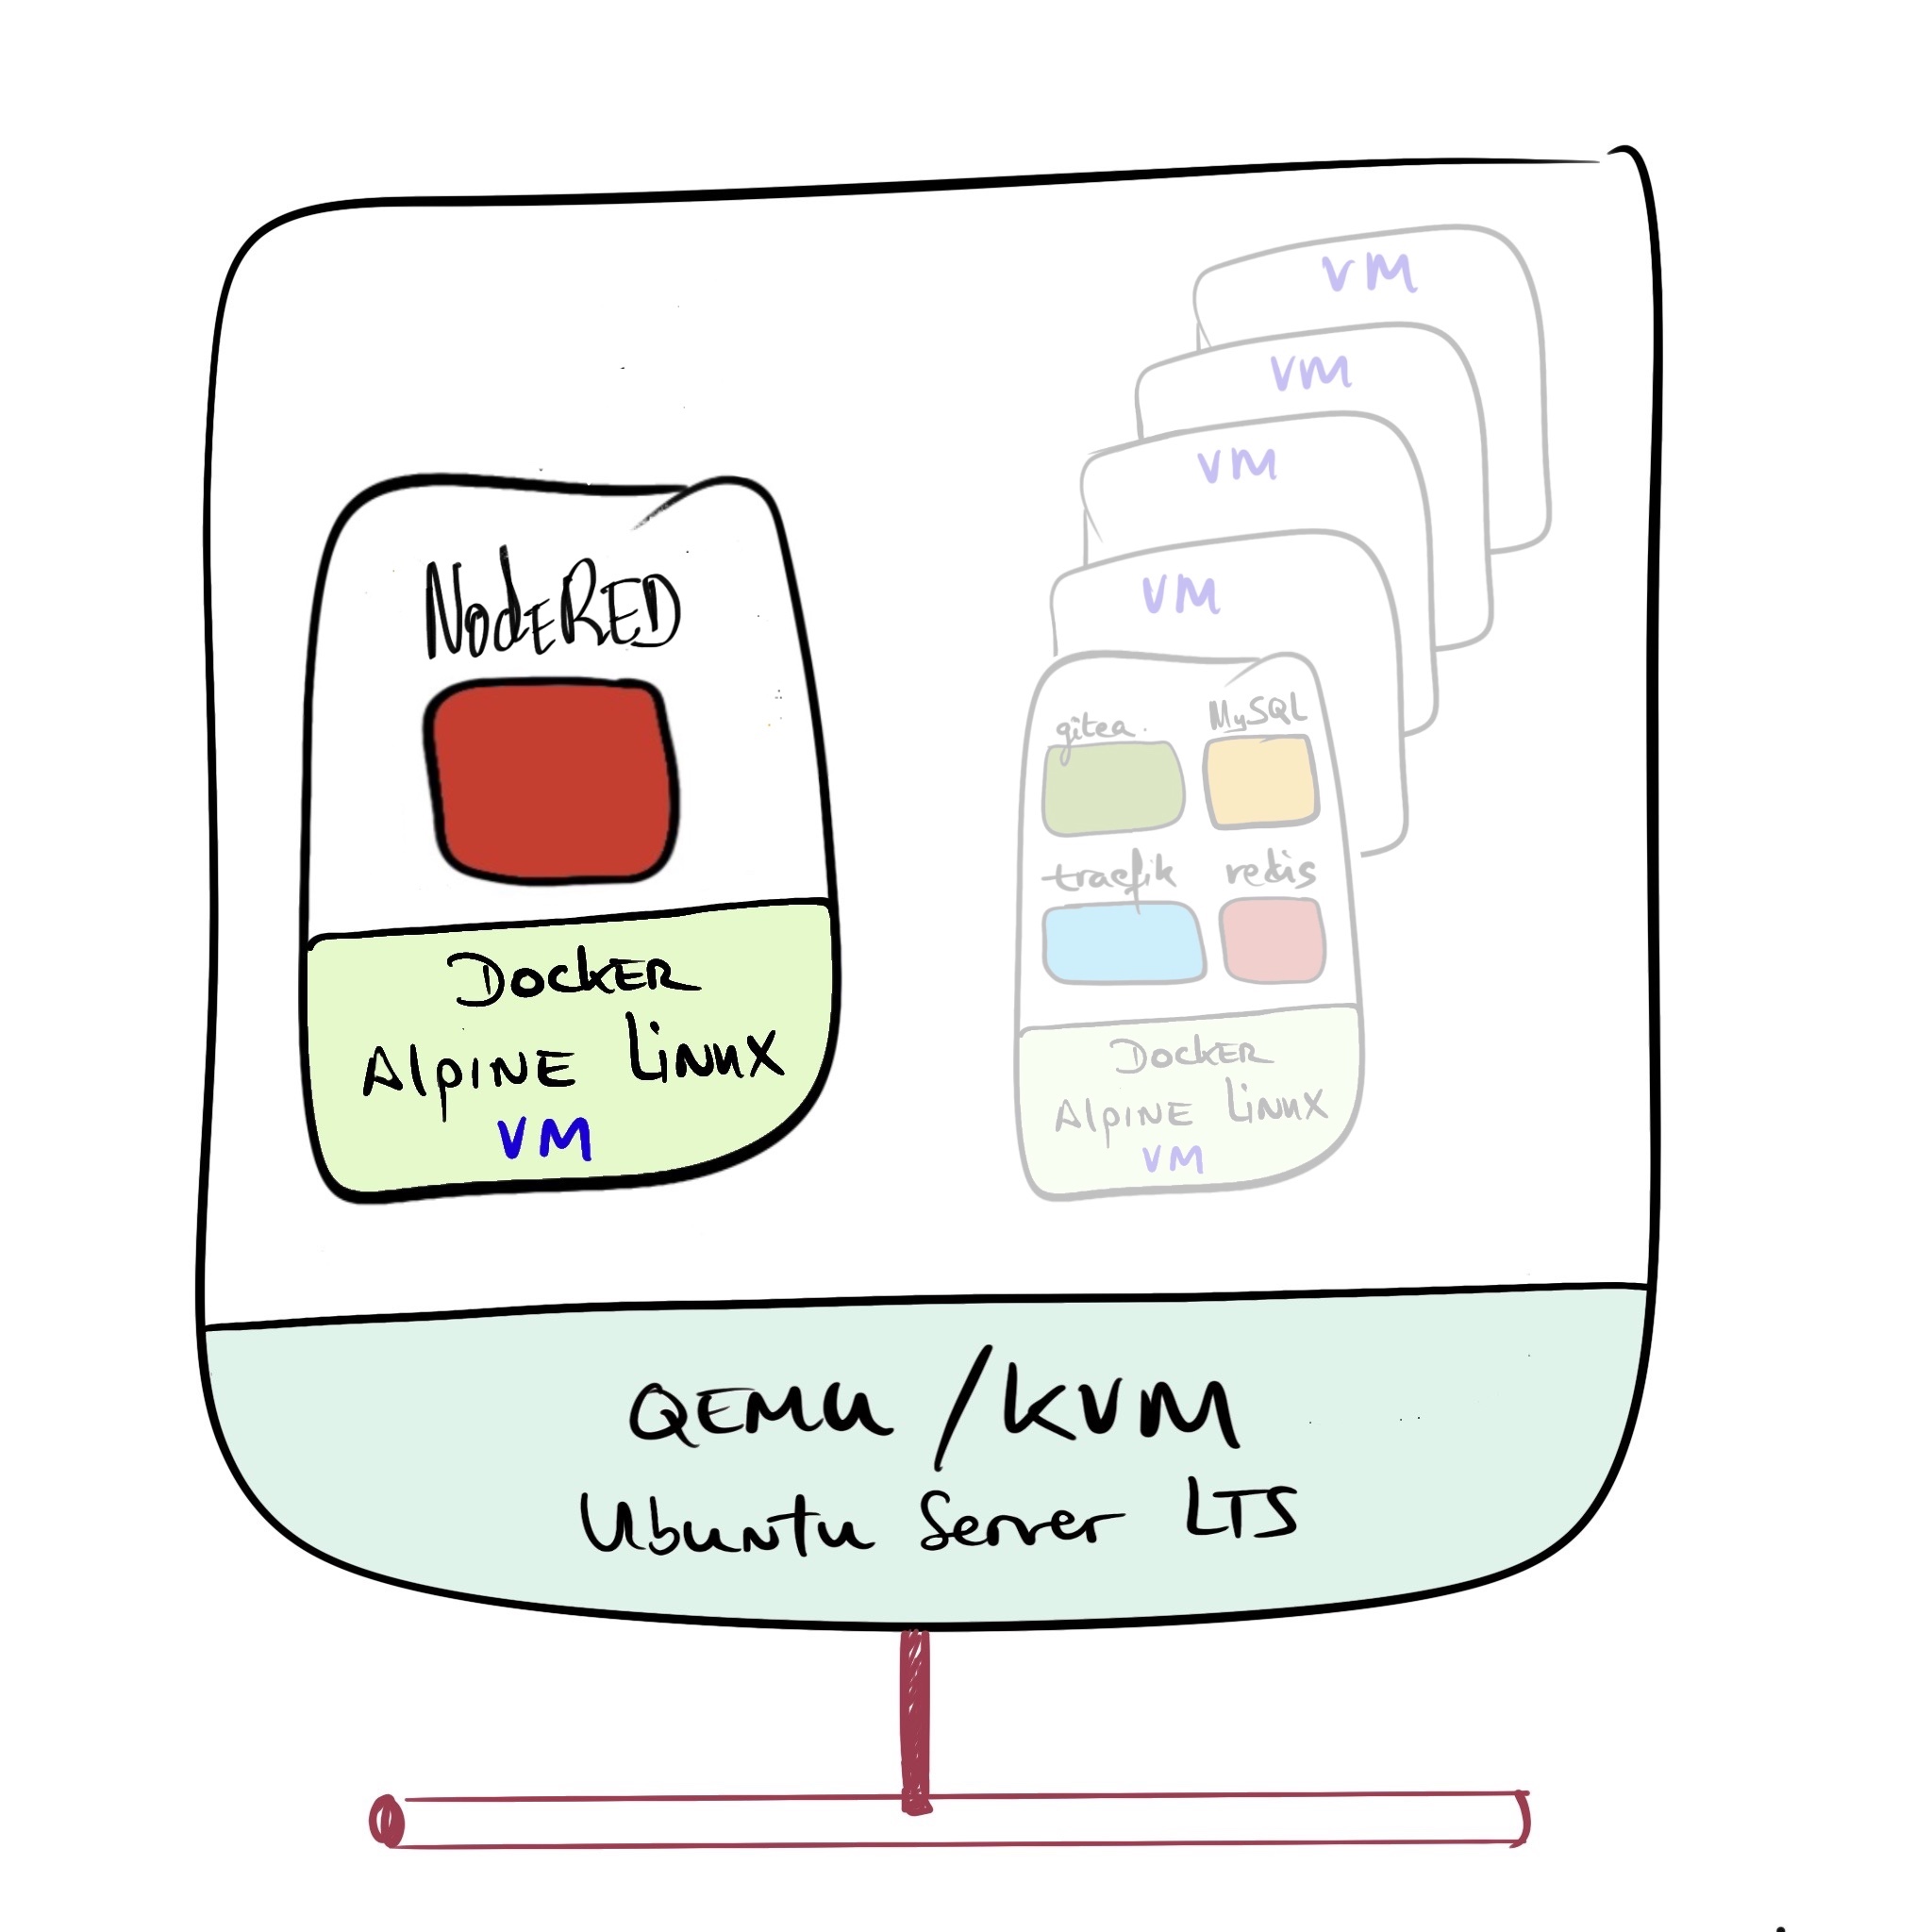
As I mentioned, I install NodeRed as a container on a Docker host running on the lightweight Alpine Linux distribution, which in turn runs on my QEMU/KVM Hypervisor. This is the architecture:
Alpine Linux Virtual Machine
I create a Virtual Machine based on Alpine Linux with everything needed to run Docker and name it nodered.yourdomain.com.
| IMPORTANT: Follow the documentation for installing Alpine + Docker at this link. |
- Once I finish the installation, I verify its
/etc/hosts
127.0.0.1 nodered.yourdomain.com nodered localhost.localdomain localhost
::1  localhost localhost.localdomain
- I enter the VM with my user (luis) and create the
nodereddirectory where I’ll place all the working files for the containers.
nodered:~$ id
uid=1000(luis) gid=1000(luis) groups=1000(luis),10(wheel),18(audio),27(video),28(netdev),101(docker)
nodered:~$ pwd
/home/luis
nodered:~$ mkdir nodered
NodeRED Container
The Docker Hub repository is called nodered/node-red
First I’ll create just the Traefik part, to make sure it works correctly.
- I create the data directory for nodered
nodered:~/nodered$ mkdir data_nodered
nodered:~/nodered$ chown  -R luis:luis data_nodered/
- I create
~/.nodered/docker-compose.yml.
version: "3.9"

services:
  node-red:
    image: nodered/node-red:3.0.2-18
    container_name: nodered
    restart: unless-stopped
    environment:
      - TZ=Europe/Madrid
    ports:
      - "1880:1880"
    networks:
      - public
    volumes:
      - ./data_nodered:/data
      - /etc/timezone:/etc/timezone:ro
      - /etc/localtime:/etc/localtime:ro
    logging:
      driver: "json-file"
      options:
        max-size: "1m"

# Networking
networks:
  public:
    name: public
- I start the service
nodered:~/nodered$ docker-compose up -d
:
nodered:~/nodered$ docker-compose logs -f
Attaching to nodered_node-red_1
node-red_1  | 3 Oct 15:38:18 - [info]
node-red_1  |
node-red_1  | Welcome to Node-RED
node-red_1  | ===================
node-red_1  |
node-red_1  | 3 Oct 15:38:18 - [info] Node-RED version: v3.0.2
node-red_1  | 3 Oct 15:38:18 - [info] Node.js  version: v18.7.0
node-red_1  | 3 Oct 15:38:18 - [info] Linux 5.15.71-0-virt x64 LE
node-red_1  | 3 Oct 15:38:18 - [info] Loading palette nodes
node-red_1  | 3 Oct 15:38:18 - [info] Settings file  : /data/settings.js
node-red_1  | 3 Oct 15:38:18 - [info] Context store  : 'default' [module=memory]
node-red_1  | 3 Oct 15:38:18 - [info] User directory : /data
node-red_1  | 3 Oct 15:38:18 - [warn] Projects disabled : editorTheme.projects.enabled=false
node-red_1  | 3 Oct 15:38:18 - [info] Flows file     : /data/flows.json
node-red_1  | 3 Oct 15:38:18 - [info] Creating new flow file
node-red_1  | 3 Oct 15:38:18 - [warn]
node-red_1  |
node-red_1  | Your flow credentials file is encrypted using a system-generated key.
node-red_1  |
node-red_1  | If the system-generated key is lost for any reason, your credentials
node-red_1  | file will not be recoverable, you will have to delete it and re-enter
node-red_1  | your credentials.
node-red_1  |
node-red_1  | You should set your own key using the 'credentialSecret' option in
node-red_1  | your settings file. Node-RED will then re-encrypt your credentials
node-red_1  | file using your chosen key the next time you deploy a change.
node-red_1  |
node-red_1  | 3 Oct 15:38:18 - [info] Server now running at http://127.0.0.1:1880/
node-red_1  | 3 Oct 15:38:18 - [warn] Encrypted credentials not found
node-red_1  | 3 Oct 15:38:18 - [info] Starting flows
node-red_1  | 3 Oct 15:38:18 - [info] Started flows
Working with NodeRED
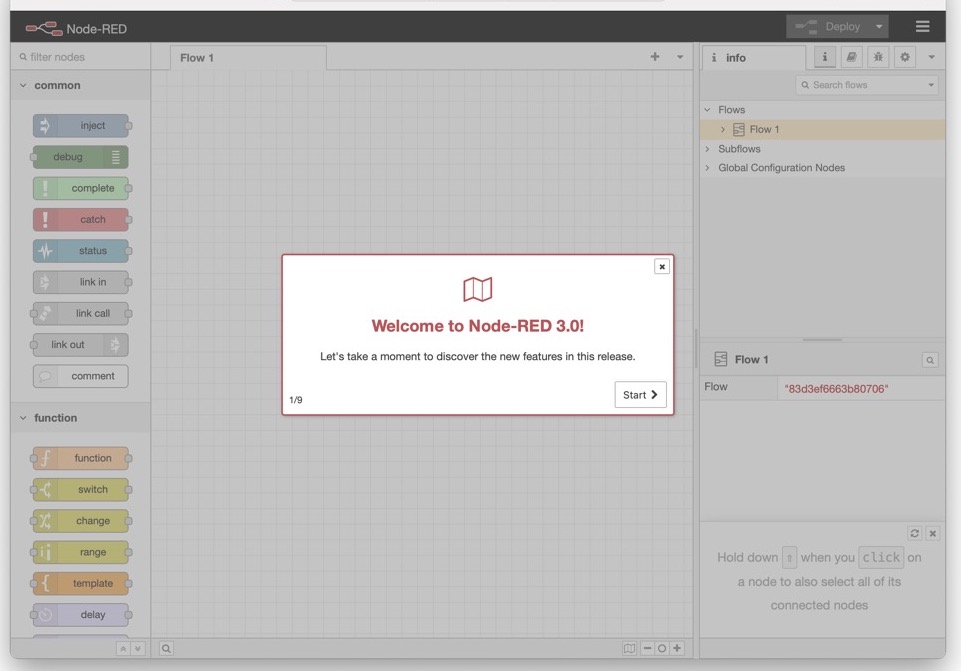
I navigate to http://nodered.yourdomain.com:1880 and perform the initial configuration. If you don’t have experience, I recommend following the official Node-RED documentation.
Adding Nodes to the Palette
Node-RED comes with a basic set of useful nodes, but many more are available from both the Node-RED project and the wider community. You can search for available nodes in the Node-RED library.
You can add nodes with npm install <npm-package-name> from the command line, but it’s complicated when running in a container. It’s much easier to install nodes directly from the editor (in the browser).
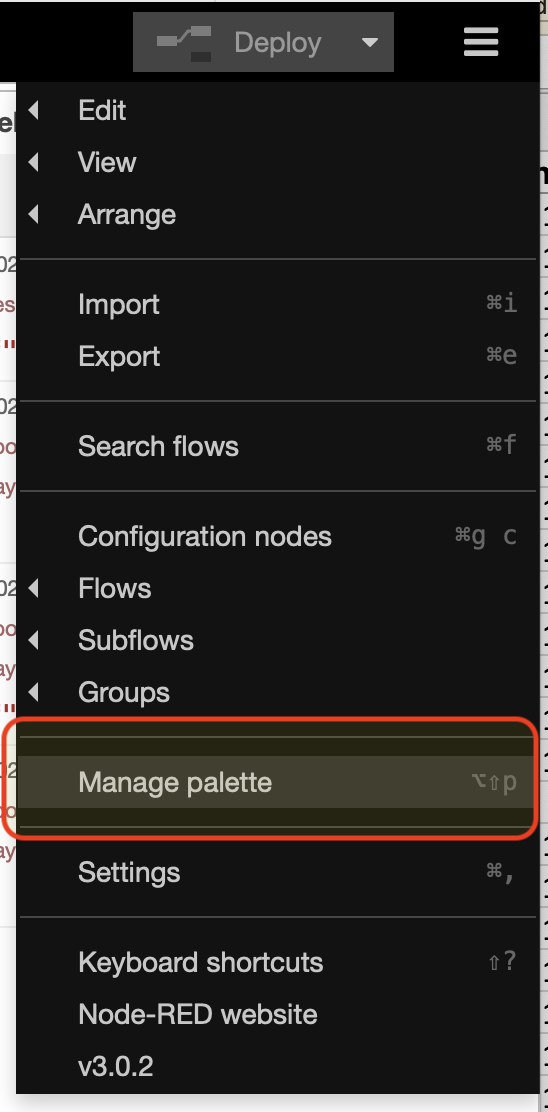
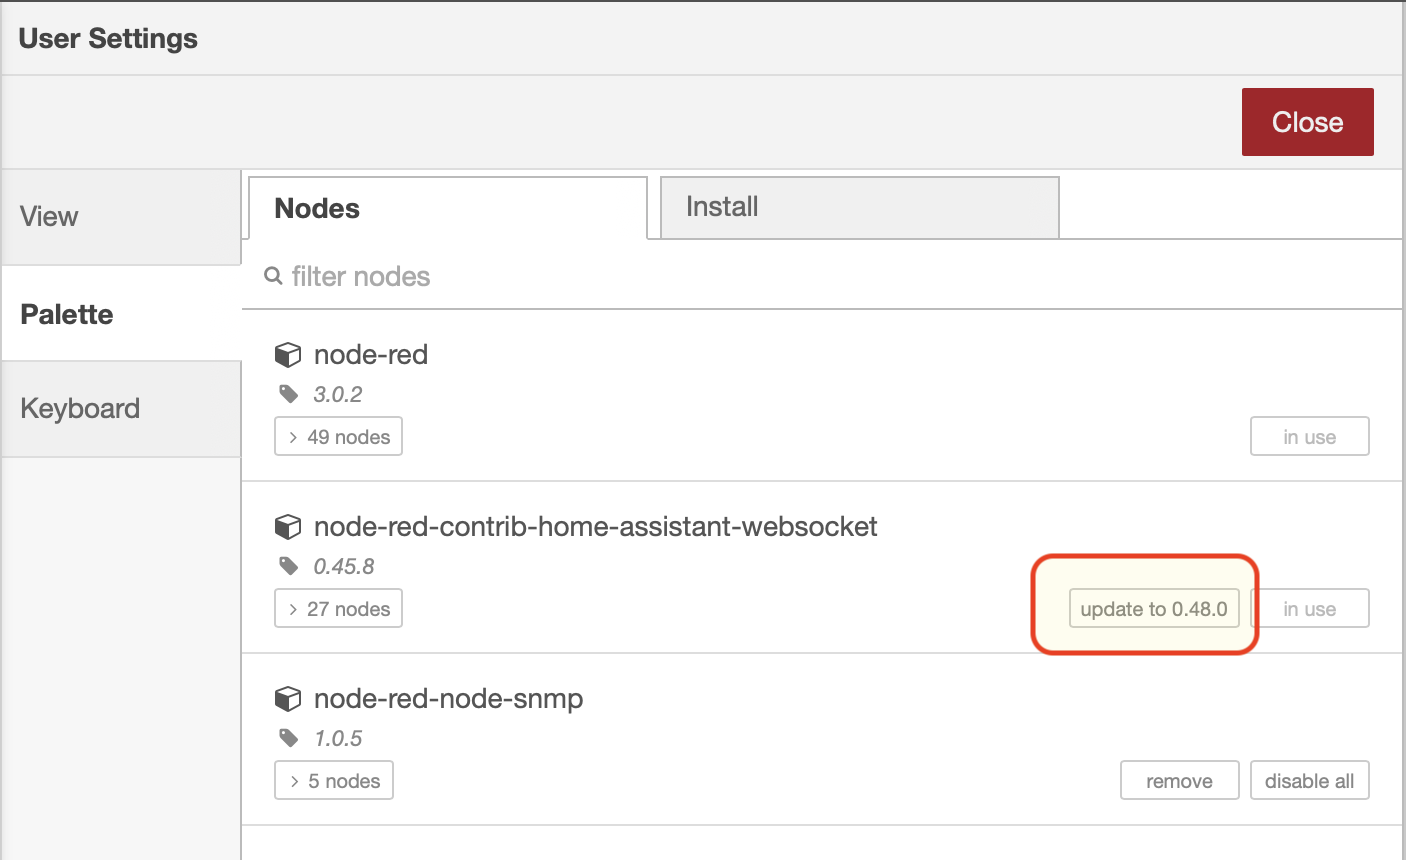
- I select the
Manage paletteoption from the main menu.
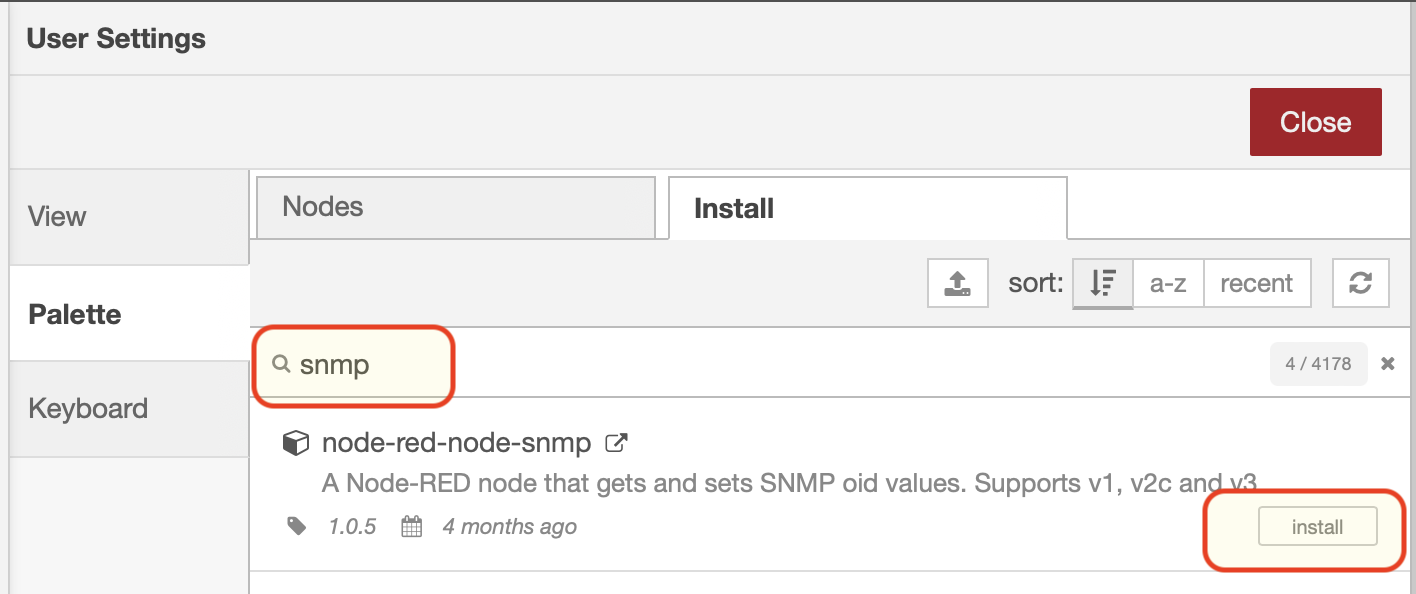
- I go to the “Install” tab and search the catalog of available modules and install them.

- The “Nodes” tab shows all installed modules, which ones are in use, and whether updates are available for any of them.
Future Container Updates
- I check available versions at Docker Hub -> NodeRED (tags)
- I edit the
docker-compose.ymlfile and change the version number, for example upgrading from3.0.1to3.0.2
  :
services:
  node-red:
    image: nodered/node-red:3.0.2
    container_name: nodered
  :
- Running a pull downloads the new version
nodered:~/nodered$ docker-compose pull nodered
- I stop the services, remove the containers, and start them again.
nodered:~/nodered$ docker-compose down
nodered:~/nodered$ docker-compose up -d
- When connecting with the browser, you should see that the update was successful.
