Every now and then I get the urge to practice my rusty Java skills. I’m going to write a small program to monitor devices on my home network using Java and SNMP. I like to keep my development projects on my private git server (based on gitea). In this post I describe the process of creating a git repository, a Java Project with Eclipse, and how to connect them together. If you use GitHub, the process is identical, although the UI options may look slightly different compared to Gitea.
| You’ll find a couple of posts about GIT on this blog. If you want to dive deep and truly understand git, I recommend GIT in Detail and the GIT Cheat Sheet. If you’re interested in setting up Gitea on your home network, here and here you’ll find a couple more posts. |
Setting Up SSH on Your Computer
First of all, with my gitea server I use SSH to clone repositories, so it’s important to have it properly configured. If you use GitHub, I recommend doing exactly the same.
- I had already done this, but let me explain how I created my public/private key pair. Note: in my case I saved them with the name
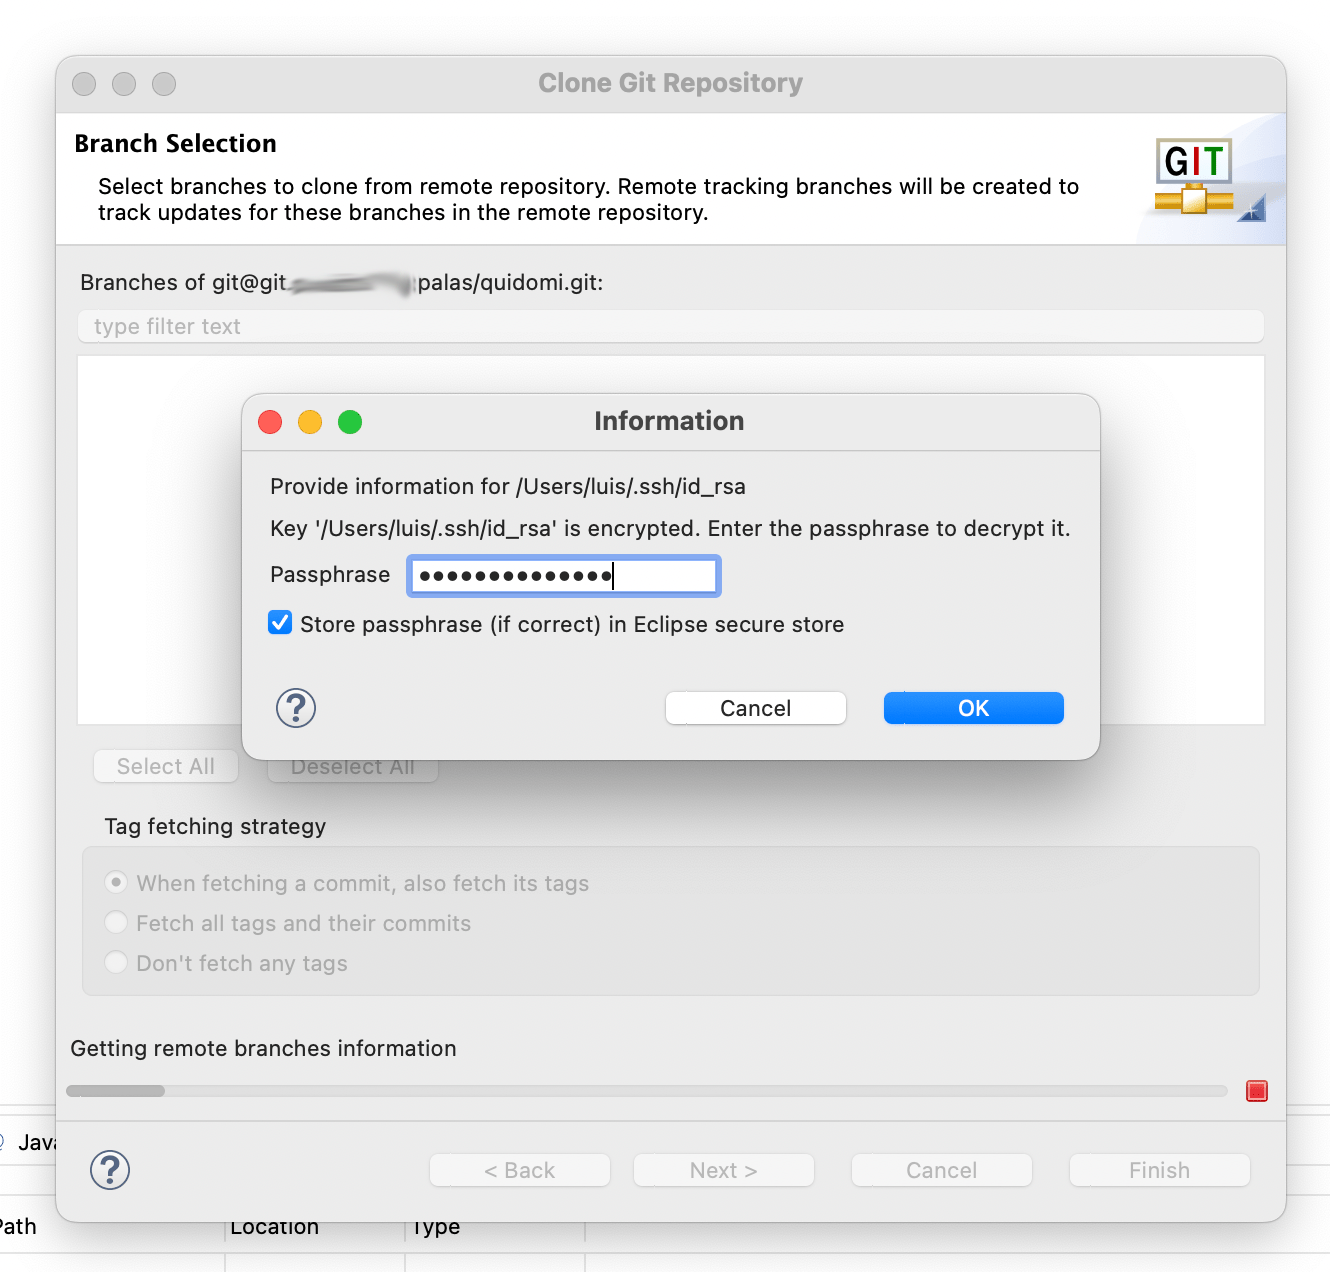
id_gitea. - The passphrase it asks for will be needed later when cloning and/or connecting to the
giteaserver.
luis@idefix ~ $ ssh-keygen -t rsa -b 2048
:
- Two files were created: one with the private key (
id_gitea) and one with the public key (id_gitea.pub), which can be shared. Never share the private one.
➜  ~ ls -1  .ssh/id_gitea*
.ssh/id_gitea      <== NEVER SHARE
.ssh/id_gitea.pub  <== Shareable on github, gitea...
- Finally, in my Gitea user account I copy/paste the contents of
id_gitea.pubas a new key on the Gitea server.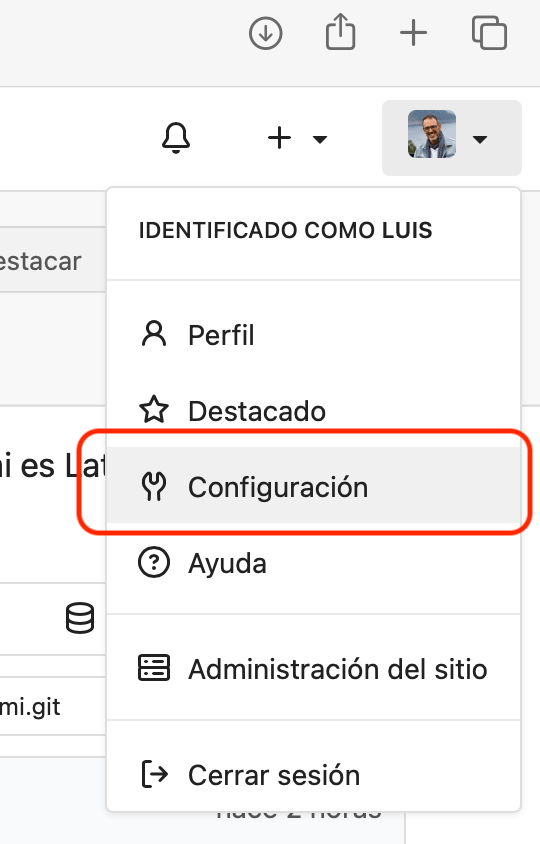
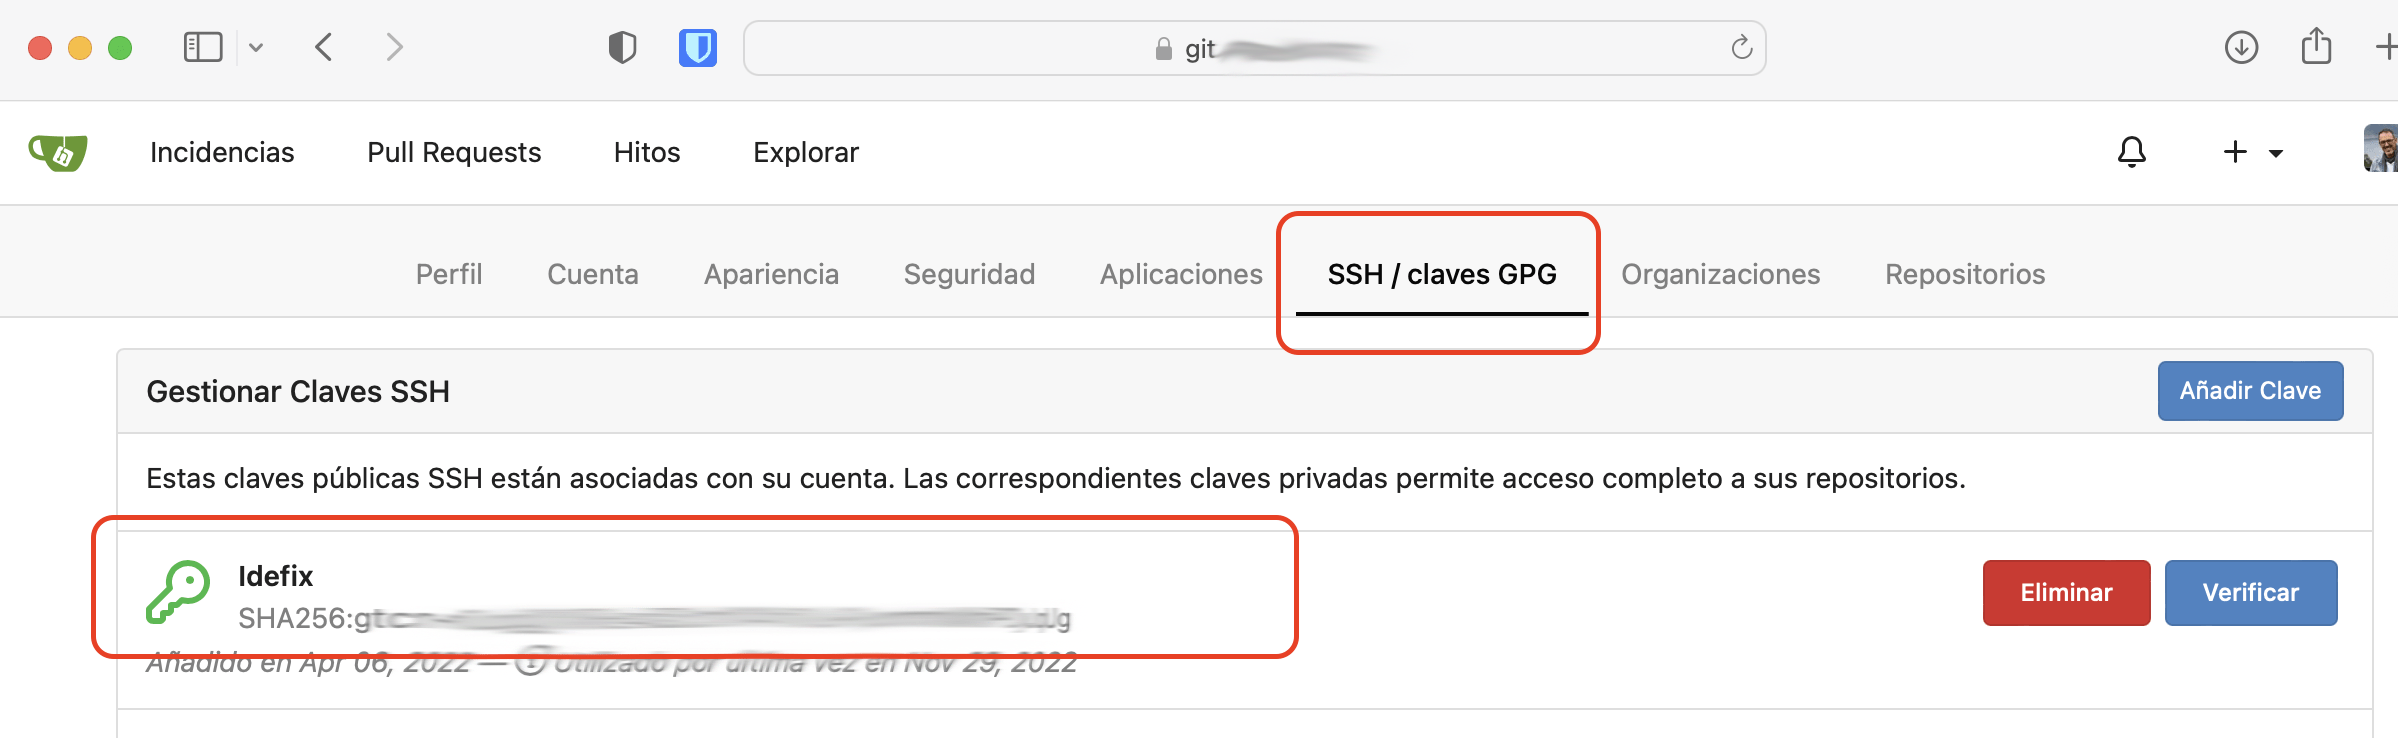
| Note: If you want to work with ssh on github, you need to do the same on github.com — add your public key as one of the accepted keys for working via SSH. You’ll find it under User logo > Settings > SSH and GPG keys. |
Setting Up .gitconfig on Your Computer
- Whether you’re going to clone from the command line or from applications (e.g., Eclipse), it’s convenient to set up the
.gitconfigfile in your user’s home folder. At minimum, thenameandemailfields should be configured.
$ cat $HOME/.gitconfig
[user]
 name = Luis Palacios
 email = my.email@domain.com
You can do this in Eclipse from Preferences > Version control > Git > Configuration.
Eclipse
First, some concepts to better understand where Eclipse stores projects and what changes when we use Git. There are many ways to organize projects and workflows, and Eclipse is flexible enough when it comes to organizing and locating things.
- Eclipse Workspace: Basically, a “Workspace” is a “collection of projects and settings”. Creating one creates a folder on disk containing a single subfolder called
.metadata(which stores the workspace configuration and list of linked projects). Think of it as apointer to a list of projects. - Eclipse Project: To write a program, you need to create a project. A Project groups together a set of related resources (source code, class diagrams, binaries, documentation). Note: with the right plugin you can create projects in Ada, ABAP, C, C++, C#, Clojure, COBOL, D, Erlang, Fortran, Groovy, Haskell, JavaScript, Julia, Lasso, Lua, NATURAL, Perl, PHP, Prolog, Python, R, Ruby (Ruby on Rails), Rust, Scala, and Scheme.
When we use Git, we add a third concept:
- Git Repository: Eclipse knows a lot about Git (it can create and clone/connect repositories, and even execute any git command), but a Git repository is not an Eclipse project per se.
- The way to work when we want “git” is to start with it: create the repository on GitHub (or GitLab or Gitea), then clone it to my computer, and finally create an Eclipse Project inside that repository.
Setting Up Eclipse for Git
- First I configure GIT in Eclipse. I go to
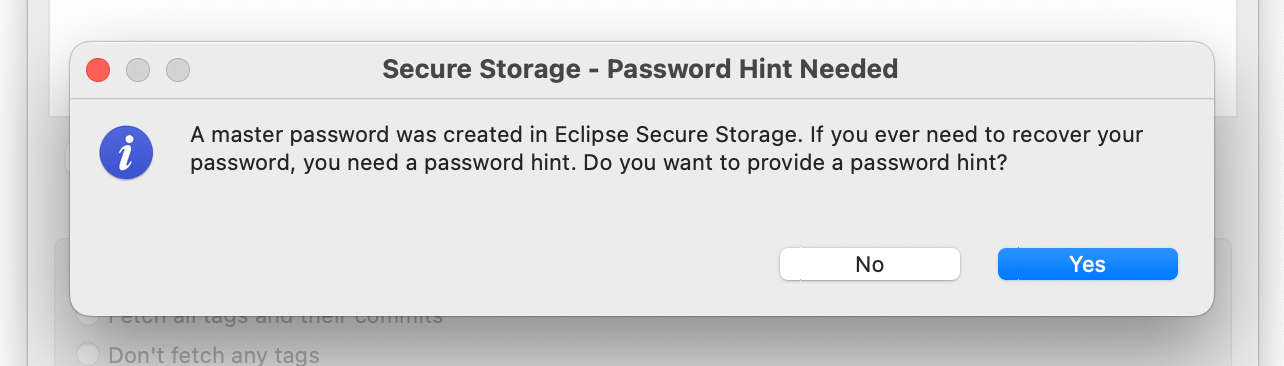
Settings > Git. There are two important points here. The first is to specify the root folder where I’ll store my projects cloned from the git server. The second is to ask Eclipse to save passwords as they’re requested.
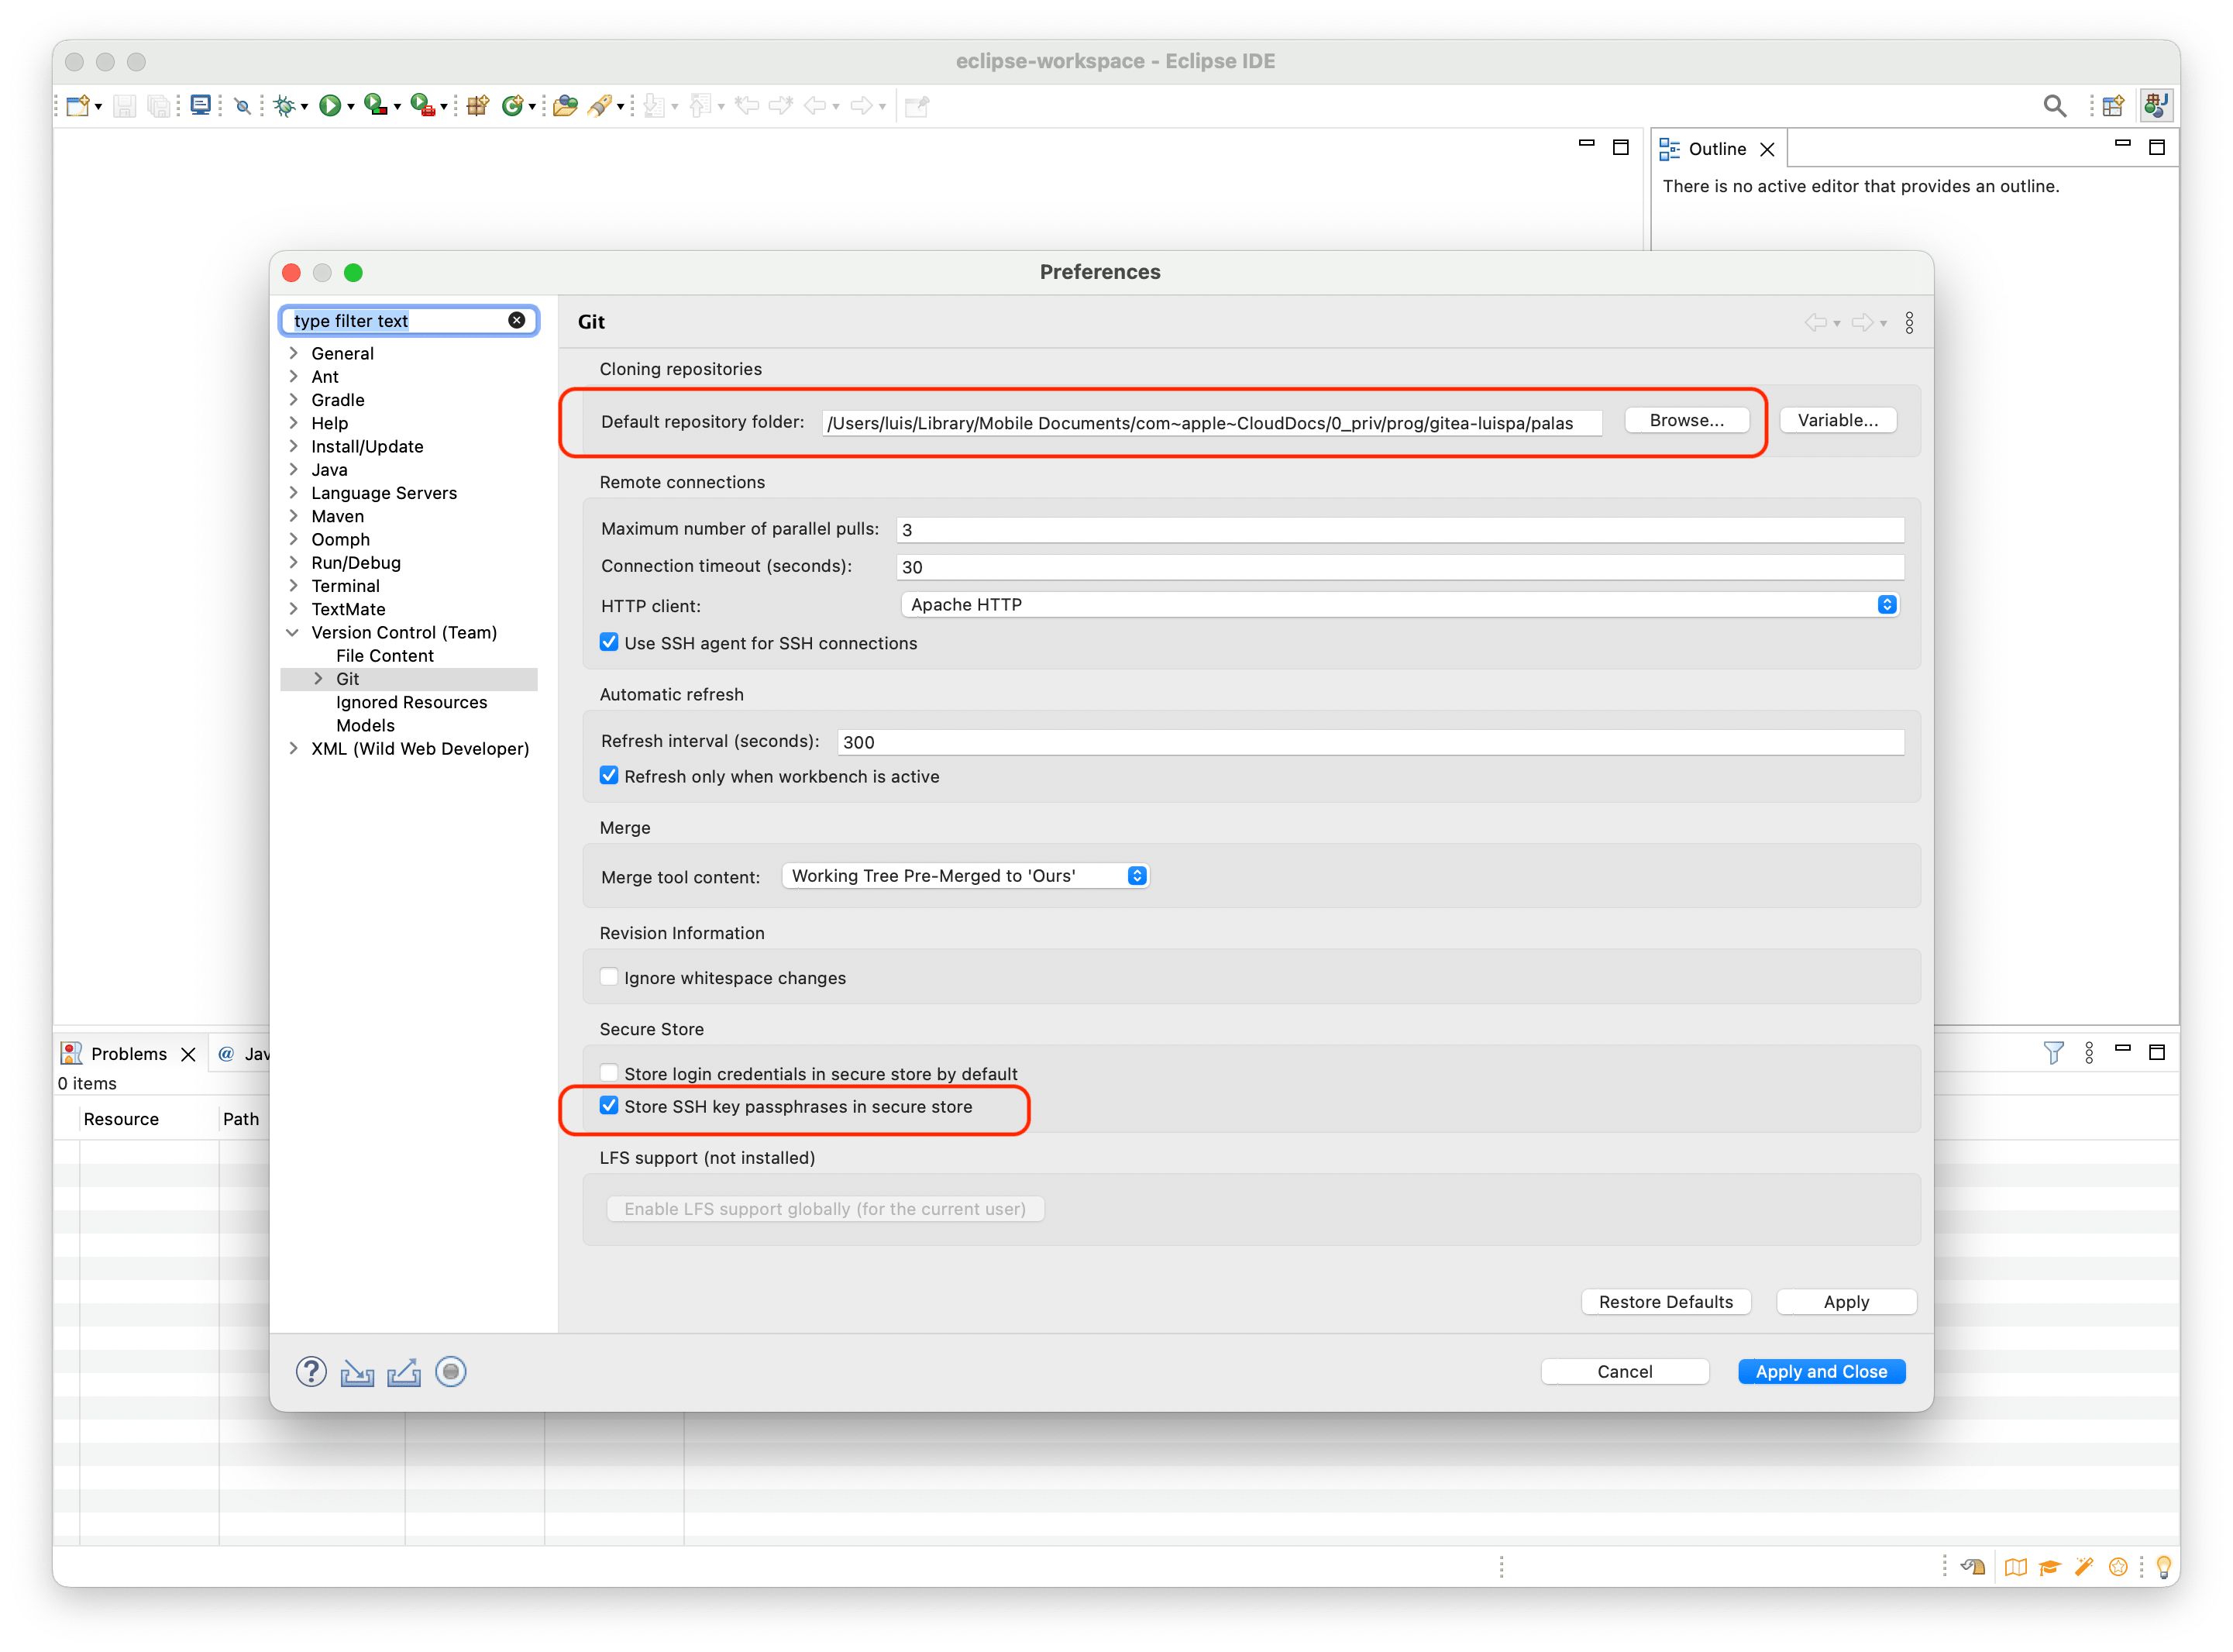
So we have two important folders:
- The main Eclipse Workspace:
/Users/luis/eclipse-workspace - The folder where I keep Git repositories (clones):
/Users/luis/0_priv/prog/gitea-luispa/palas
The latter is just any folder you dedicate on your computer to your development projects — it has nothing to do with Eclipse. In my case I always use the same one regardless of the IDE.
Eclipse Project “Inside” a Git Repository
These are the steps to put an Eclipse Project inside the folder of a Git repository.
- I create a repository on the server (in my case
gitea), which I calledquidomi. - I open or clone the repository
/Users/luis/0_priv/prog/gitea-luispa/palas/quidomi
- I create an Eclipse Project in the workspace, which I call
QuiDomi./Users/luis/eclipse-workspace/QuiDomi
- I link both — the Eclipse Project with the Git Repository.
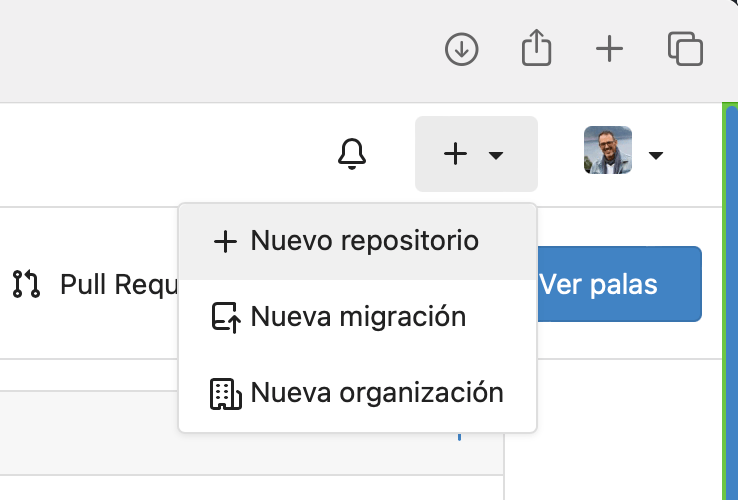
1. Creating the quidomi Repository on Gitea
If we already have the repository created, we skip this step. I create the repository for my small Java project. From my gitea server:
I define the necessary parameters:
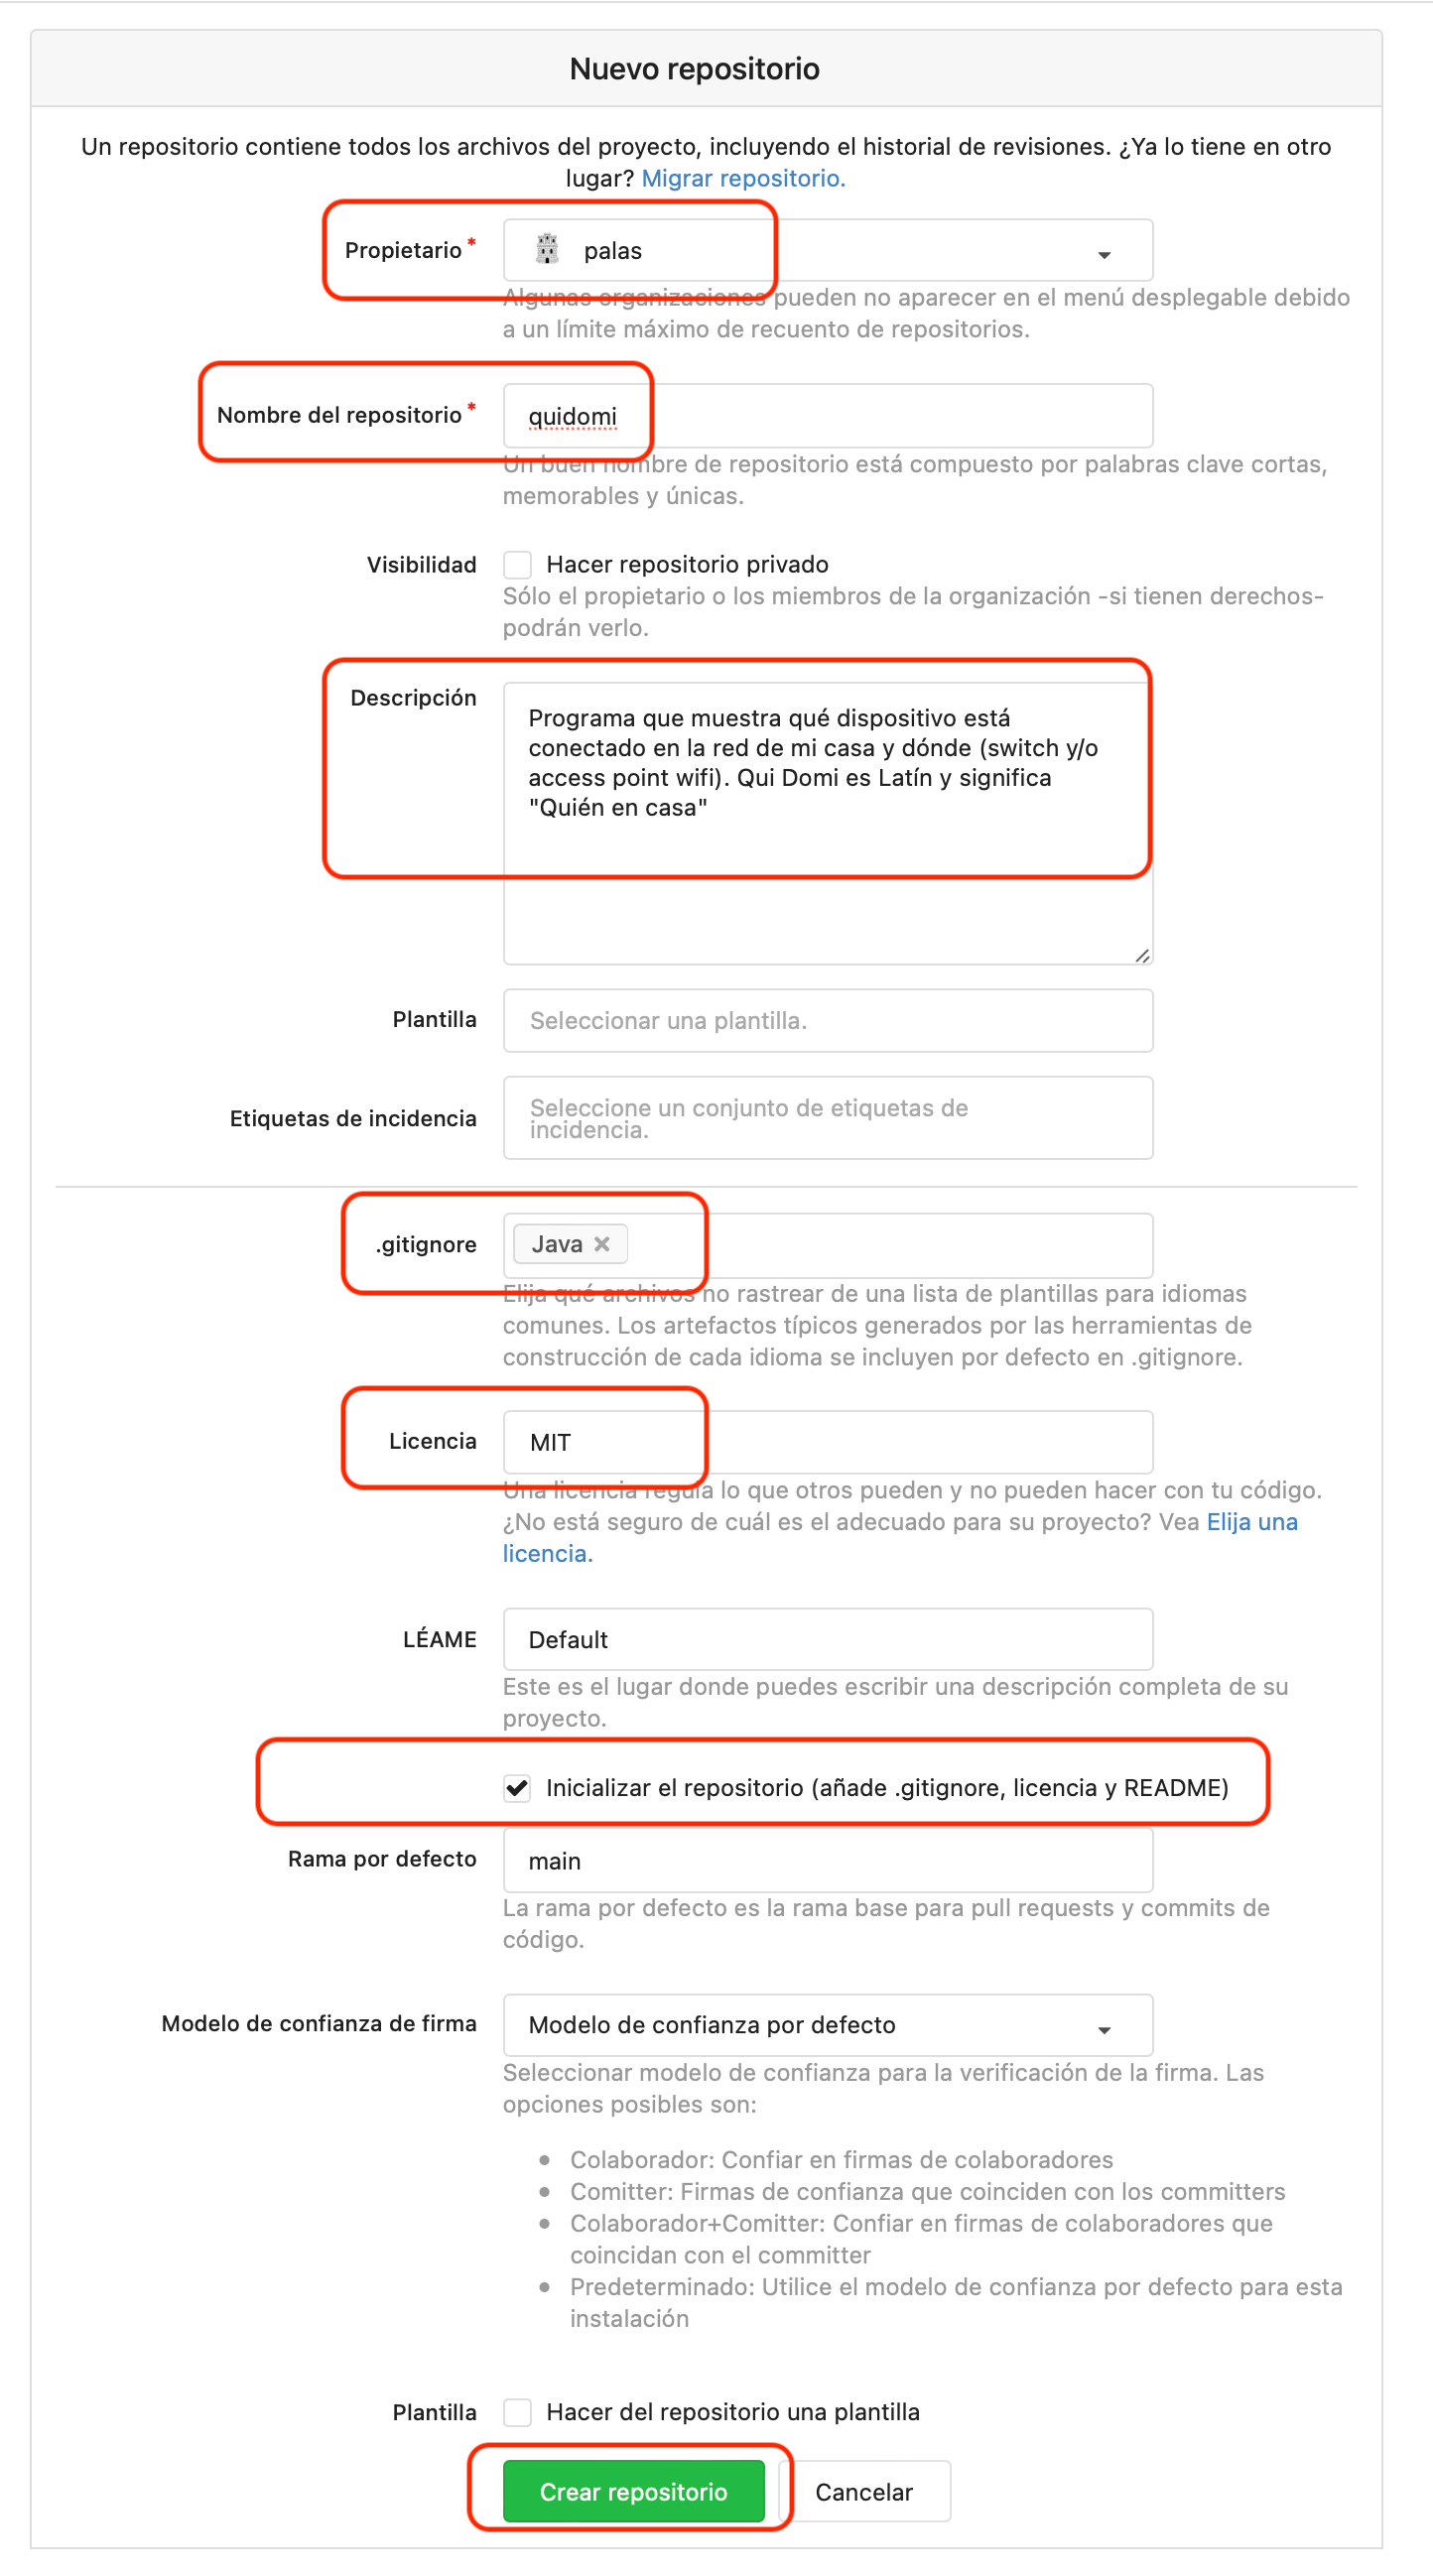
Once created, I have access to the URL we’ll use later for cloning.
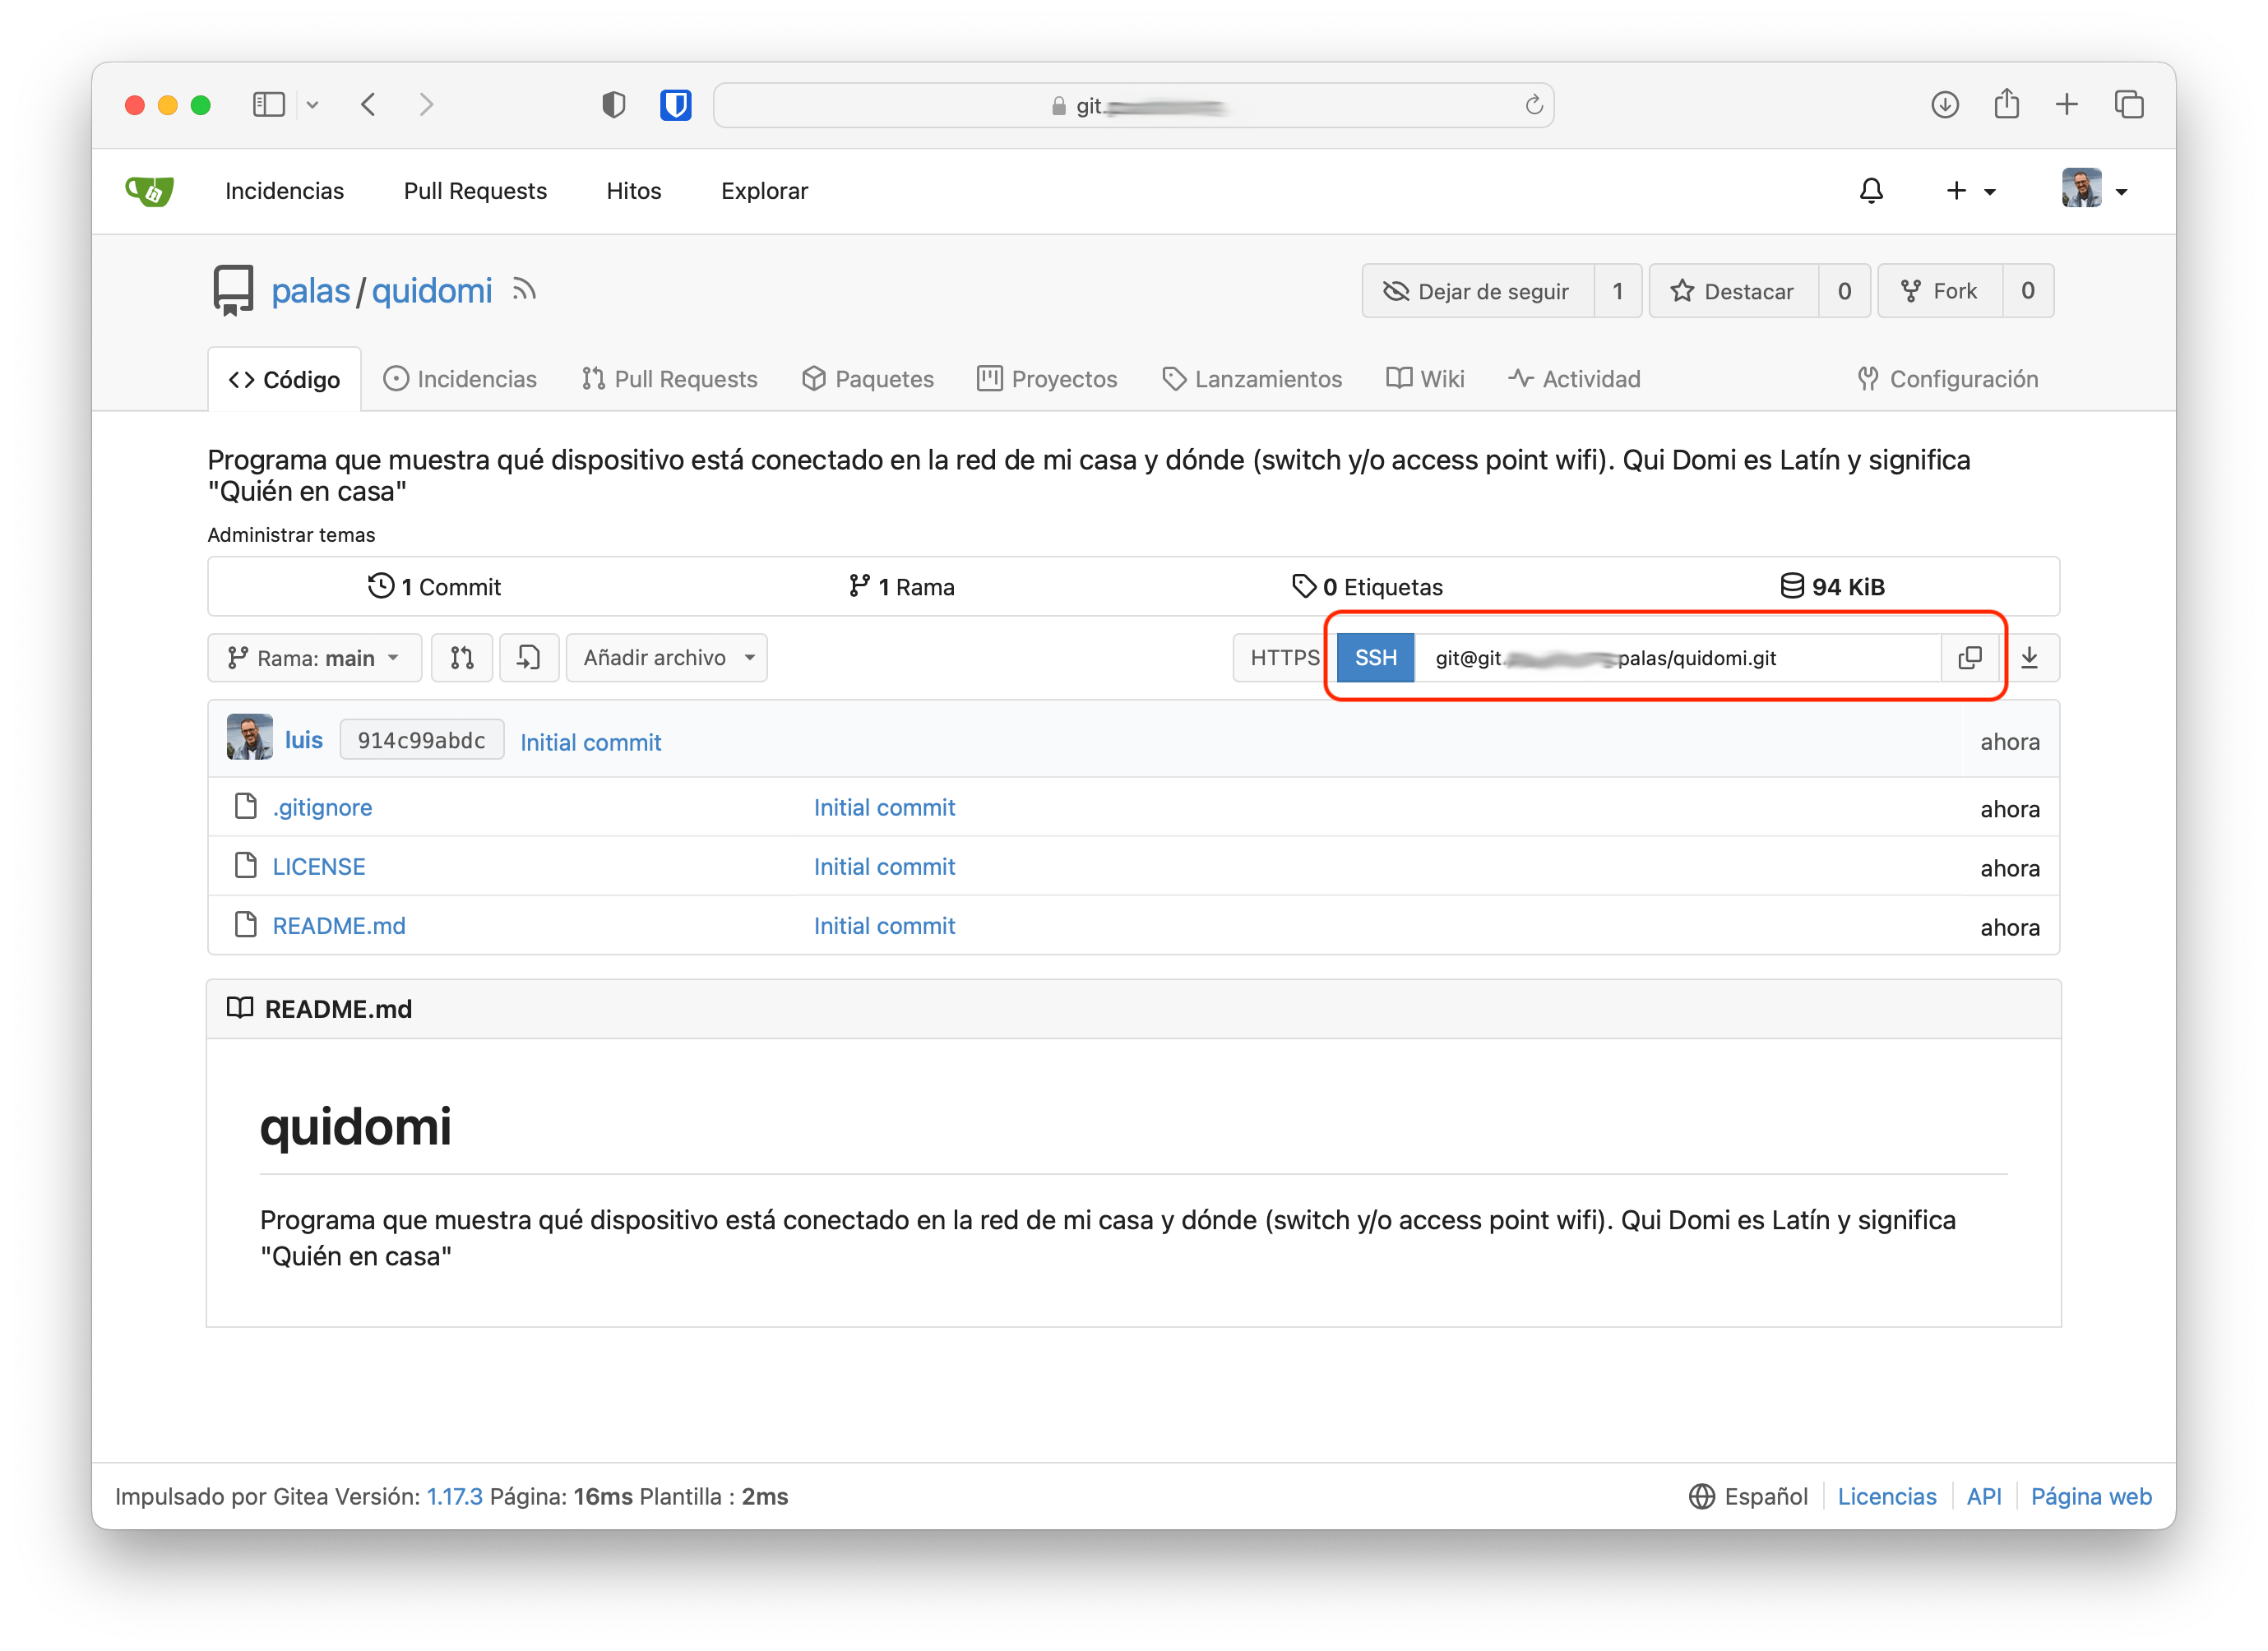
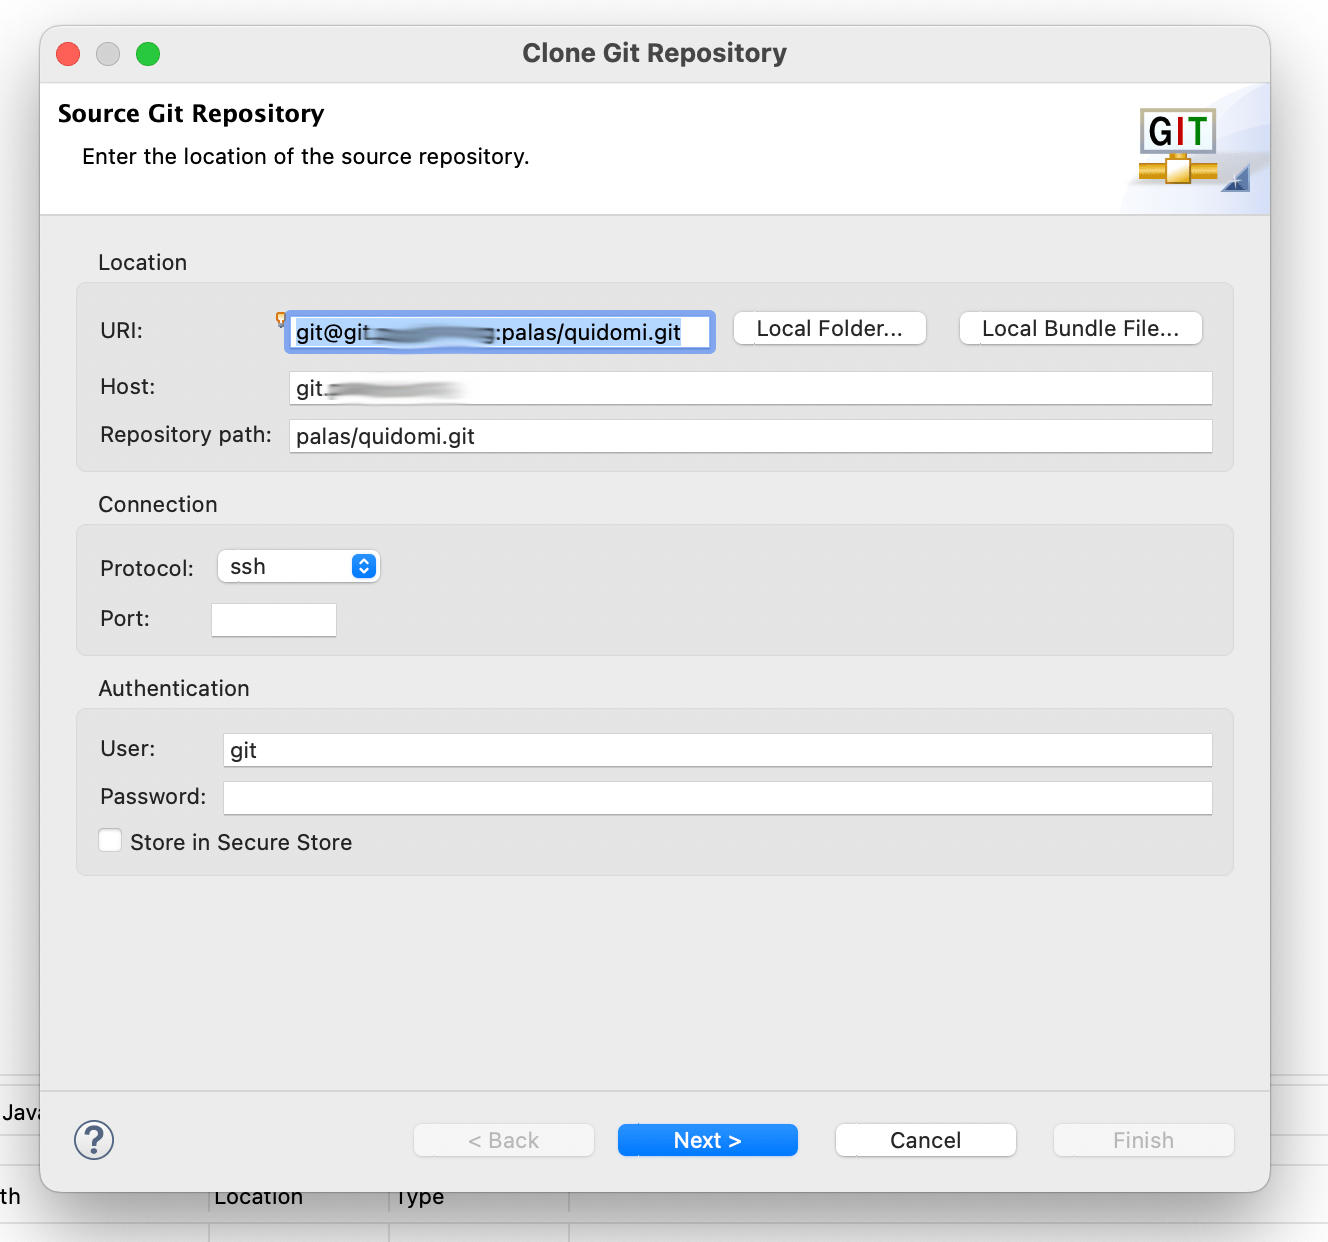
- I note the URL for cloning. If I select
SSH, the user (the part to the left of@) should always begit. Don’t confuse it with your user on that server (if you have access). When using SSH as the sync method with git, the user is alwaysgit@...
git@git.yourdomain.com:palas/quidomi.git
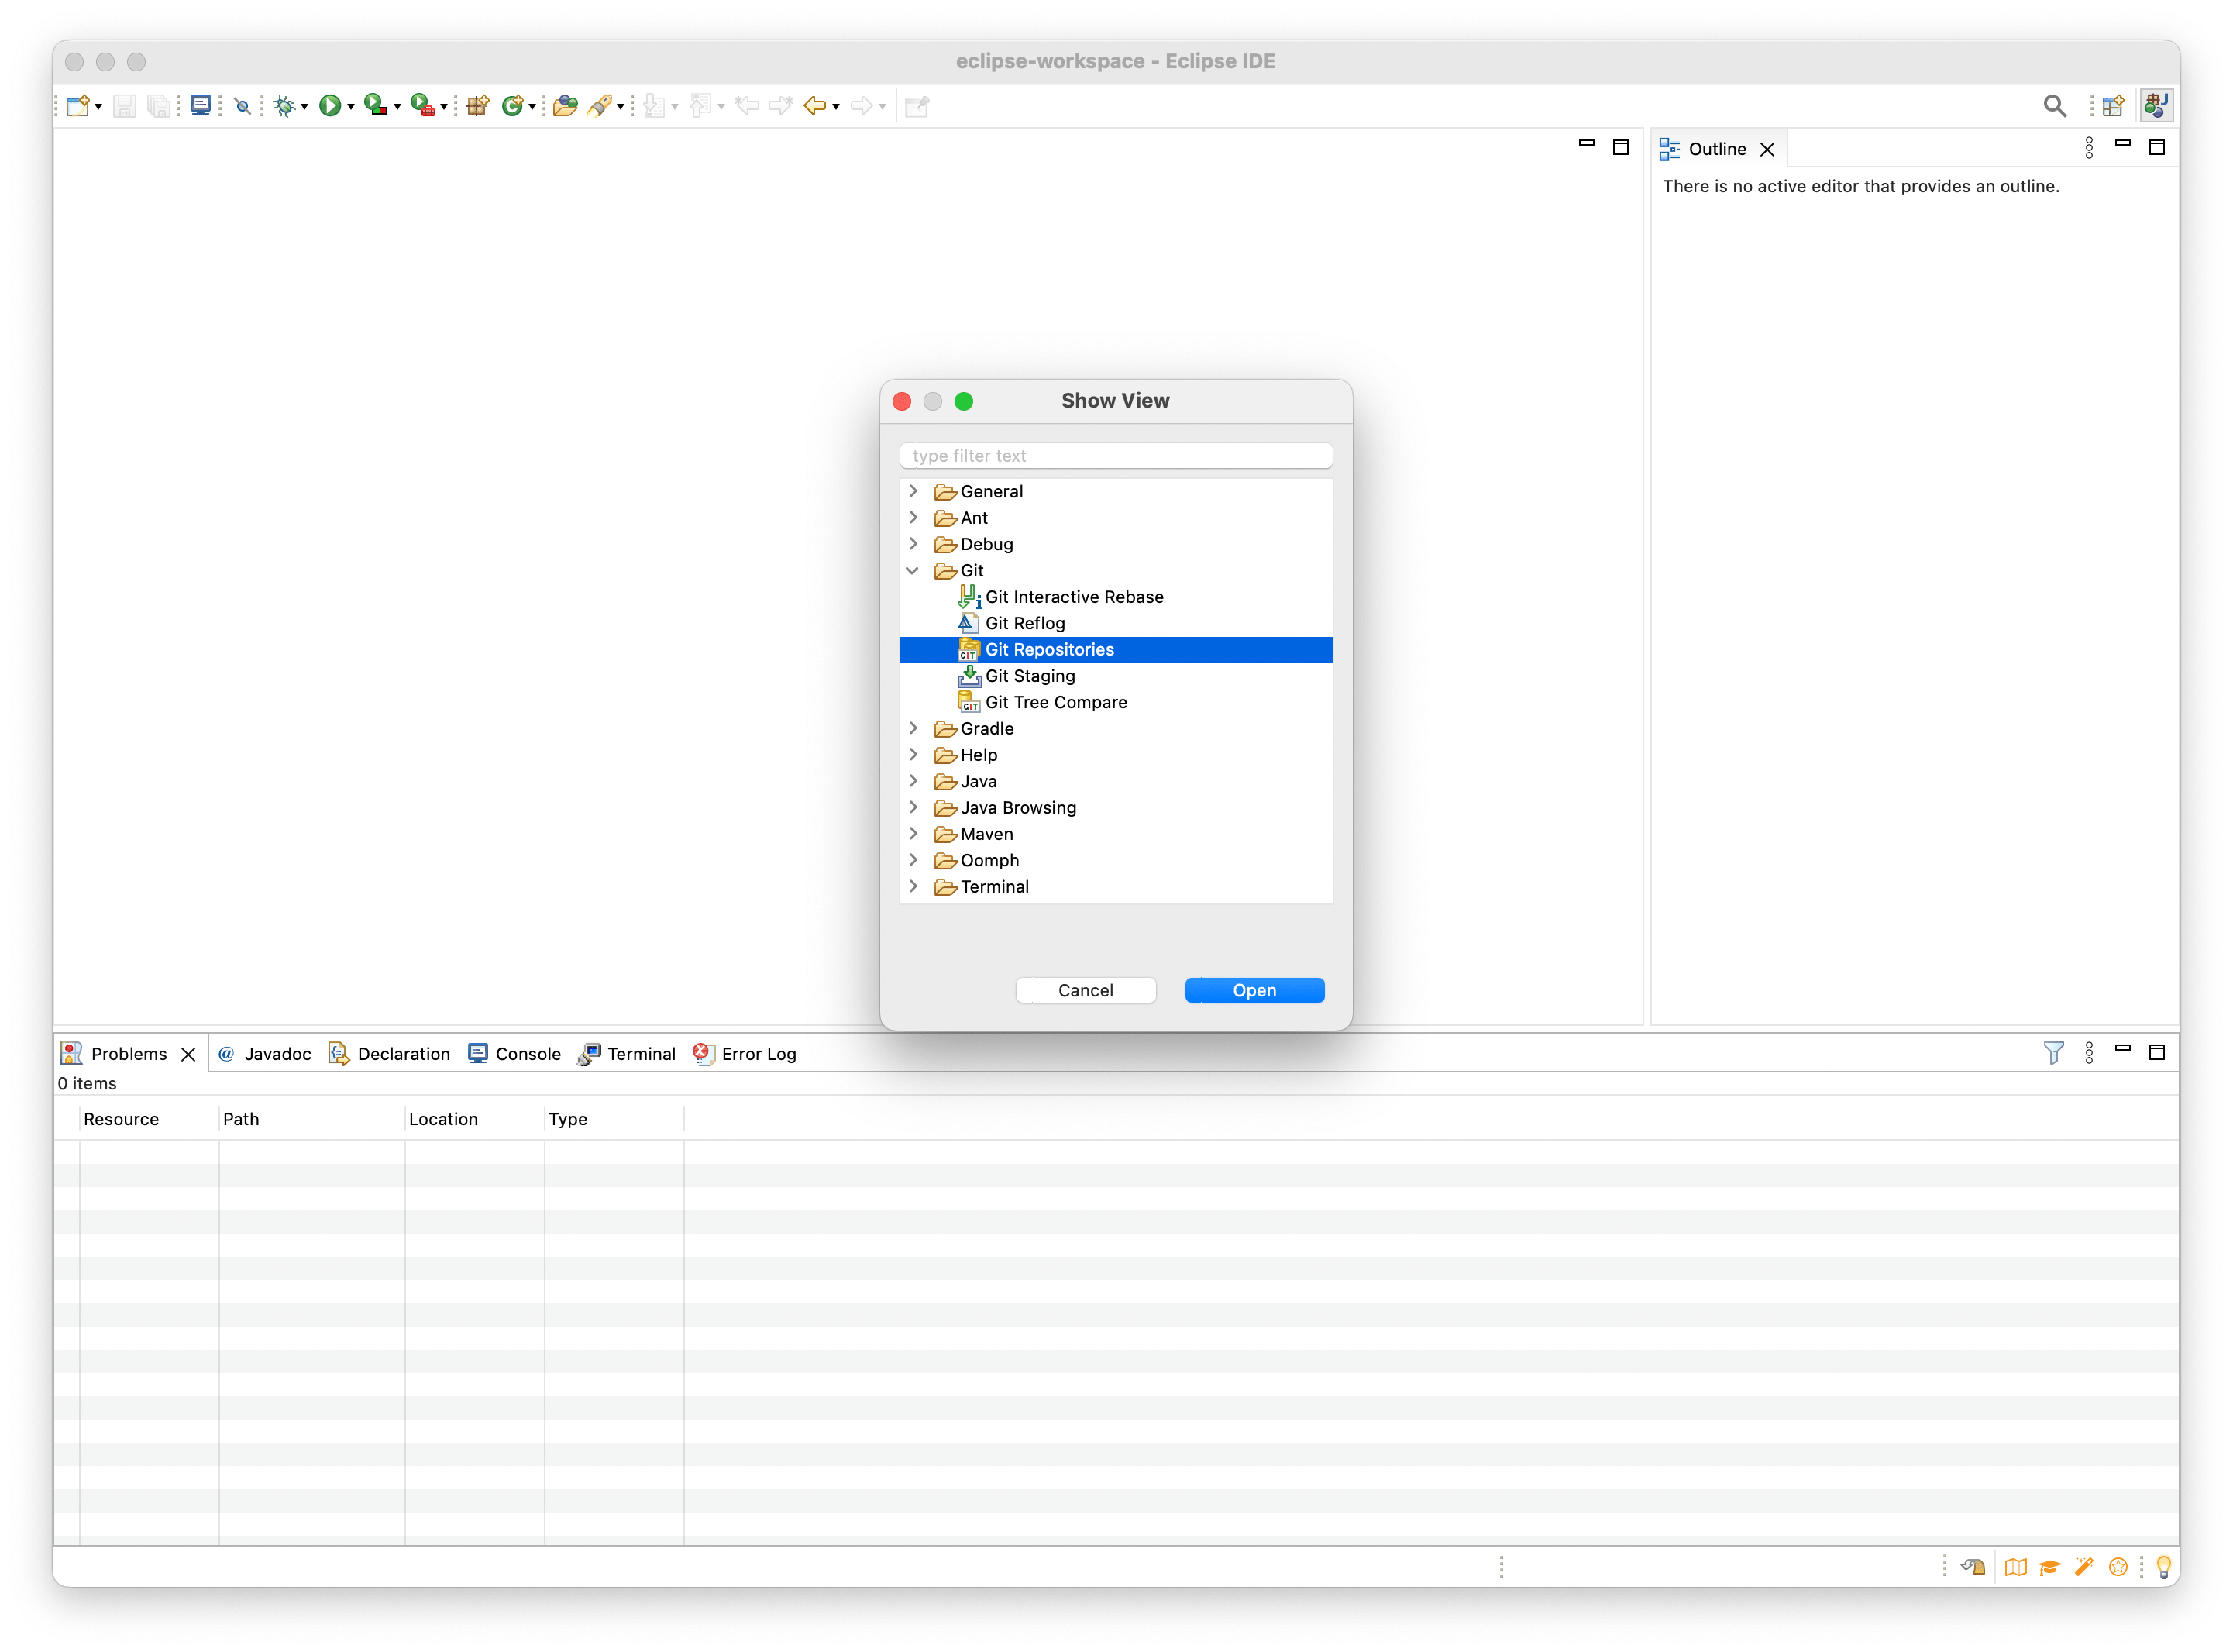
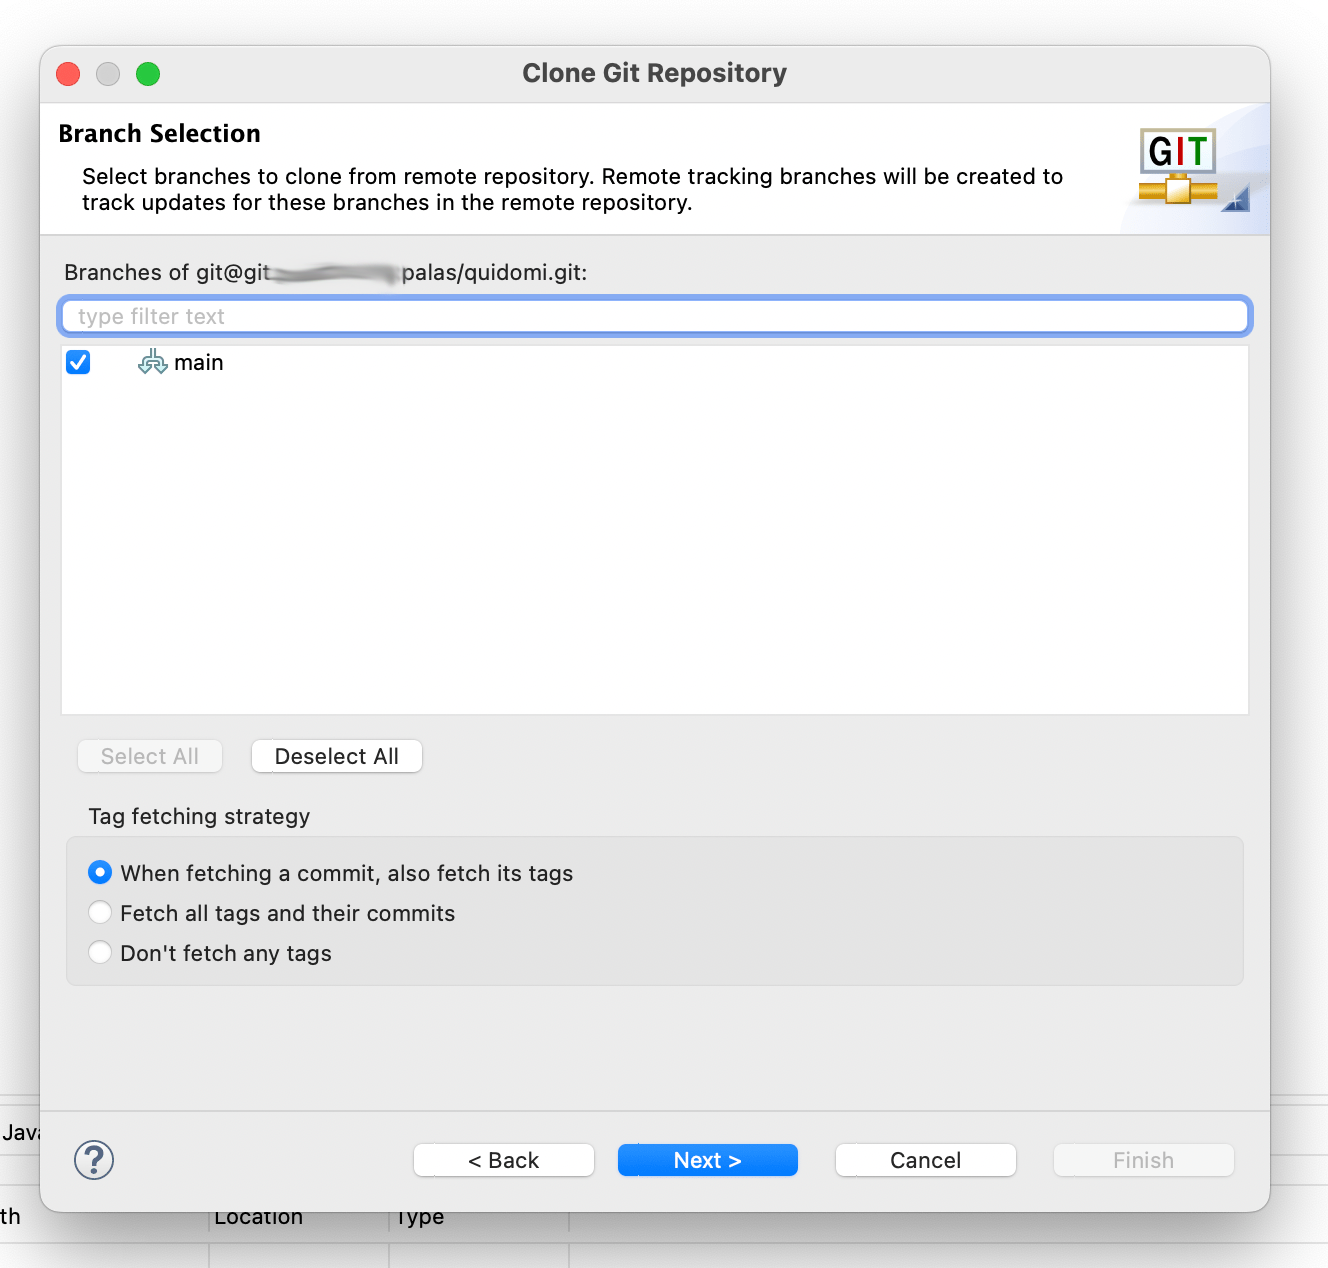
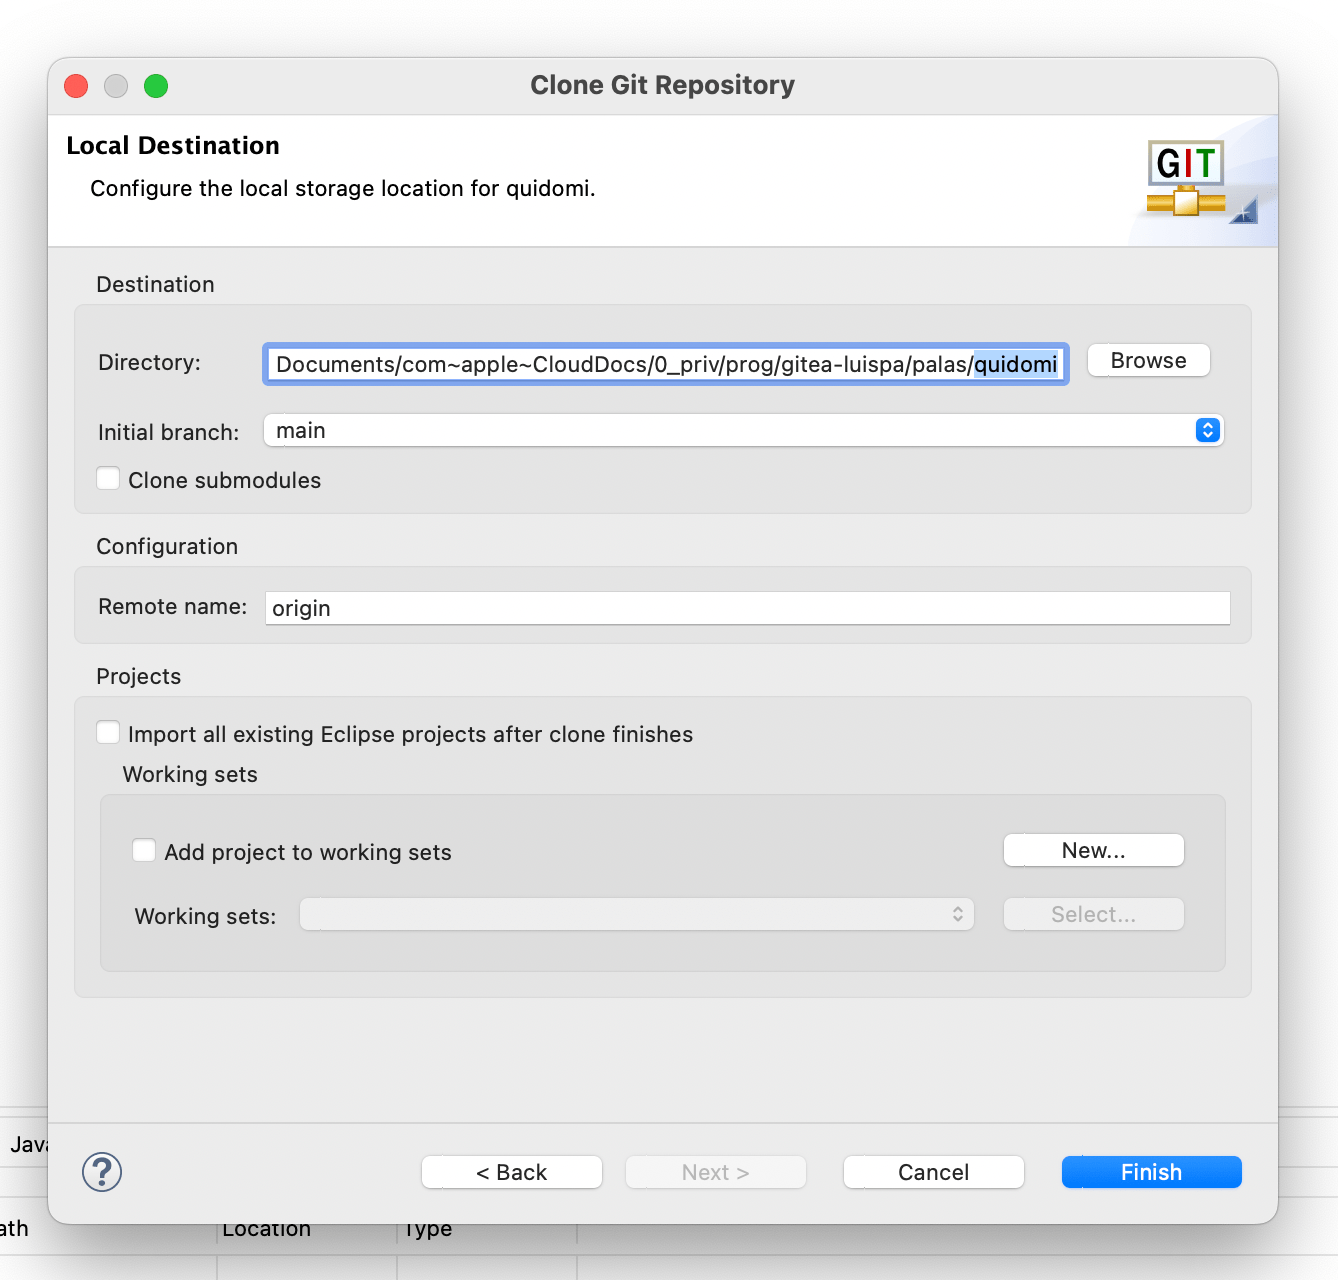
2. Cloning or Opening the Repository
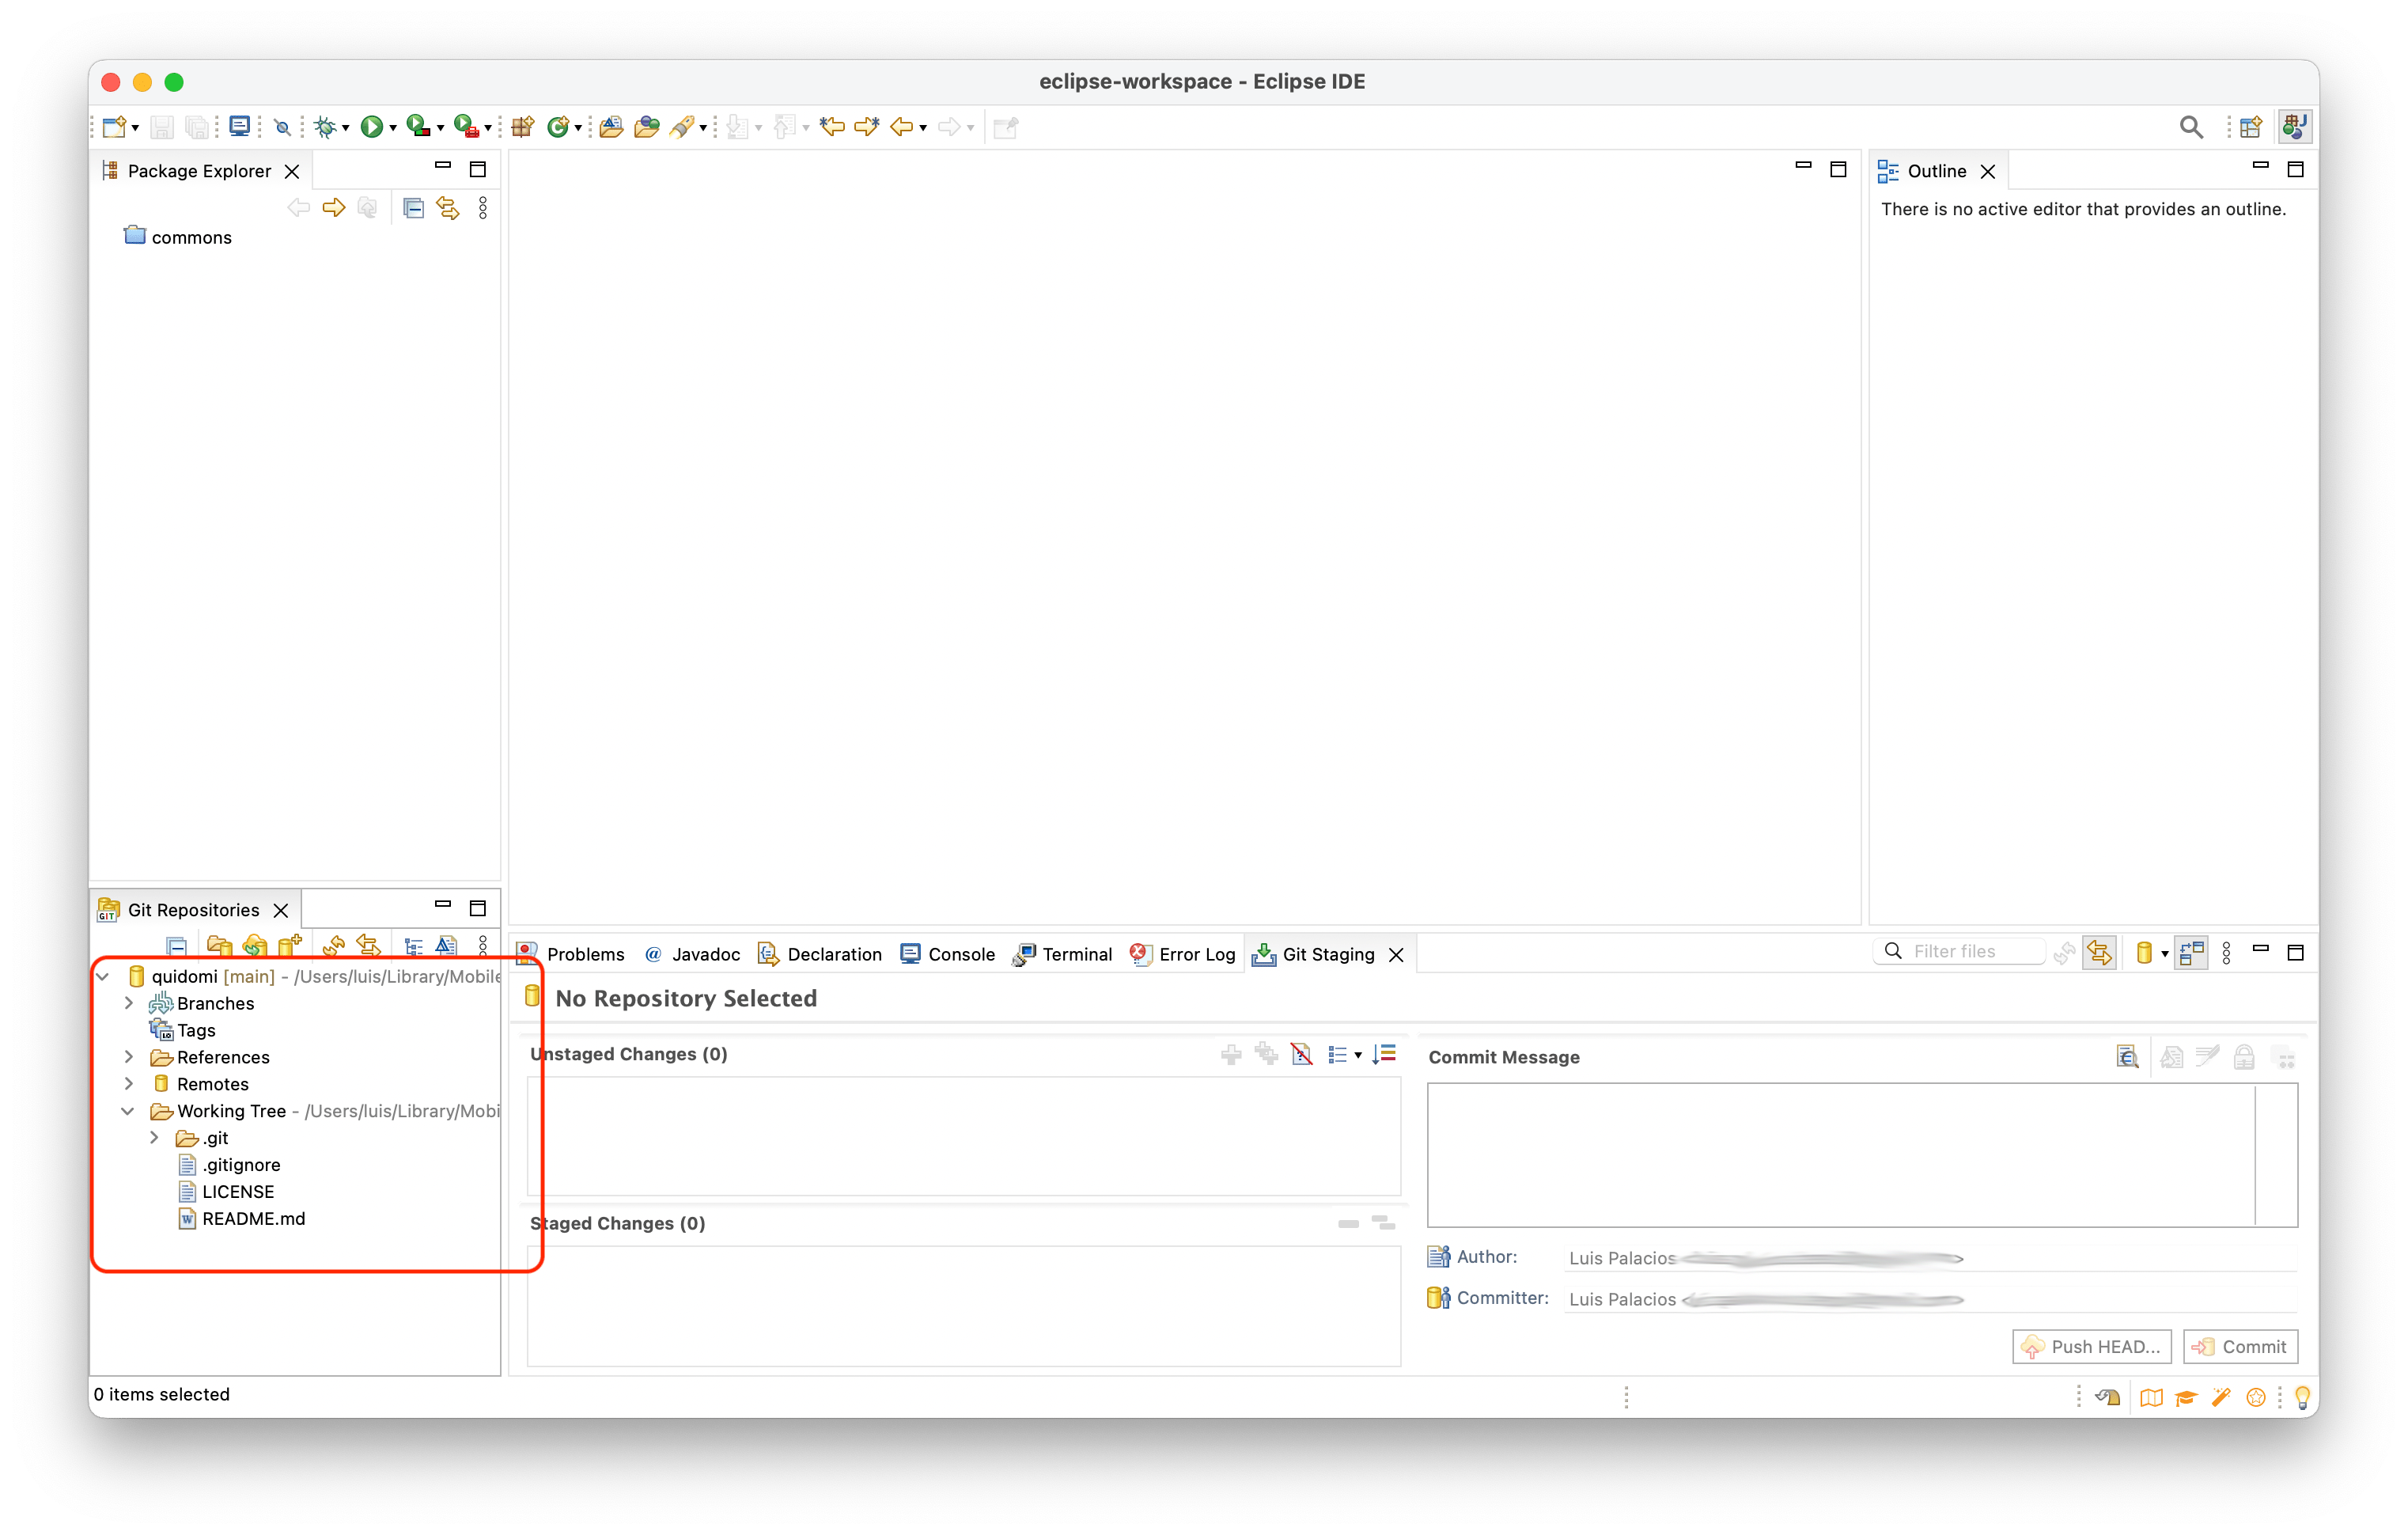
- First I show the Git work view from
Window > Show View > Other > Git > Git Repositories.
| Note: If I already had the repository cloned on my computer, see the end of this section. |
From the new window I click Clone a Git repository.
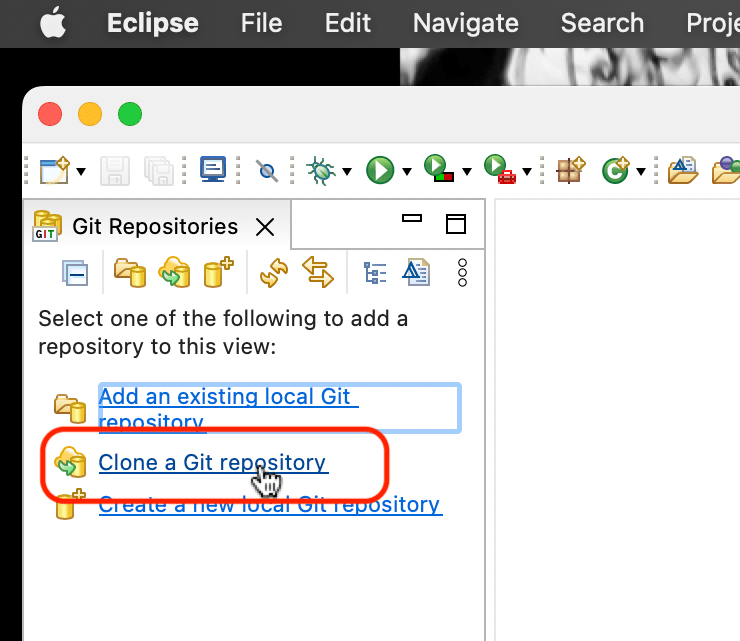
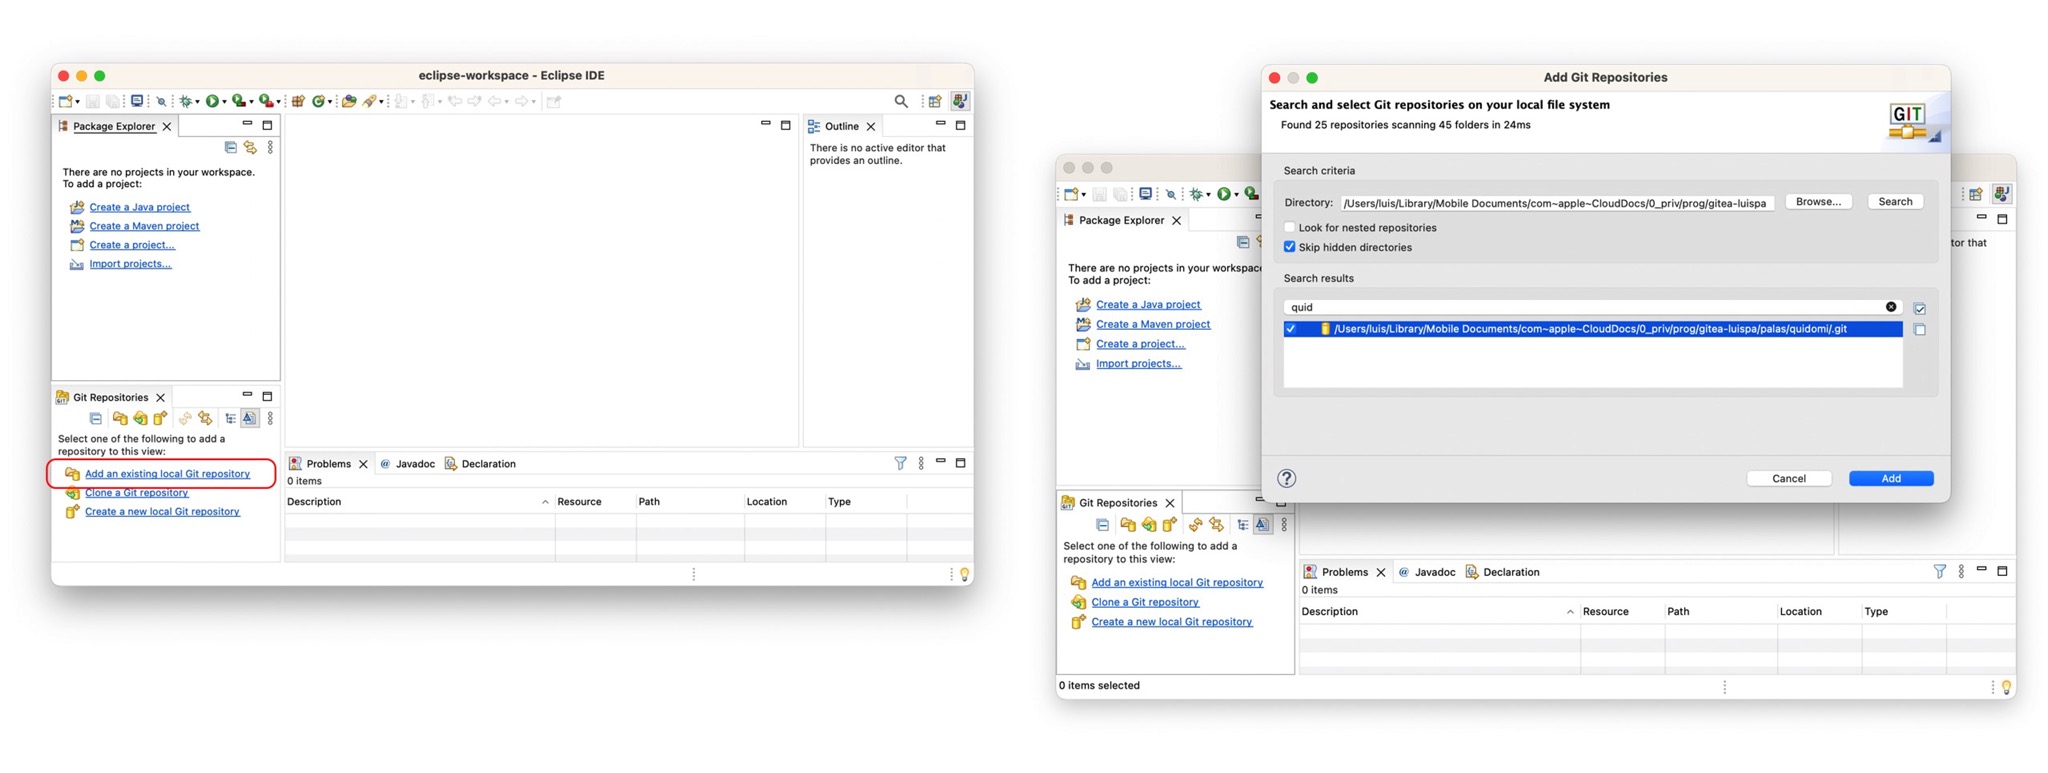
In case I had already cloned the repository, I wouldn’t have needed to clone it — I would simply click Add an existing local Git repository and select it.
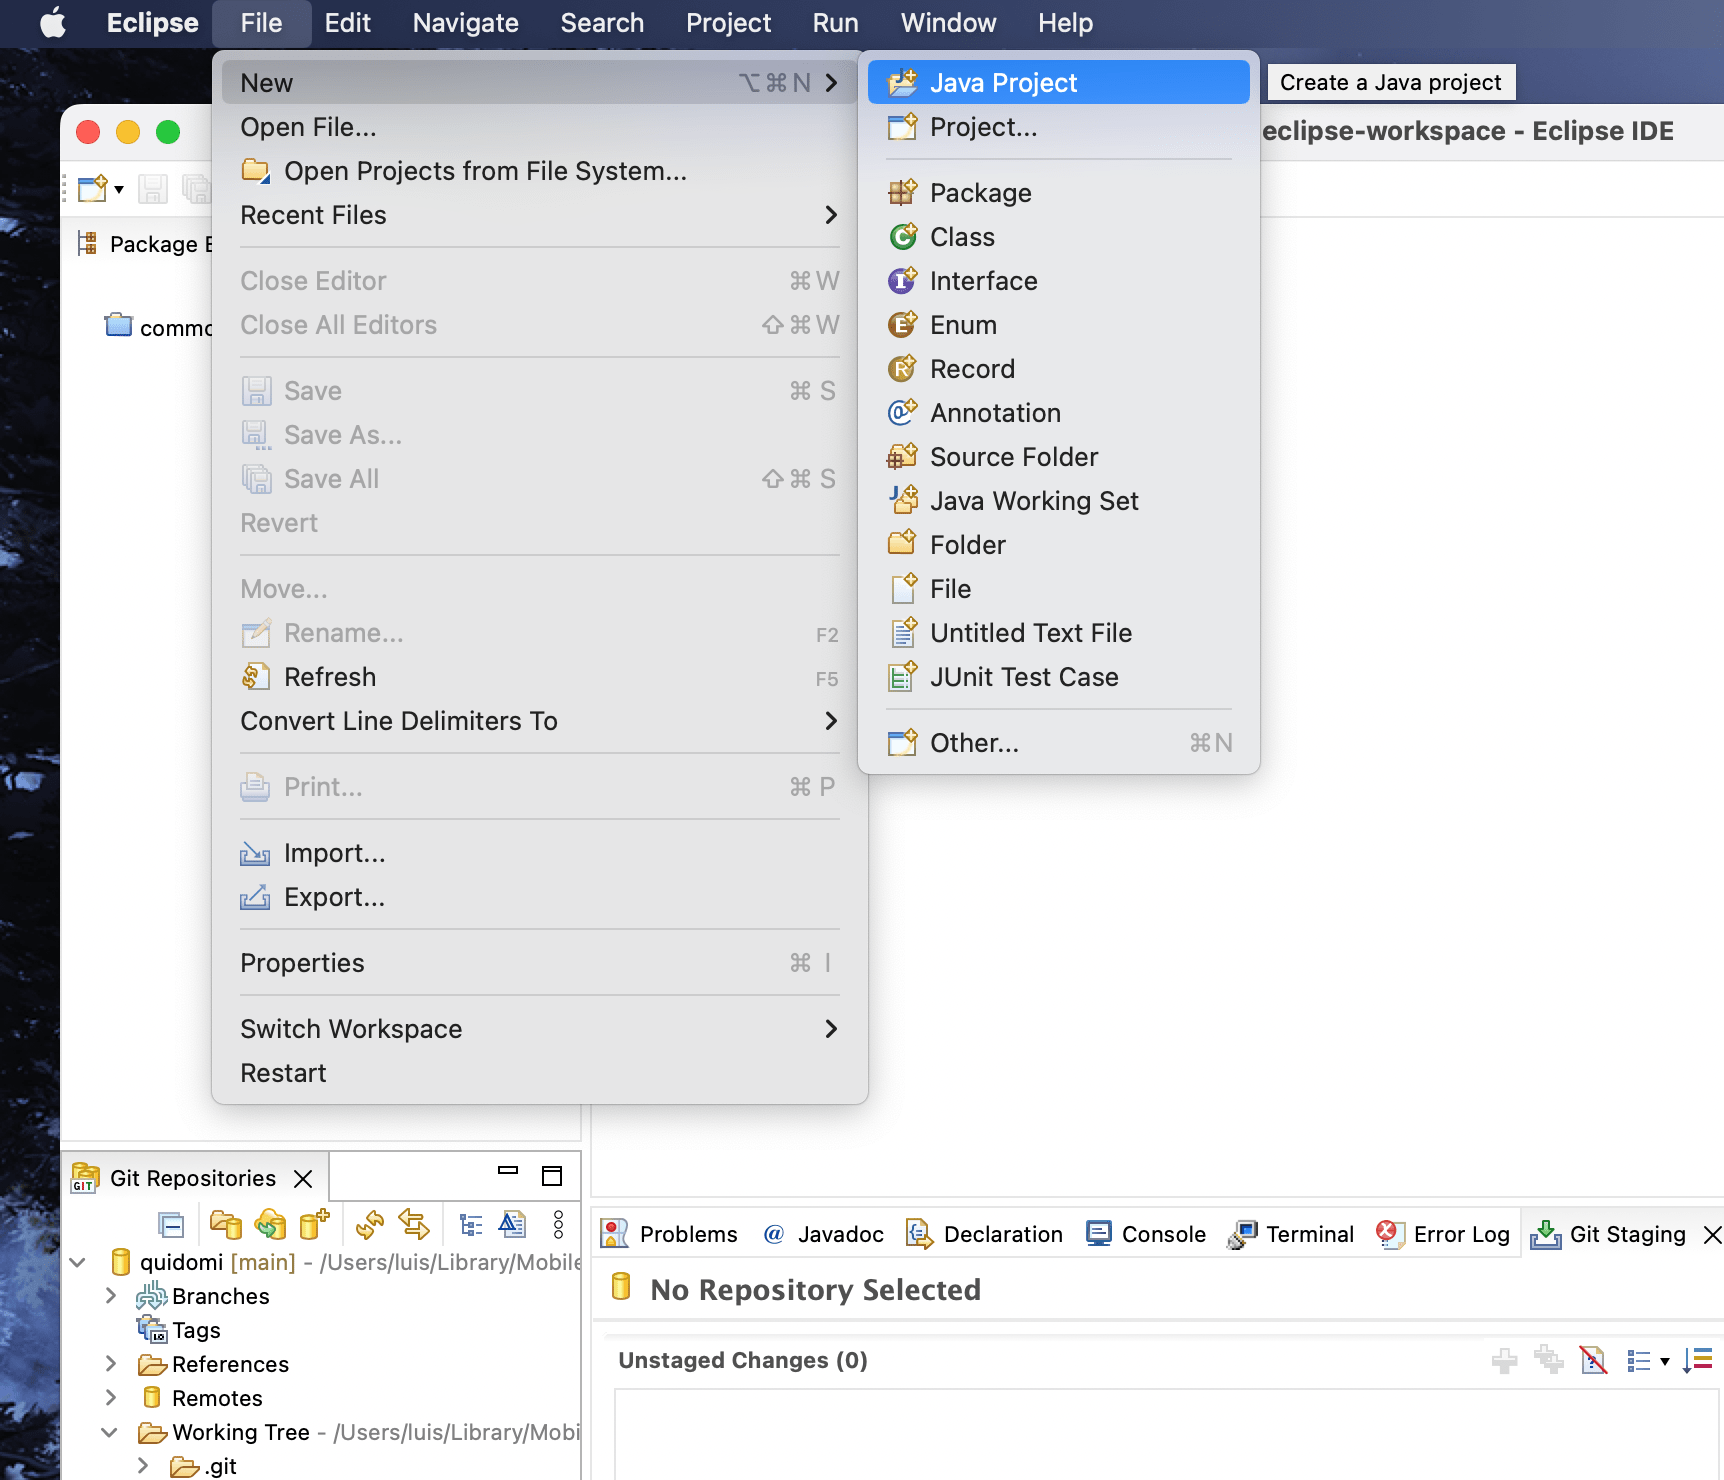
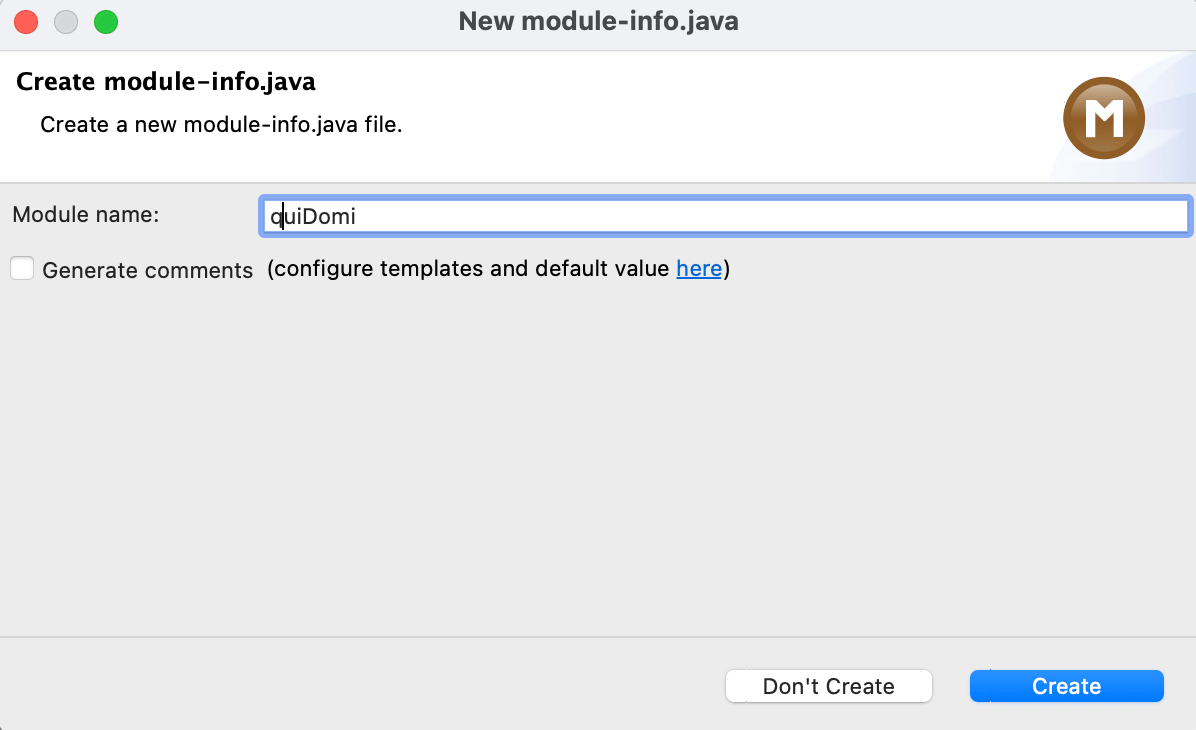
3. Creating the Eclipse Project QuiDomi
Next we create a Project in Eclipse and name it the same as our repository, but for now they have nothing to do with each other — in fact, they’ll be unlinked until the next step (4).
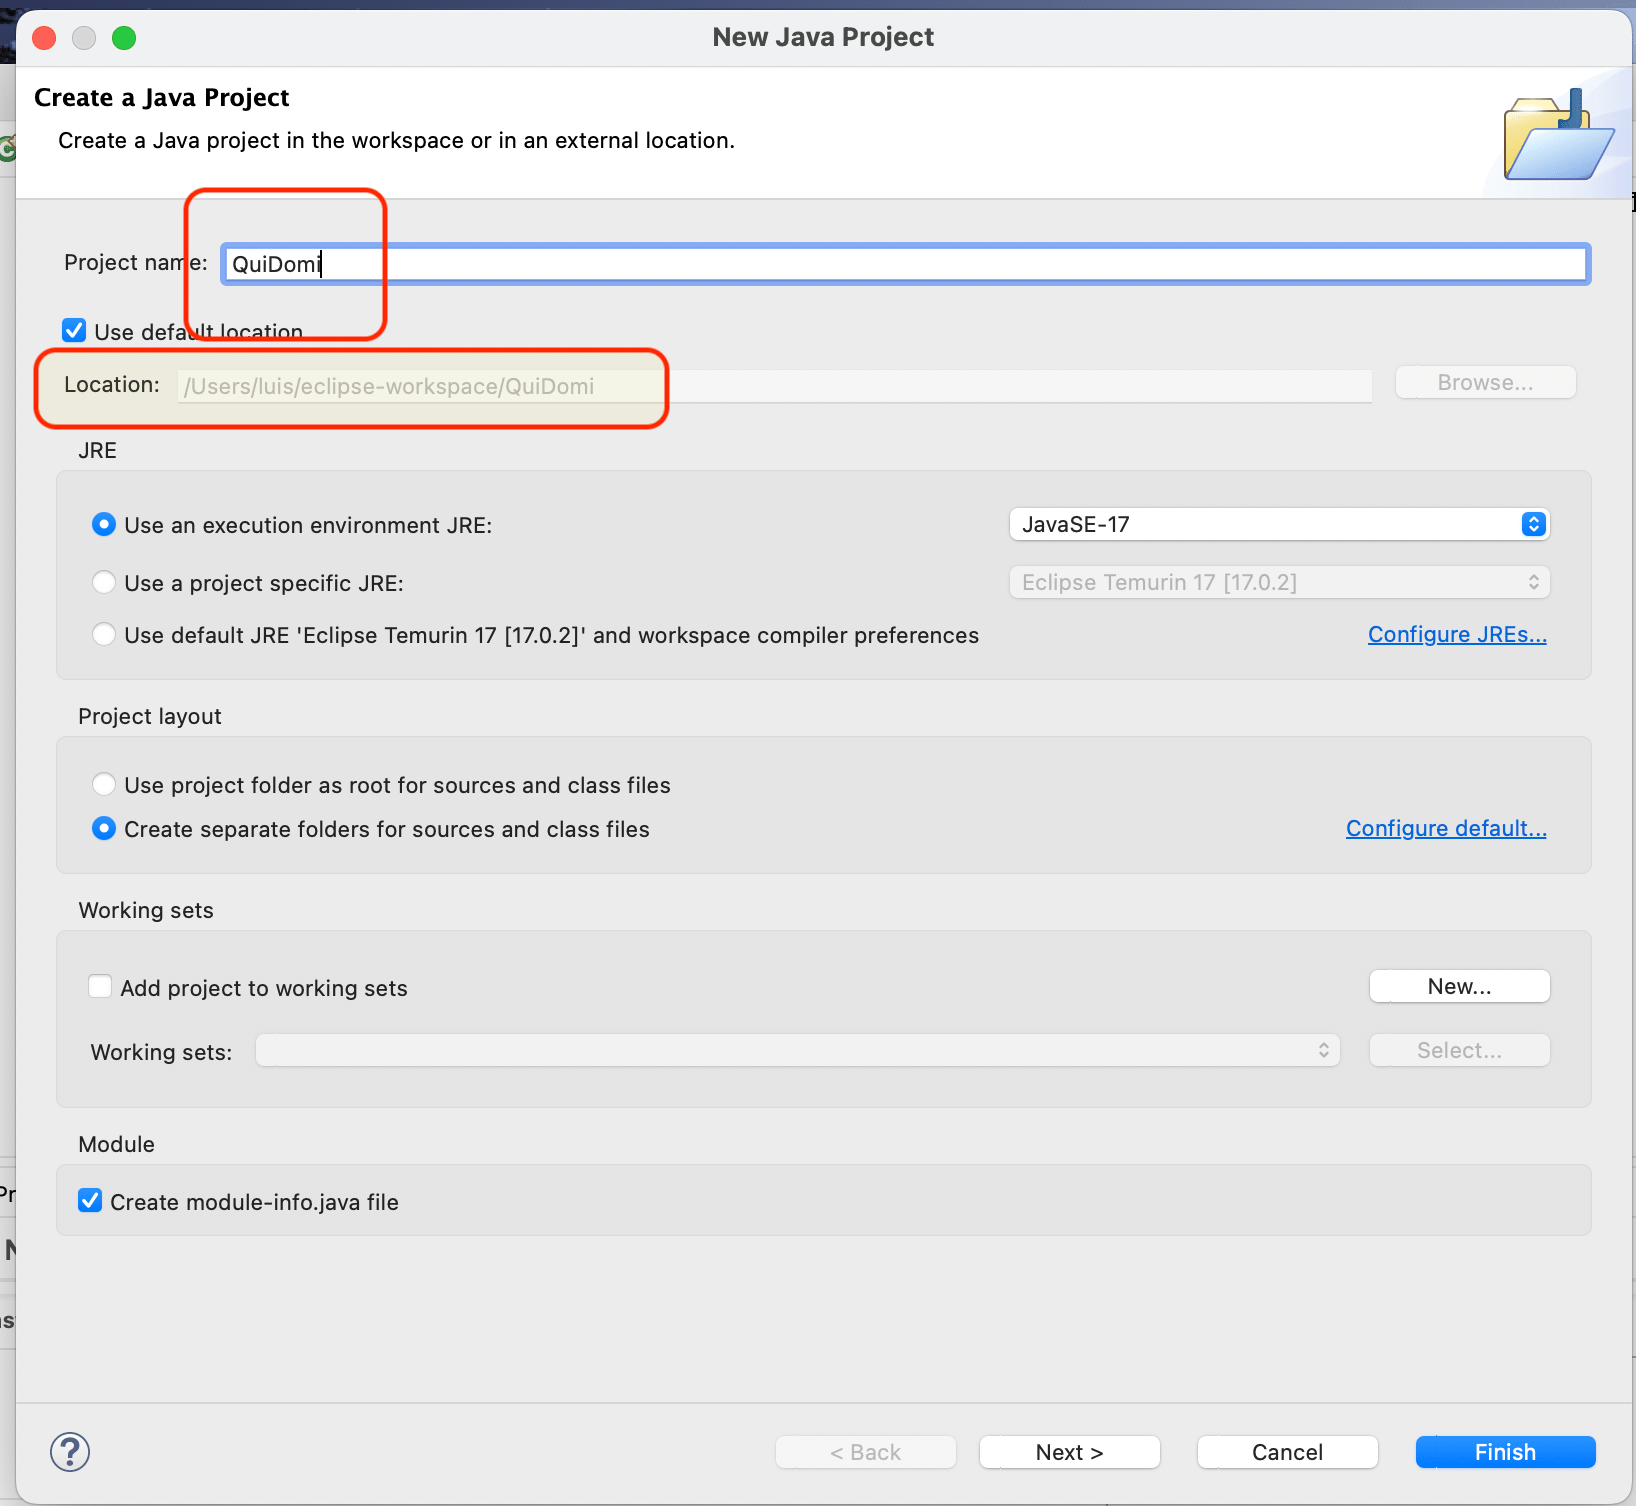
| Note: This project will be located in a subfolder of the workspace. When we link it to the Git repository, it will be moved. |
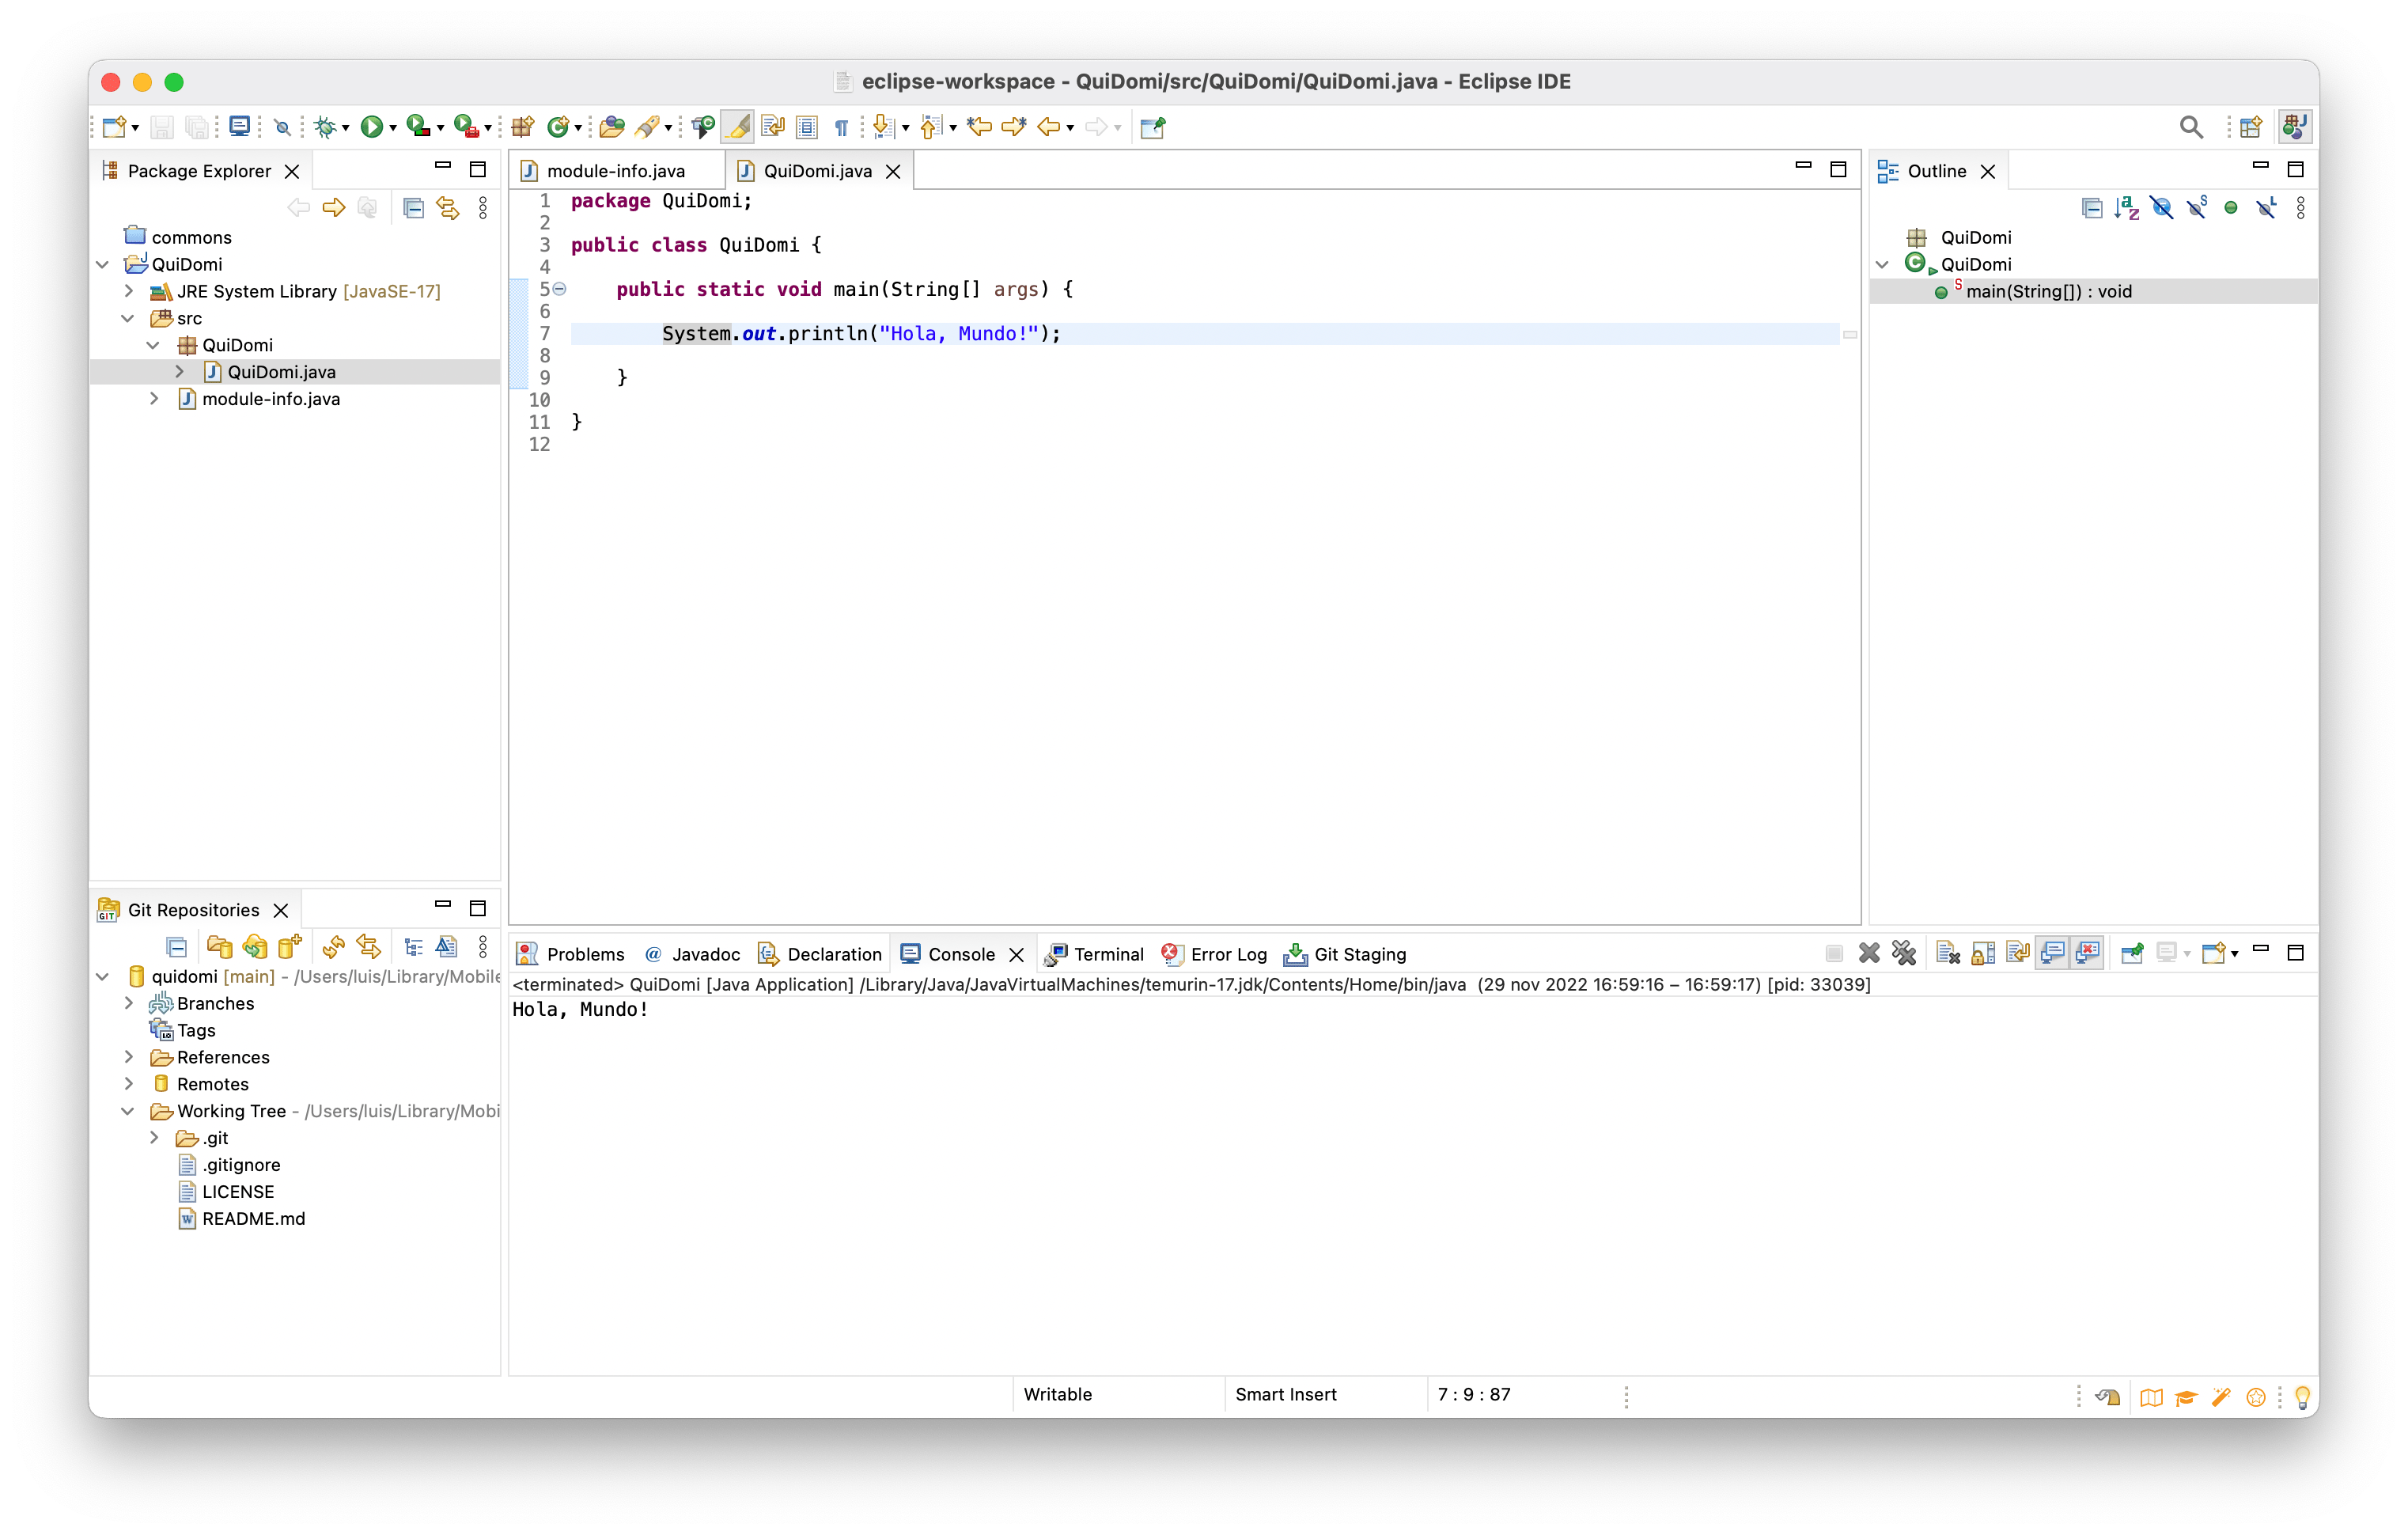
- You can start working on your Project, but everything will stay local until you link / move it under the local (cloned) Git repository folder. In this example I’ve created a simple “Hello, world!”.
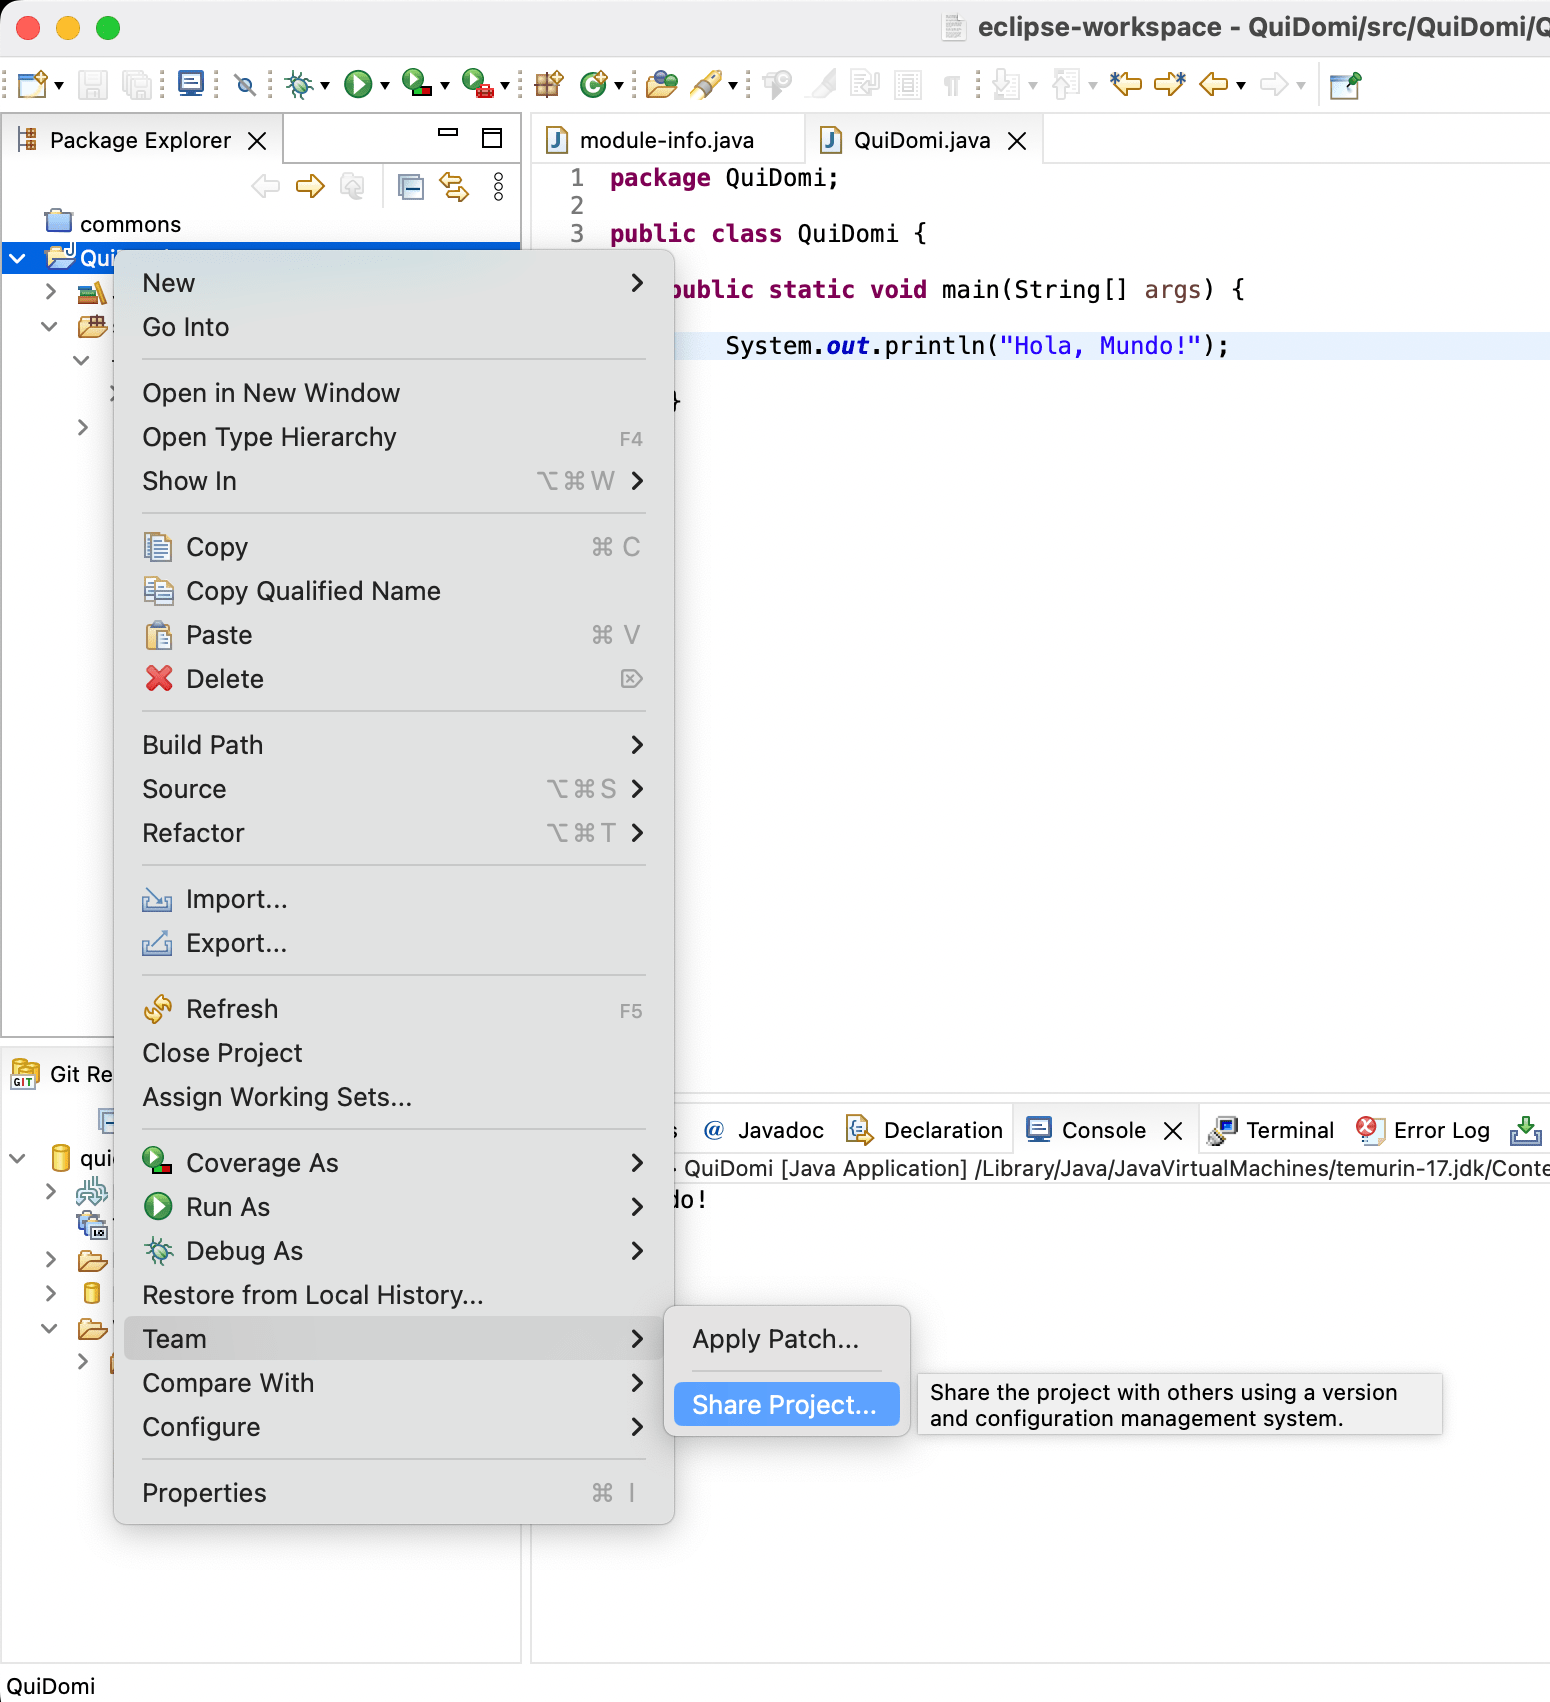
4. Linking the Project with the Git Repository
On the Eclipse Project QuiDomi, I right-click on QuiDomi in the Package Explorer and go to “Team > Share Project”, select the quidomi Git repository we saw in steps 1 and 2. What happens is:
- The Project “moves” (the entire project folder) under the repository folder.
- In the workspace we still have the pointer to the project (although its contents have physically moved).
- From this point on we can work from Eclipse in “git mode” with this project/program, make commits, etc.
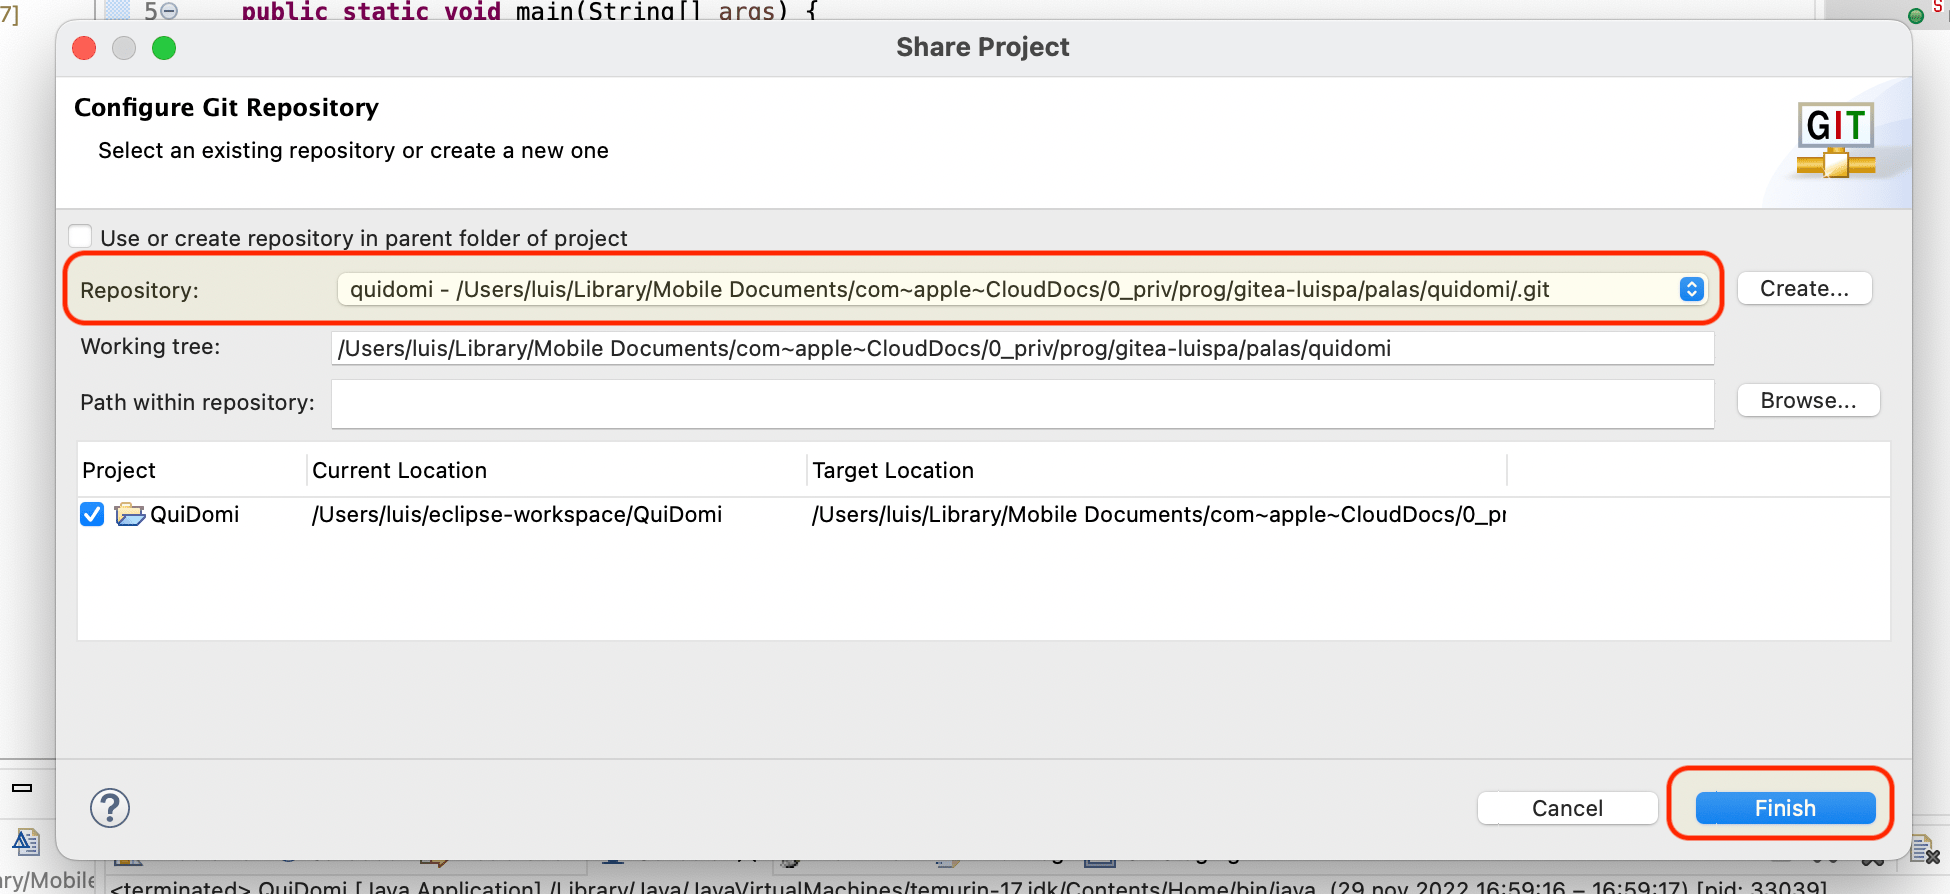
- Once you click Finish, a couple of things happen. First, the Project folder
QuiDomithat was in the workspace moves under the repository folder:
+----  /Users/luis/eclipse-workspace/QuiDomi
|
+----> /Users/luis/0_priv/prog/gitea-luispa/palas/quidomi/QuiDomi

➜  palas> ls -al quidomi
total 24
drwxr-xr-x@  7 luis  staff   224 29 nov 17:05 .
drwxr-xr-x@ 20 luis  staff   640 29 nov 17:05 ..
drwxr-xr-x@ 11 luis  staff   352 29 nov 16:46 .git
-rw-r--r--   1 luis  staff   303 29 nov 16:46 .gitignore
-rw-r--r--   1 luis  staff  1078 29 nov 16:46 LICENSE
drwxr-xr-x@  8 luis  staff   256 29 nov 17:05 QuiDomi      <=== !!!
-rw-r--r--   1 luis  staff   176 29 nov 16:46 README.md

➜  palas> tree quidomi
quidomi
├── LICENSE
├── QuiDomi         <=== !!!
│   ├── bin
│   │   ├── QuiDomi
│   │   │   └── QuiDomi.class
│   │   └── module-info.class
│   └── src
│       ├── QuiDomi
│       │   └── QuiDomi.java
│       └── module-info.java
└── README.md

5 directories, 6 files
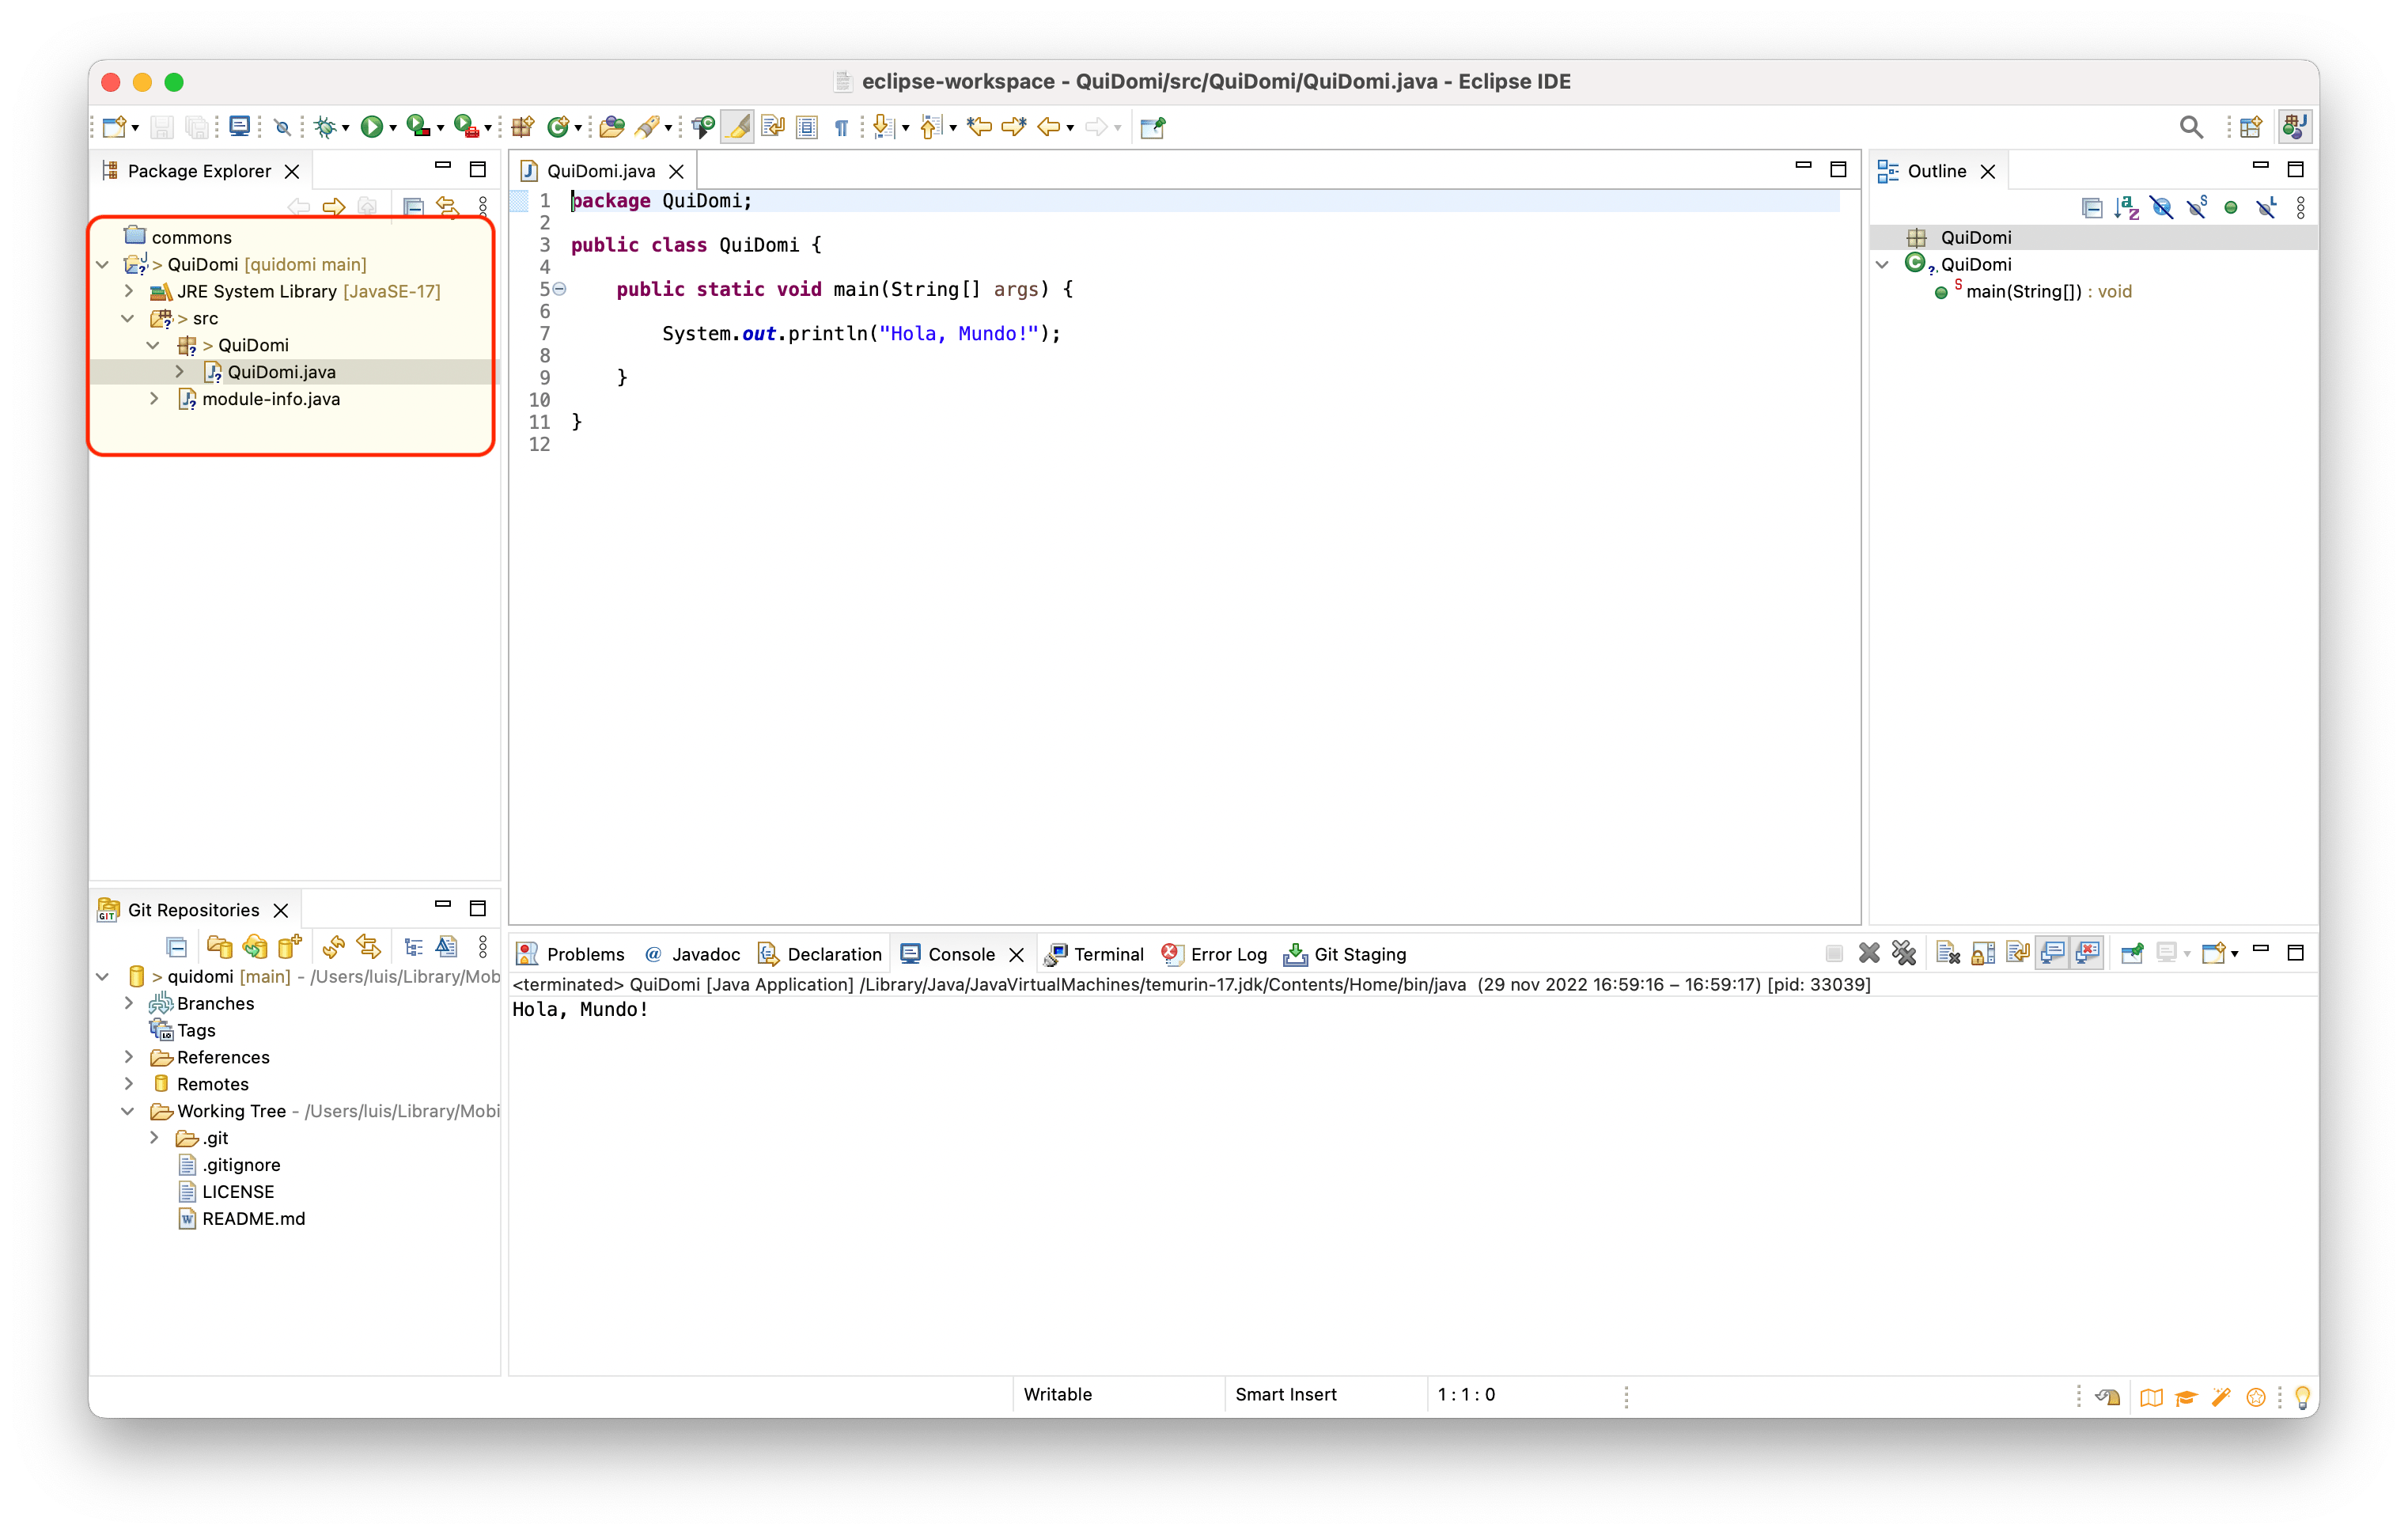
The second thing that happens is you start getting visual feedback. Notice how small “badges” appear on the folder icons — they’re symbols indicating the status within the git repository.
Working on the Project and Doing Stage/Commits/Push
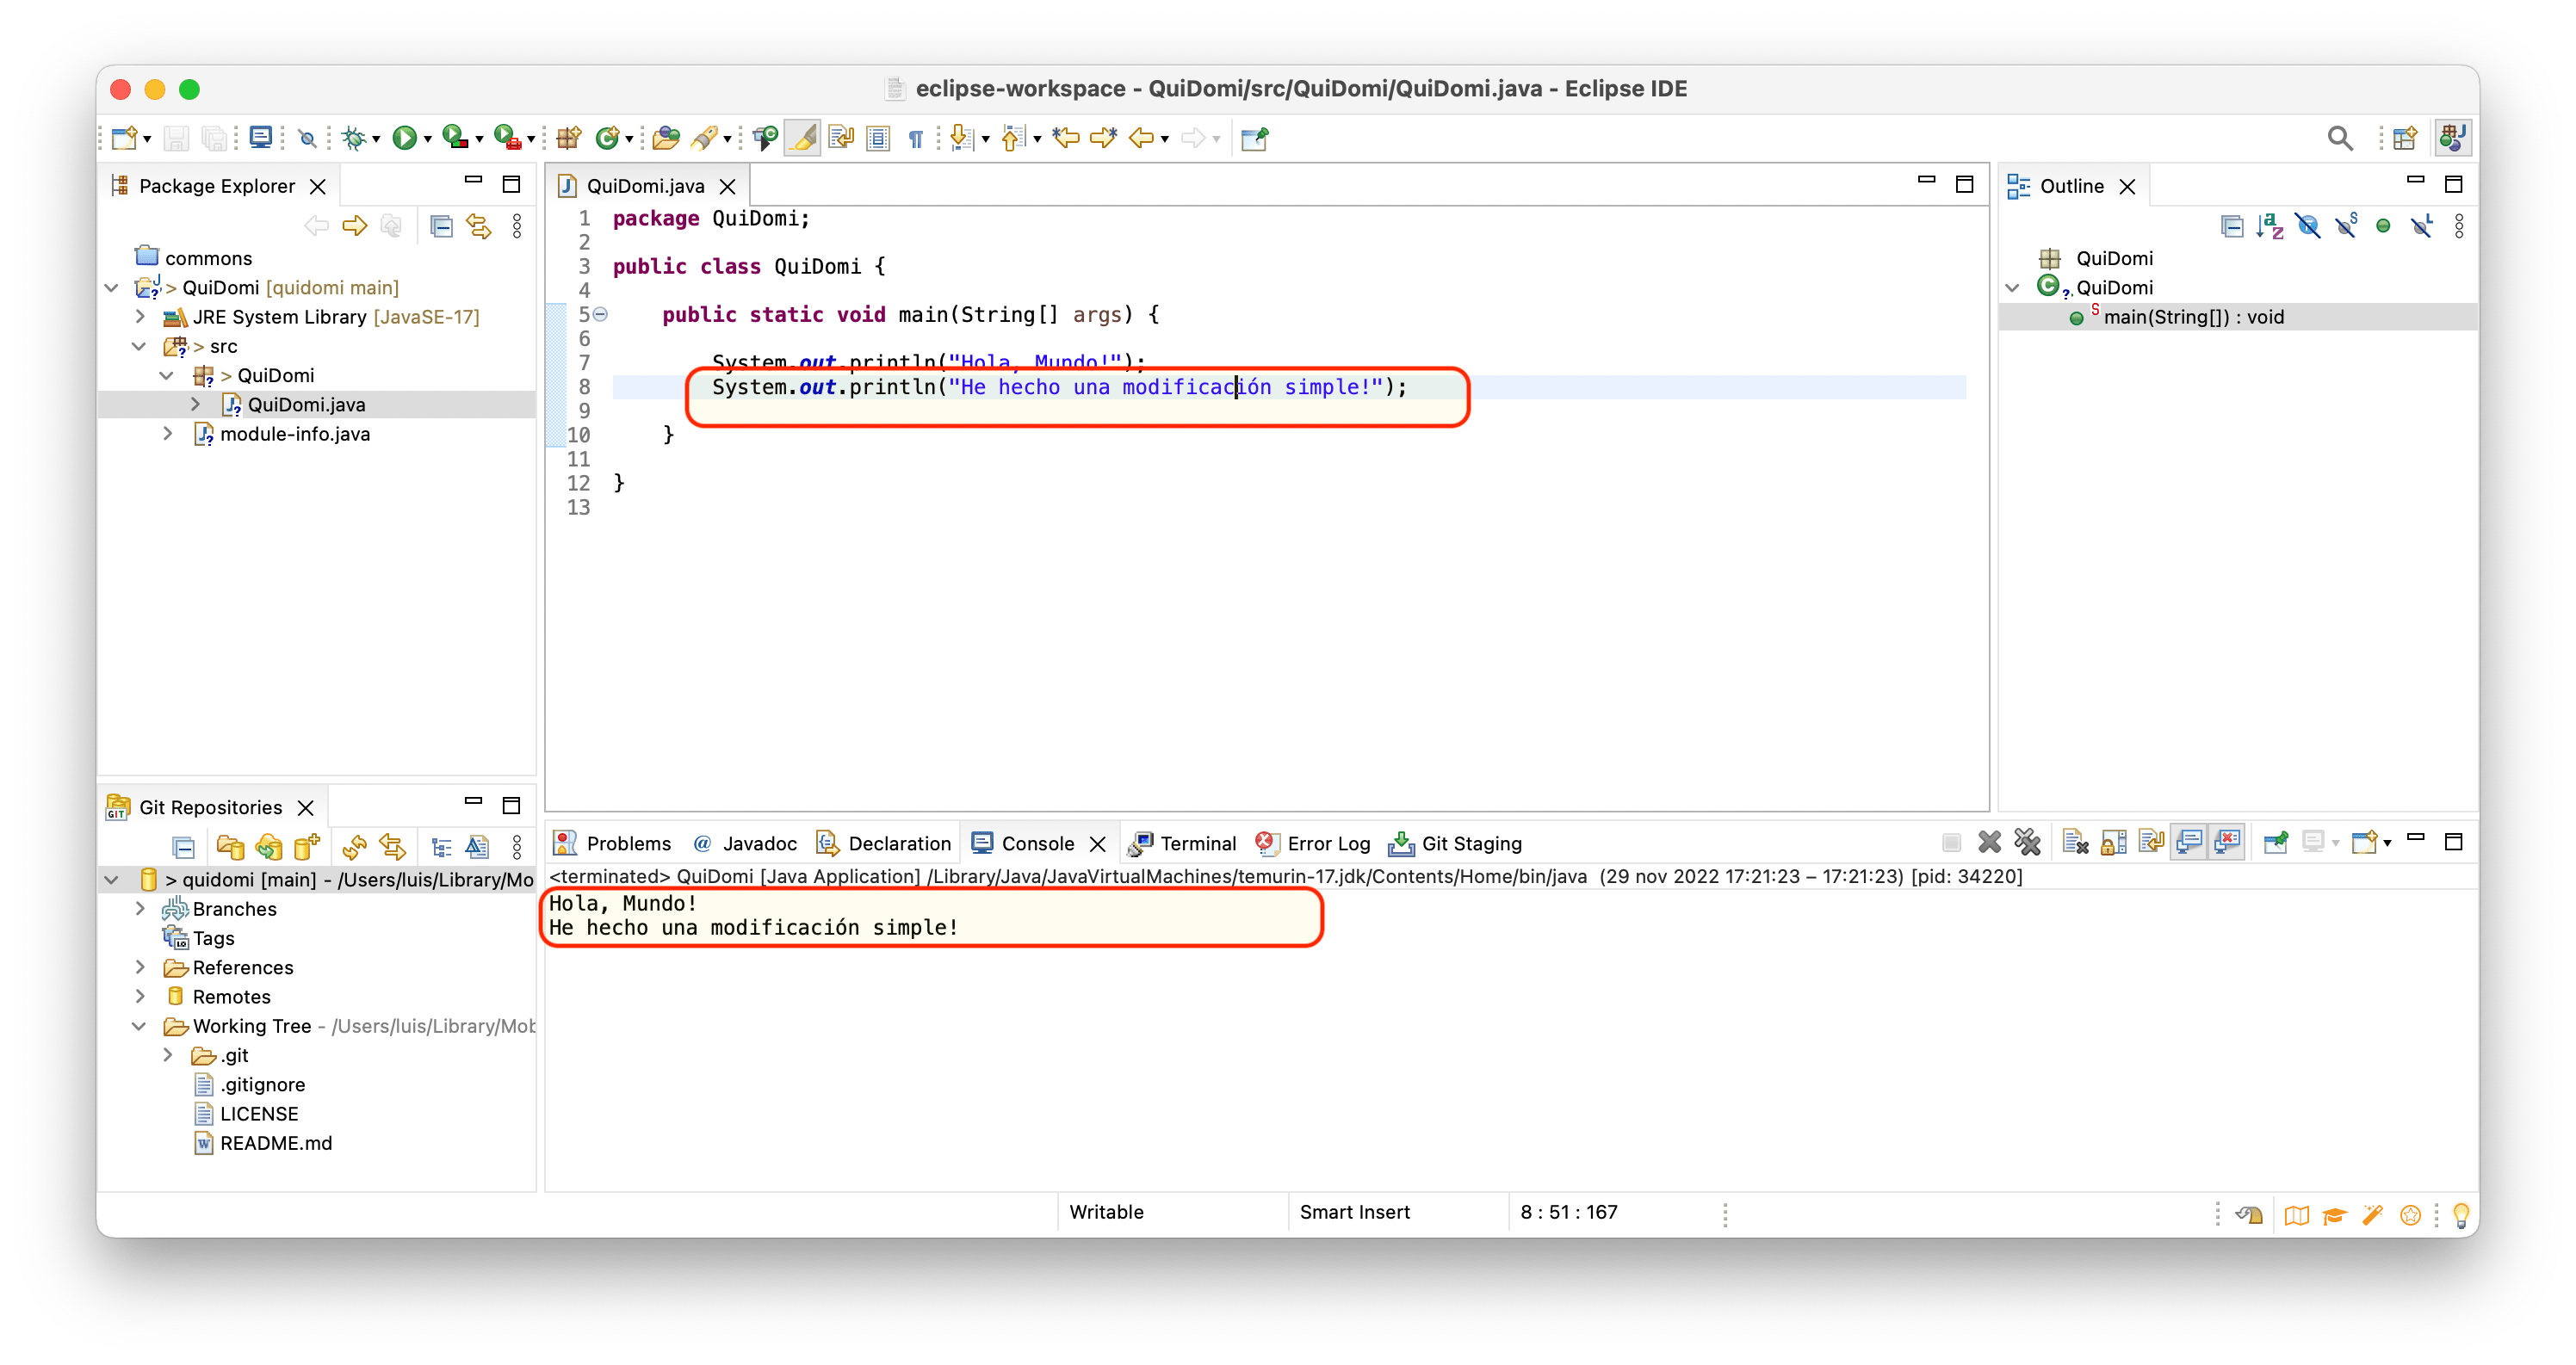
- We make modifications, compile, verify everything works.
- We decide we want to push the changes to the git server.
- We start the
commitprocess.
- First I move the modifications to the staging area — still local.
- Then I execute the
commit— still local. - Finally I do a
push— sending to remote (Gitea server).
I start with a simple modification, compile, and verify…
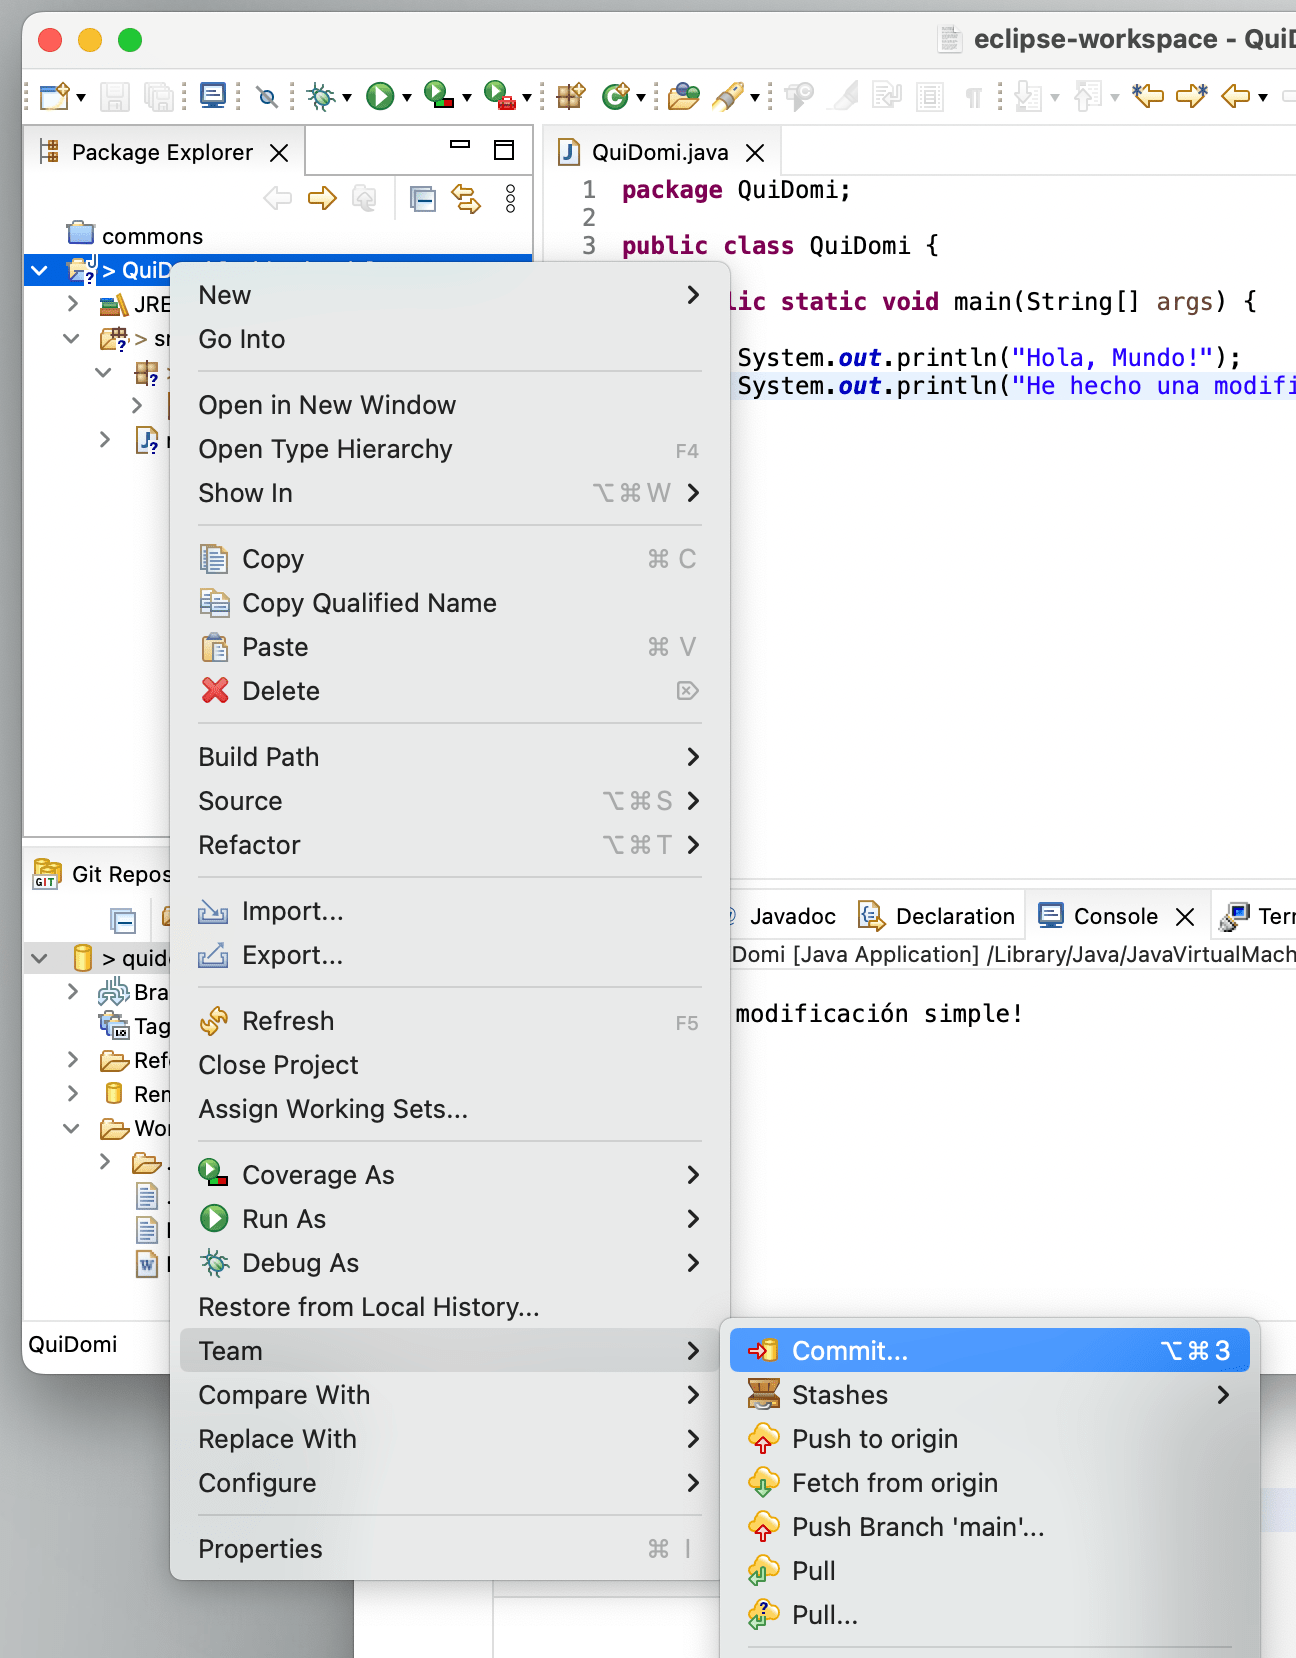
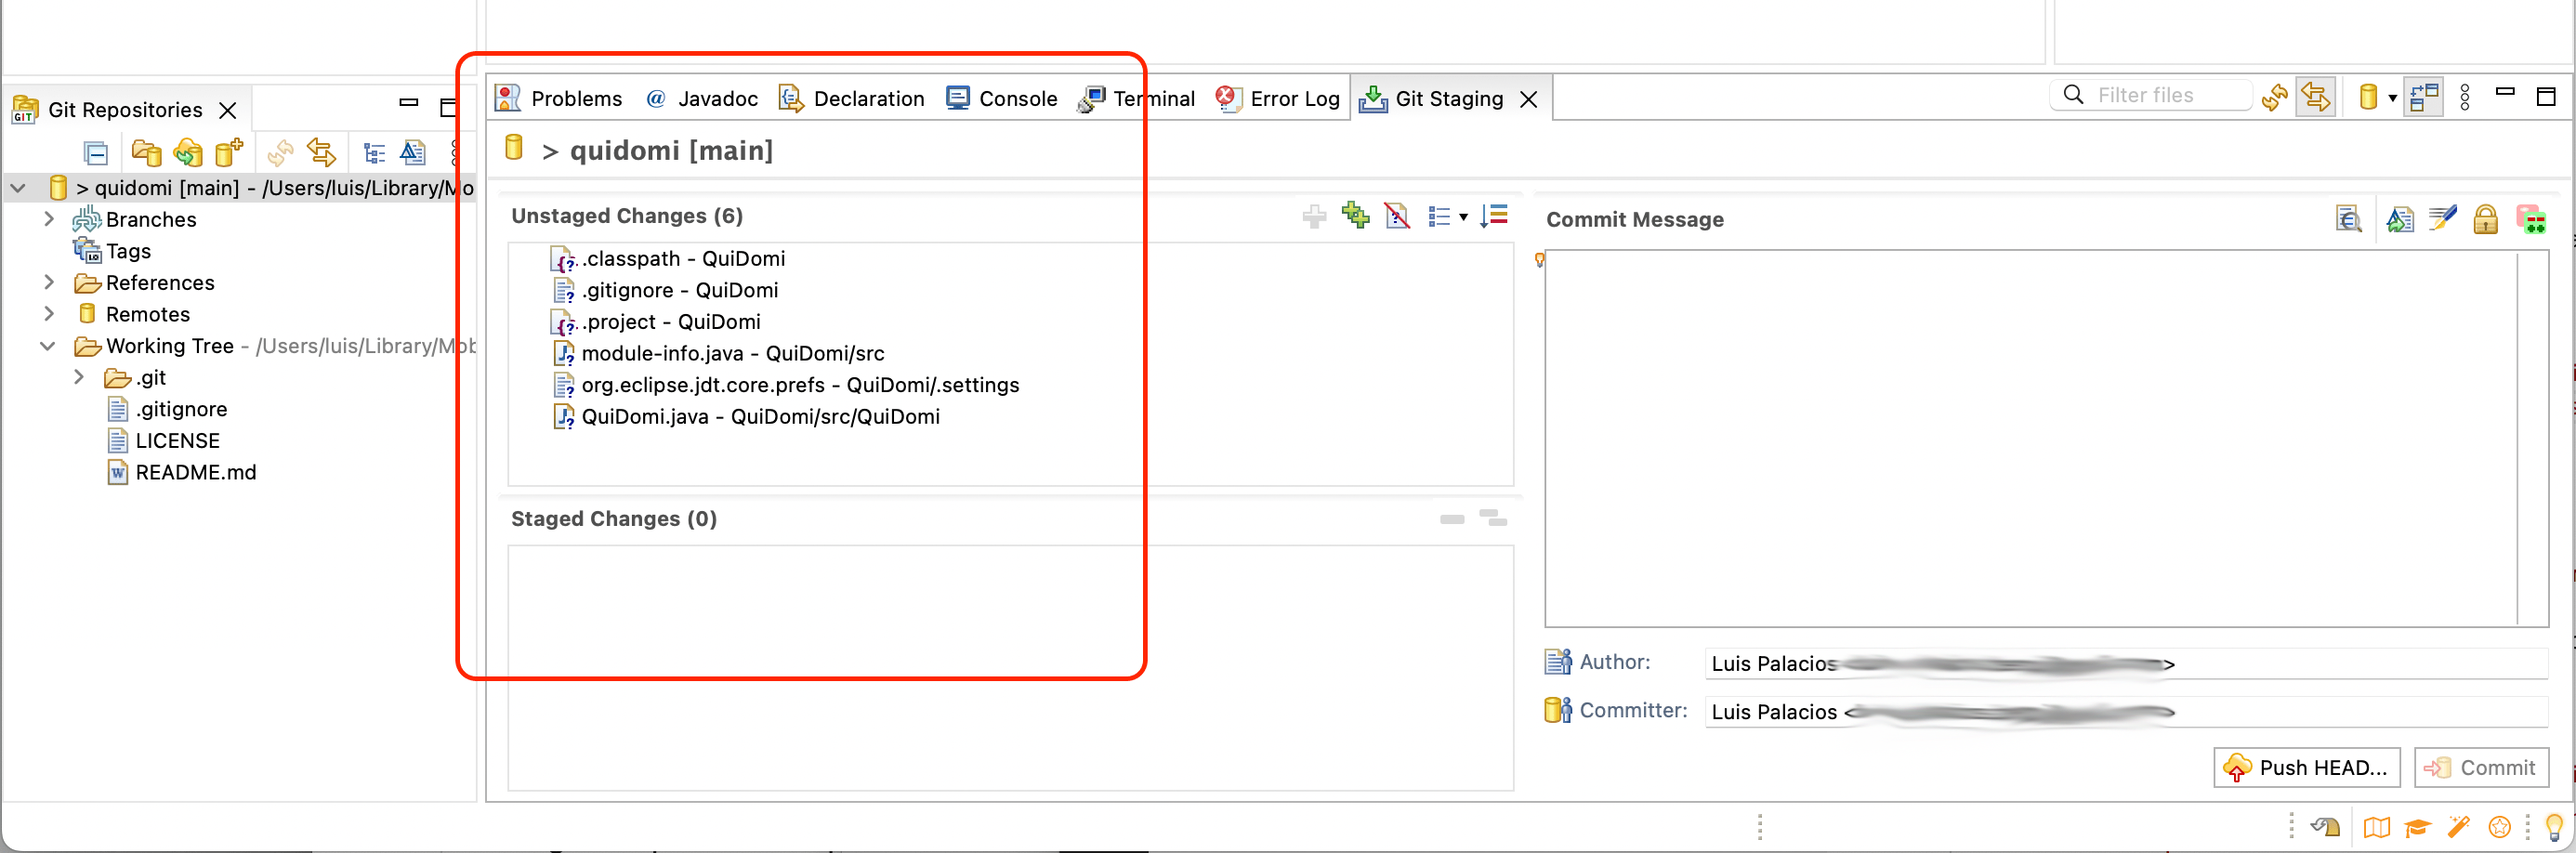
I decide to start the commit process (via Team > Commit).
I review the “Unstaged Changes” — that is, which files are not yet in the staging area.
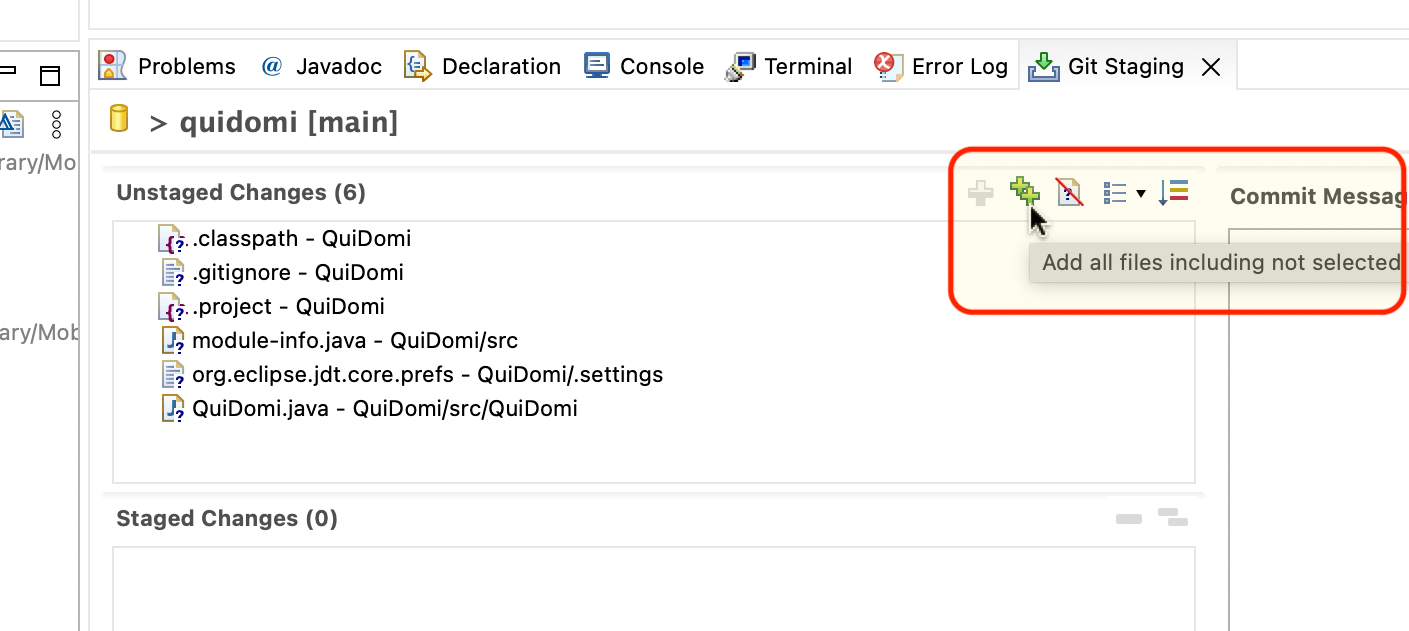
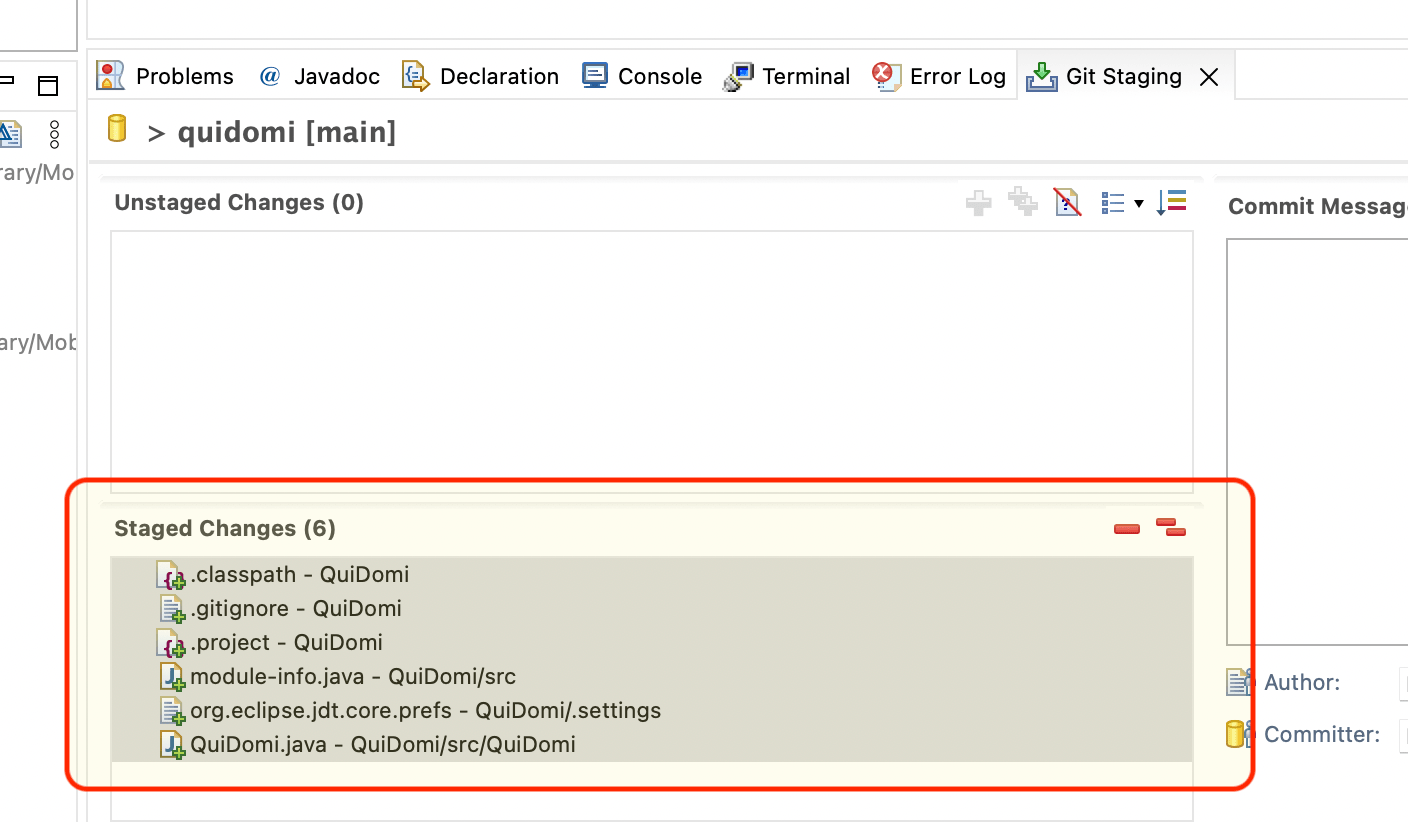
I request that those files be moved to the Staging area.
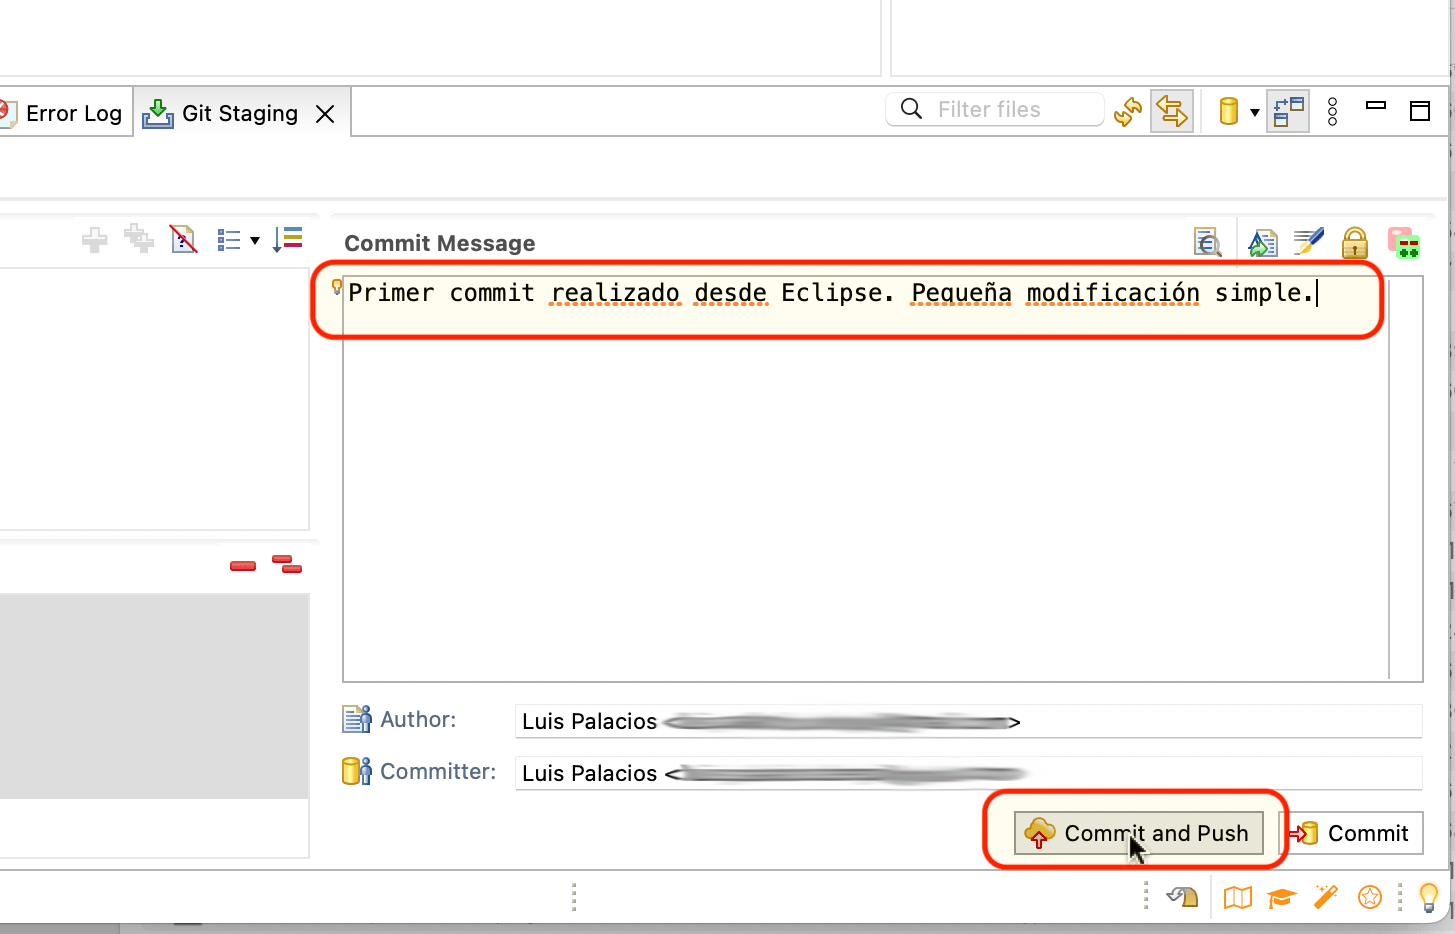
I write the commit message and click Commit & Push.
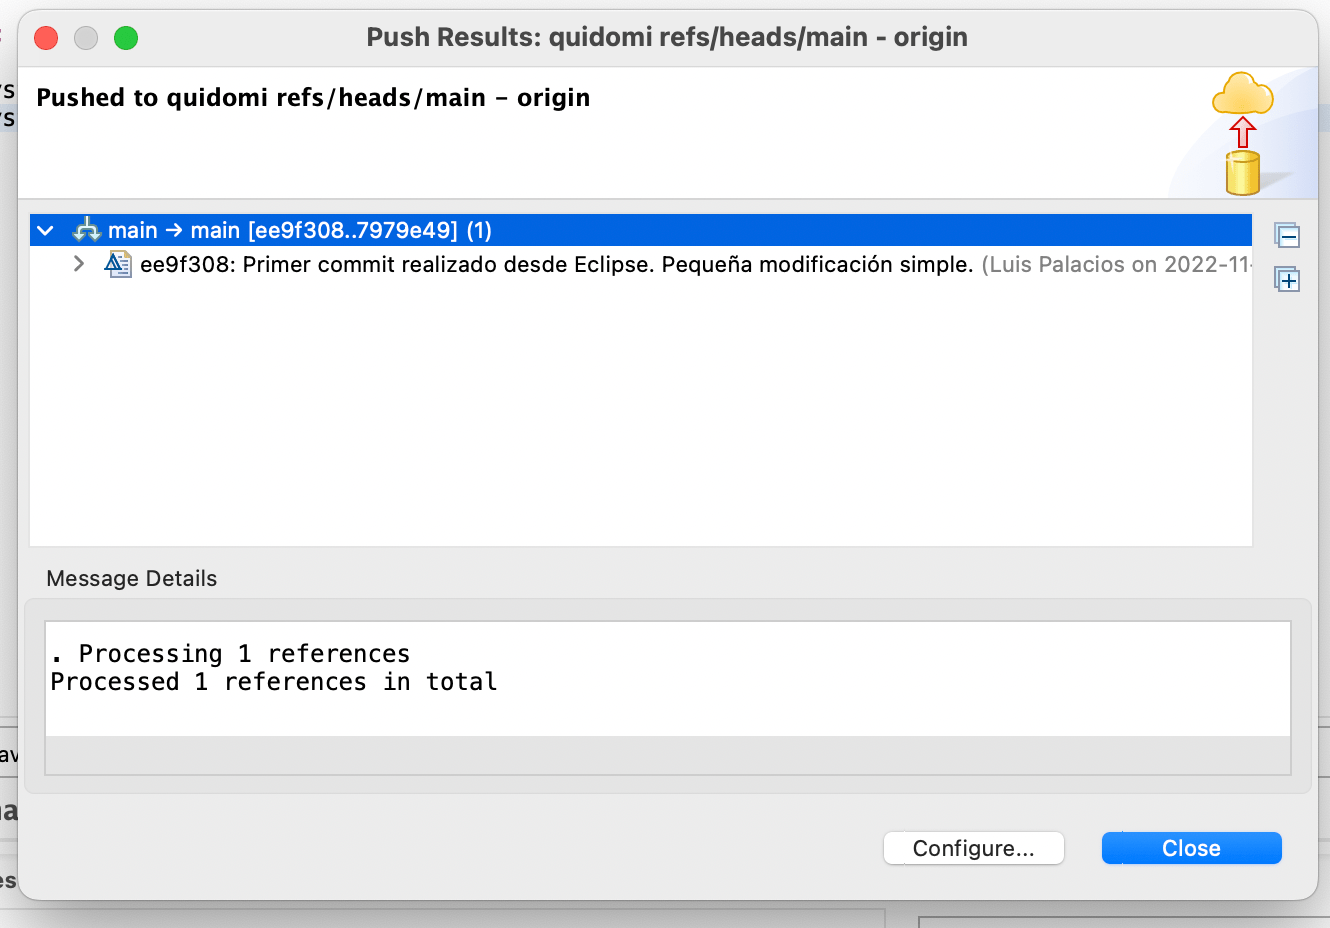
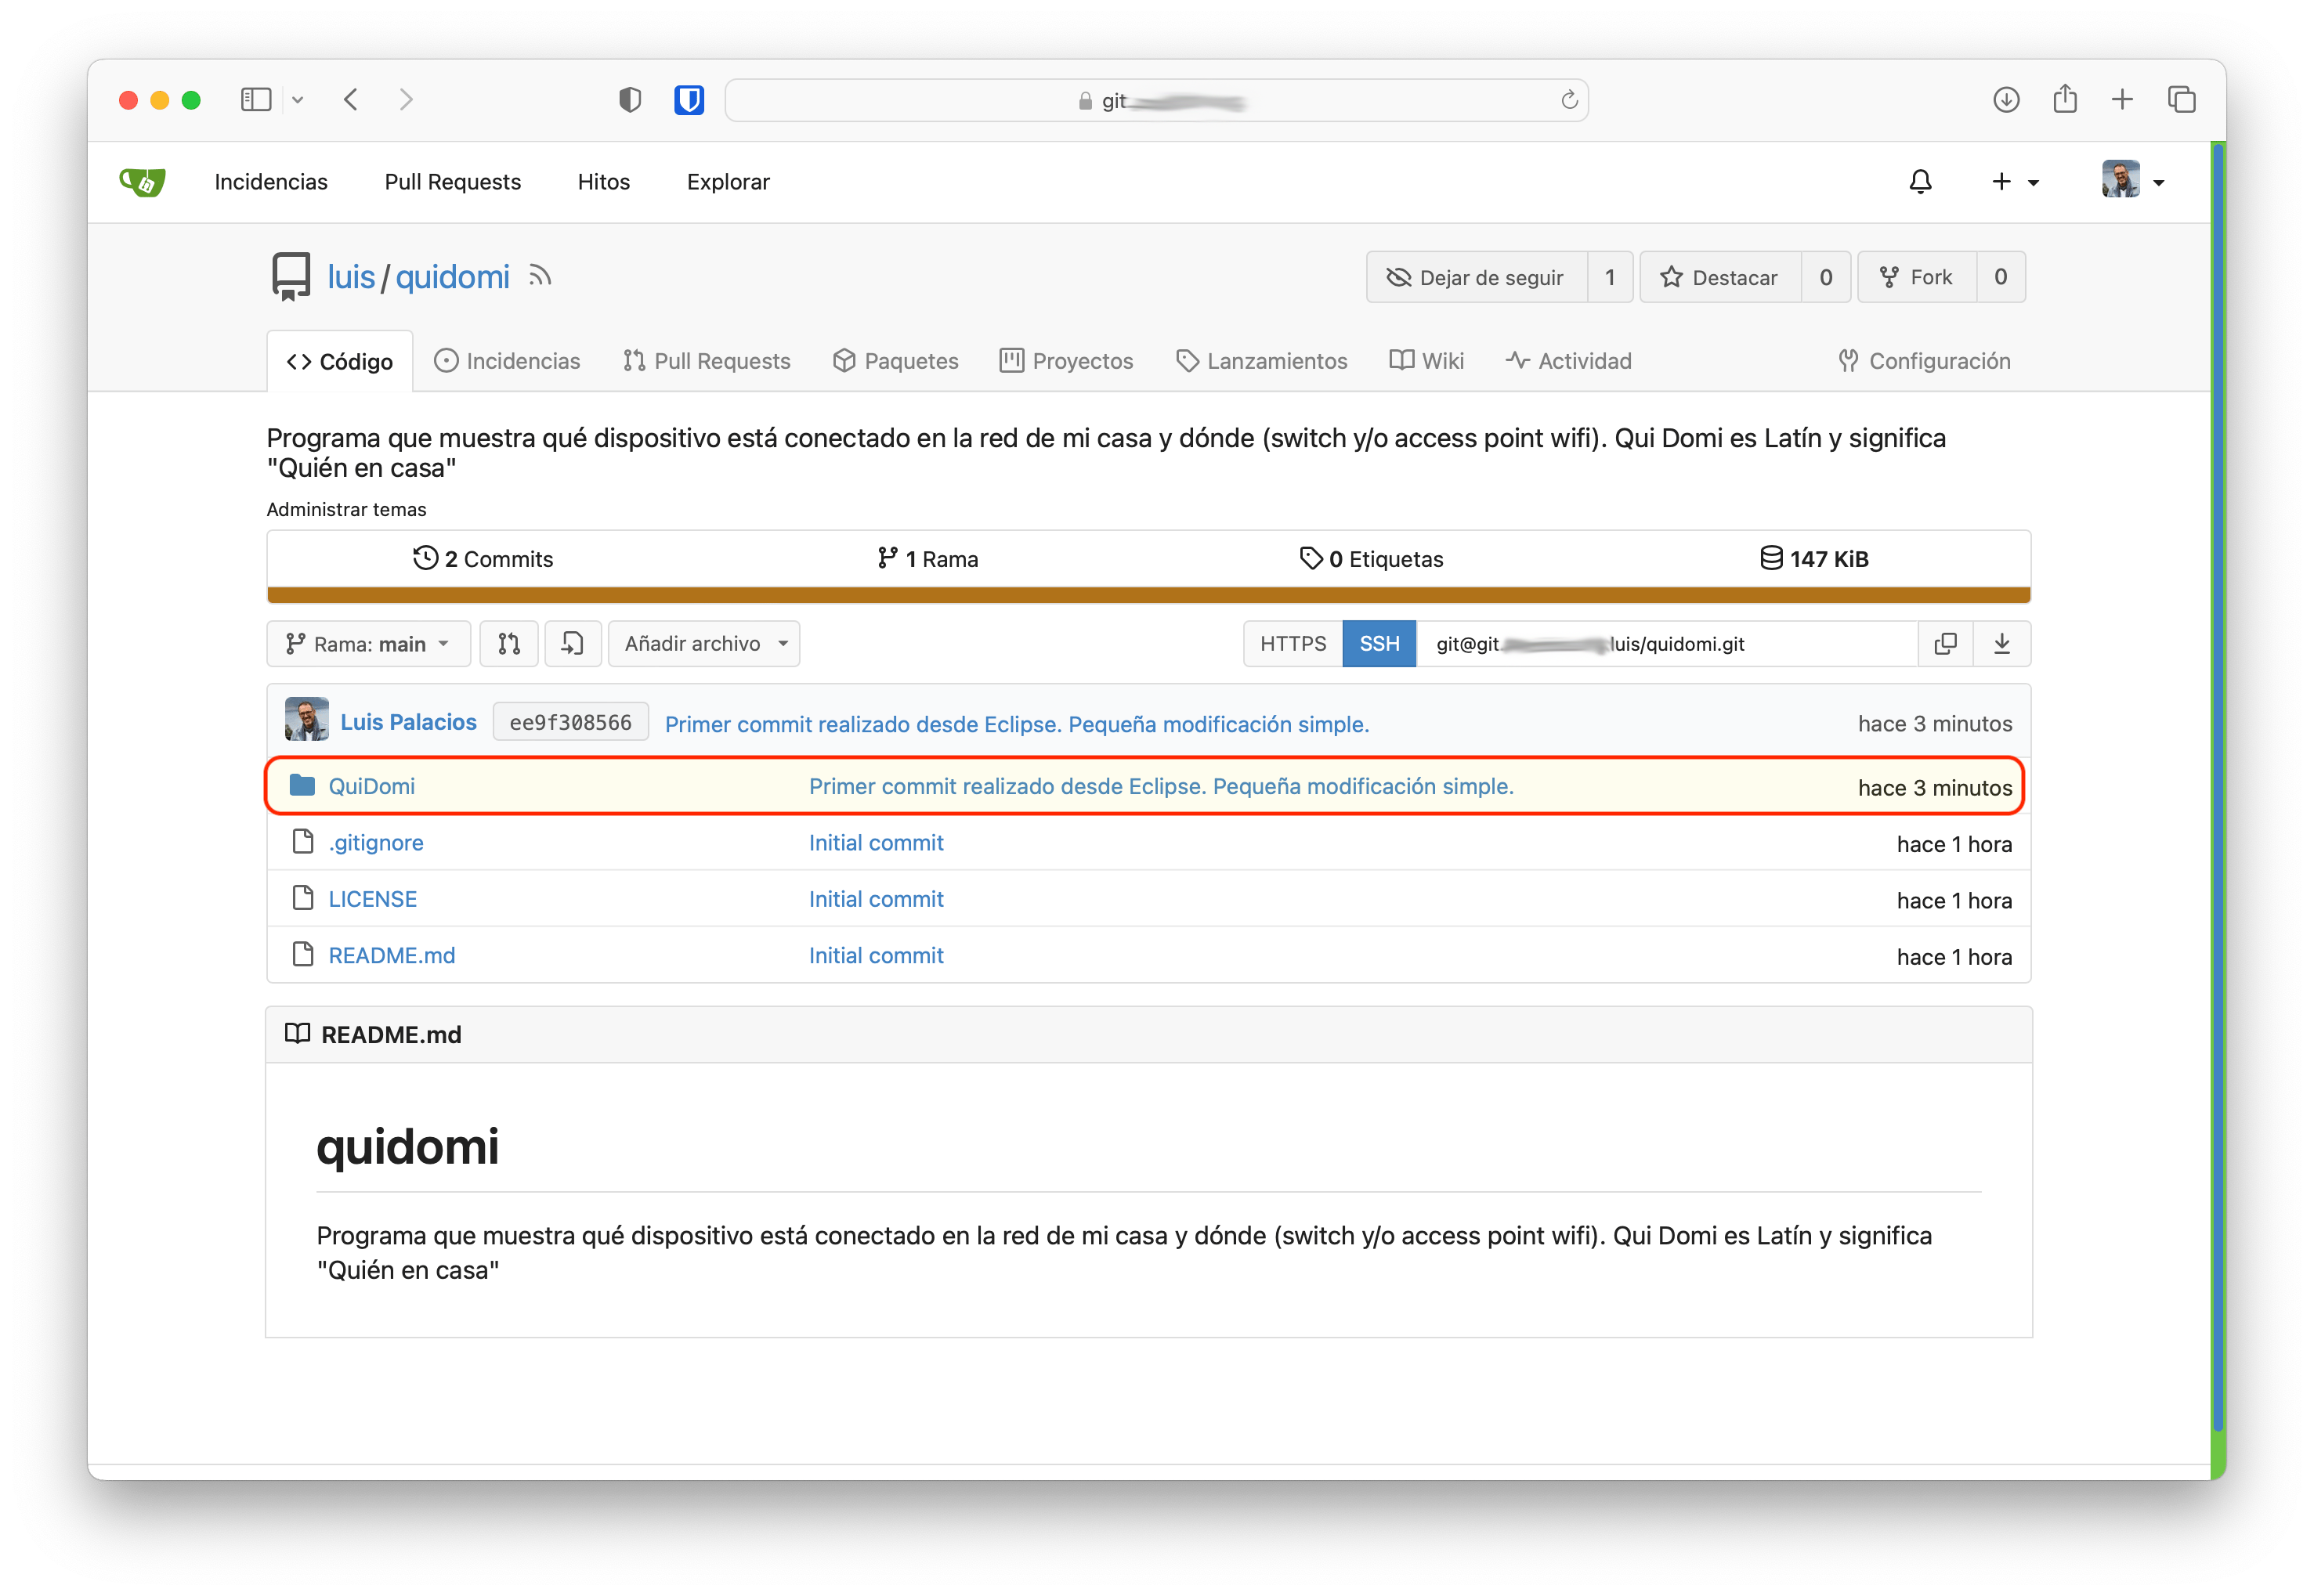
I check on my gitea server that the changes have been received.
GIT Terminology
| Here’s a small cheat sheet on git terminology. Remember I have a couple more posts about GIT in Detail and the GIT Cheat Sheet. |
| English | Description |
|---|---|
| staging area | An intermediate zone (inside the .git subfolder within the repository folder). It’s where files are prepared waiting to be used in the next commit. |
| index | The list of all files considered ready and tracked that are in the staging area (between your working copy and the future commit). |
| working copy | Your project’s complete directory — the part not controlled by git, i.e., all files and directories outside the .git subdirectory. |
| commit | Accepting what we have in the Staging Area as final and moving it to a “confirmed” state, identifying it with a numeric pointer (commit hash). Together with its ancestors, they form a snapshot or version of your project. |
| branch | A name that acts as a pointer to a specific commit within your .git repository. |
| clone | Bringing a complete remote repository to local, creating a duplicate to work on. |
| fetch | We request the latest information from a remote, without file transfer. Used to check if there are any changes available. |
| merge | A command that performs a three-way merge between the two latest snapshots of each branch and their common ancestor, creating a new commit with the merged changes. |
| pull | A command to extract and download content from a remote repository and immediately update the local repository to reflect it. It’s really just a git fetch followed by a git merge. |
| push | Used to upload content from my local repository to a remote repository. Pushing is the way to transfer commits from your local repository to a remote one. |