In this post I describe my configuration log for setting up a Mac (INTEL or ARM) as a development machine. I install several graphical and command-line applications that are important for using a Mac as a development workstation.
The installation order can be varied, but this is what I recommend starting from a fresh macOS installation.
Note: My guides for preparing each OS for software development: macOS, Linux, and Windows.
First Steps
I’ll work from the CLI with Terminal.app during the initial setup, although I’ll quickly install iTerm2.
Xcode or Xcode Command Line Tools
This is mandatory – install the Apple command line tools (also known as Xcode command line tools) because some tools will require them later.
Installing Xcode is optional, only if you’re going to develop for macOS, iOS, watchOS, and tvOS. Depending on what you decide, the options are:
- Option 1: Install Xcode along with the Apple command line tools:
- Install Xcode from the Apple Store. Open it once and install what you need
- Then from the CLI:
xcode-select --installandsudo xcodebuild -license accept

- Option 2: Just the Apple command line tools:
- Install them from the CLI:
xcode-select --installandsudo xcodebuild -license accept
- Install them from the CLI:
iTerm2
Much better than Terminal.app – window transparency, full screen mode, split panes, Expose tabs, Growl notifications and keyboard shortcuts, customizable profiles, etc. To install it:
- Download the program from iTerm2 and copy it to Applications
A couple of tips:
- If you’re migrating from another Mac to a new one, you can copy the configuration from the old one, it’s here:
~/Library/Preferences/com.googlecode.iterm2.plist
- If you experience the problem: “When iTerm starts it takes a long time to show the prompt”, it’s solved with
sudo xcodebuild -license accept - Enable a shortcut in Finder to open an
iTermwhen the cursor is on a Finder folder.System Settings -> Keyboard -> Keyboard Shortcuts -> Services-> Files and Folders -> New iTerm2 Tab Here -> Ctrl Shift T
Nerd Fonts
Highly recommended – in fact, you’ll need it for Oh-My-Posh which I install later…
- From the Nerd Fonts repo >
Fonts Downloads. I search for and downloadFiraCode Nerd Font(it’s the one I like, but you can choose any). Unzip the file, select all.ttffiles > right-click >Open> Install all. - I configure it as the default font in iTerm: Settings -> Profiles -> Default -> Text -> Font
FiraCode Nerd Font
Homebrew
Before continuing, this is essential – as a developer with a Mac, you need Homebrew (or brew for short). macOS comes with all kinds of Unix commands (being based on FreeBSD) and many utilities, but if you want to stay up to date and install almost any tool or software, you need Homebrew.
The advantage is that you can install everything (in parallel, without messing up macOS). A ton of super interesting open source software, low-level tools, command line utilities, applications, compilers, languages, etc. – you can even install MongoDB (see below).
Installation:
/bin/bash -c "$(curl -fsSL https://raw.githubusercontent.com/Homebrew/install/HEAD/install.sh)"
devcli
I’ve created a GitHub repository called devcli to automate the installation of some tools – CLI utilities for Unix-like systems such as macOS, Linux, WSL2 (and also Windows). I was tired of wasting a couple of hours with new systems, parameterizing, tools, fonts, helper scripts. I automate everything with a single command. Check out the repository and if it works for you:
- Set up your user so
sudoworks without asking for a password- Terminal.app >
id(note your<short-username>) - Terminal.app >
sudo su - - Edit the file
nano /etc/sudoers.d/10-usuarioand add a line<short-username> ALL=(ALL) NOPASSWD:ALL - Exit and re-enter Terminal, test if this command works:
sudo cat /etc/sudoers
- Terminal.app >
Installation:
bash <(curl -fsSL https://raw.githubusercontent.com/LuisPalacios/devcli/main/bootstrap.sh)
Zsh
If you’ve run devcli, skip this section.
macOS includes Zsh (short for “Z Shell”), much more powerful than Bash. I’ve left my configuration files (which I always install) in this GitHub repository: My zsh files. I open Terminal.app and download my .zshrc.
curl -LJs -o ~/.zshrc https://raw.githubusercontent.com/LuisPalacios/zsh-zshrc/main/.zshrc
Important: Edit it with
nanoand adapt it to your username, directories, PATHs, etc. It’s set up by default to work with Oh My Posh. Next I install Homebrew, iTerm2, Nerd Font, and Oh My Posh.
Oh My Posh
If you’ve run devcli, skip this section.
Oh My Posh advertises itself as “a Prompt engine for any Shell”. It allows rendering the PROMPT in a very advanced way, but what I like most is how it handles Git, where the biggest problem is PROMPT rendering. None of the advanced renderers I’ve tried (including Starship) are as efficient as Oh My Posh. For this reason alone it has become my choice, above Starship.
brew install jandedobbeleer/oh-my-posh/oh-my-posh
Note: Check my copies of .zshrc and .oh-my-posh.yaml that were automatically downloaded in the devcli section. I always upload the latest versions here.
Visual Studio Code
Visual Studio Code is a source code editor developed by Microsoft for Windows, Linux, macOS, and Web. It includes support for so many things it’s impossible to explain here. With the immense diversity of features, plugins, and supported languages, you can use it as an IDE for any project.
Installation:
- Download it from here.
- Copy to Applications
A couple of tips:
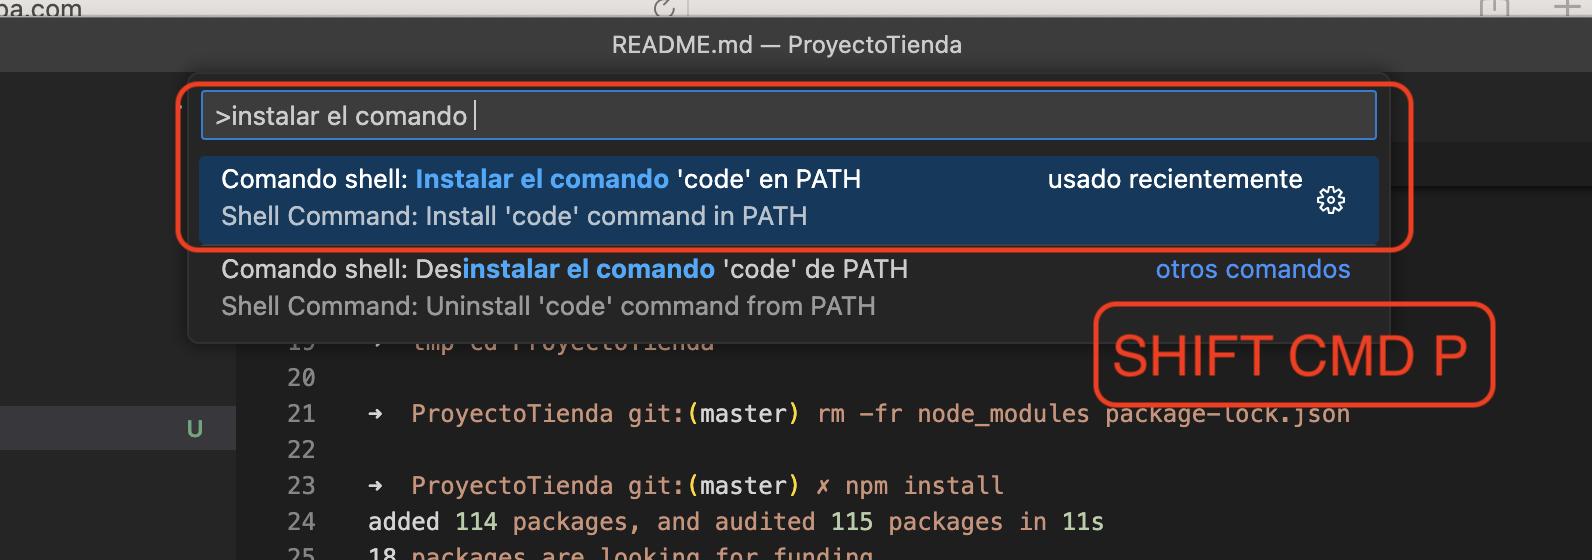
- To conveniently launch it from iTerm2, with VSCode running, press CMD-SHIFT-P and install the ‘code’ command in PATH.
- I create an alias in my
~/.zshrcto quickly launch the program from the CLI.
# Alias to launch VSCode from CLI with "e"
alias e="/usr/local/bin/code"
Settings and Synchronization: Check out the post VSCode settings and extensions for more information.
Git
If you’ve run devcli, skip this section.
Git is a free and open source distributed version control system designed to handle everything from small to very large projects with speed and efficiency. There are several installation options for the command line client (original source) – in my case I use Homebrew.
Installation:
brew update && brew upgrade
brew install git

source ~/.zshrc
I create the ~/.gitconfig and ~/.gitignore_global files, which you can download like this:
curl -s -O https://gist.githubusercontent.com/LuisPalacios/0ee871ee236485d4a064179b16ada400/raw/348a8a448095a460756f85ef0362521b886b0a2e/.gitconfig
curl -s -O https://gist.githubusercontent.com/LuisPalacios/6923f8cc708ce10f3bd4a6772625fb0c/raw/65d0ed6acba83ece4db78228821589212b9f9f4b/.gitignore_global

# Edit to customize
e .gitconfig
As a GUI client I use GitKraken. You can find more info about git in this GIT cheatsheet and GIT in detail.
SSH Public-Private Key
Now is a good time to set up your public/private key pair for connecting to remote hosts and/or using it with Git server(s). The SSH public-private key is an authentication and encryption system used for the connection between a client and a server. A pair of keys is used: a public key and a private key. The two most common use cases are:
- Connecting from my Terminal to a remote server.
- Connecting my
gitclient to a remote Git server (e.g.,github.com)
I create my public-private key, which creates two text files under ~/.ssh.
➜  ~ ssh-keygen -t ed25519 -a 200 -C "luis@mihost" -f ~/.ssh/id_ed25519
:
Enter passphrase (empty for no passphrase):            <=== If you set one, this is what the host where you copy your .pub will ask
Your identification has been saved in /Users/luis/.ssh/id_ed25519   <== PRIVATE Key. NEVER SHARE IT
Your public key has been saved in /Users/luis/.ssh/id_ed25519.pub   <== PUBLIC Key. This content is what you share!!
:
The content of the public key file is shared with the remote server (github or a Linux for remote terminal), while the private key stays local. Oversimplifying it, my public key that I give to GitHub will be used to encrypt information that only I, who possess the matching private key, can decrypt, allowing us to communicate.
In the case of GitHub, you can use this method (SSH public-private) for direct access to your account and to modify repositories securely, without needing to log in (https with username and password). It’s important to note that you must keep your private key secure, since if someone else has it, they can access your account and repositories.
Your public key content:
- Is usually placed on remote Linux machines you want to connect to: appending it to the end of the
~/.ssh/authorized_keysfile - If you didn’t set a password, those machines won’t ask for anything – you’ll get in directly, as long as you connect from a machine with the Private key :-)
- On Git servers, through their GUI, in your account properties.
You have a couple of additional posts at SSH and X11 and SSH on Linux
LLVM/CLANG
If you want to develop with C++ using CLANG, after installing Xcode and Homebrew, the next steps would be:
brew install llvm       # Installs the latest version.
brew install llvm@17    # If you also want to install a specific version.
brew install cmake      # In case you use cmake.
brew install ninja      # In case you use ninja
Java
We can install JRE (Java Runtime Environment) to run Java applications or the JDK (Java Development Kit) to develop and run Java applications.
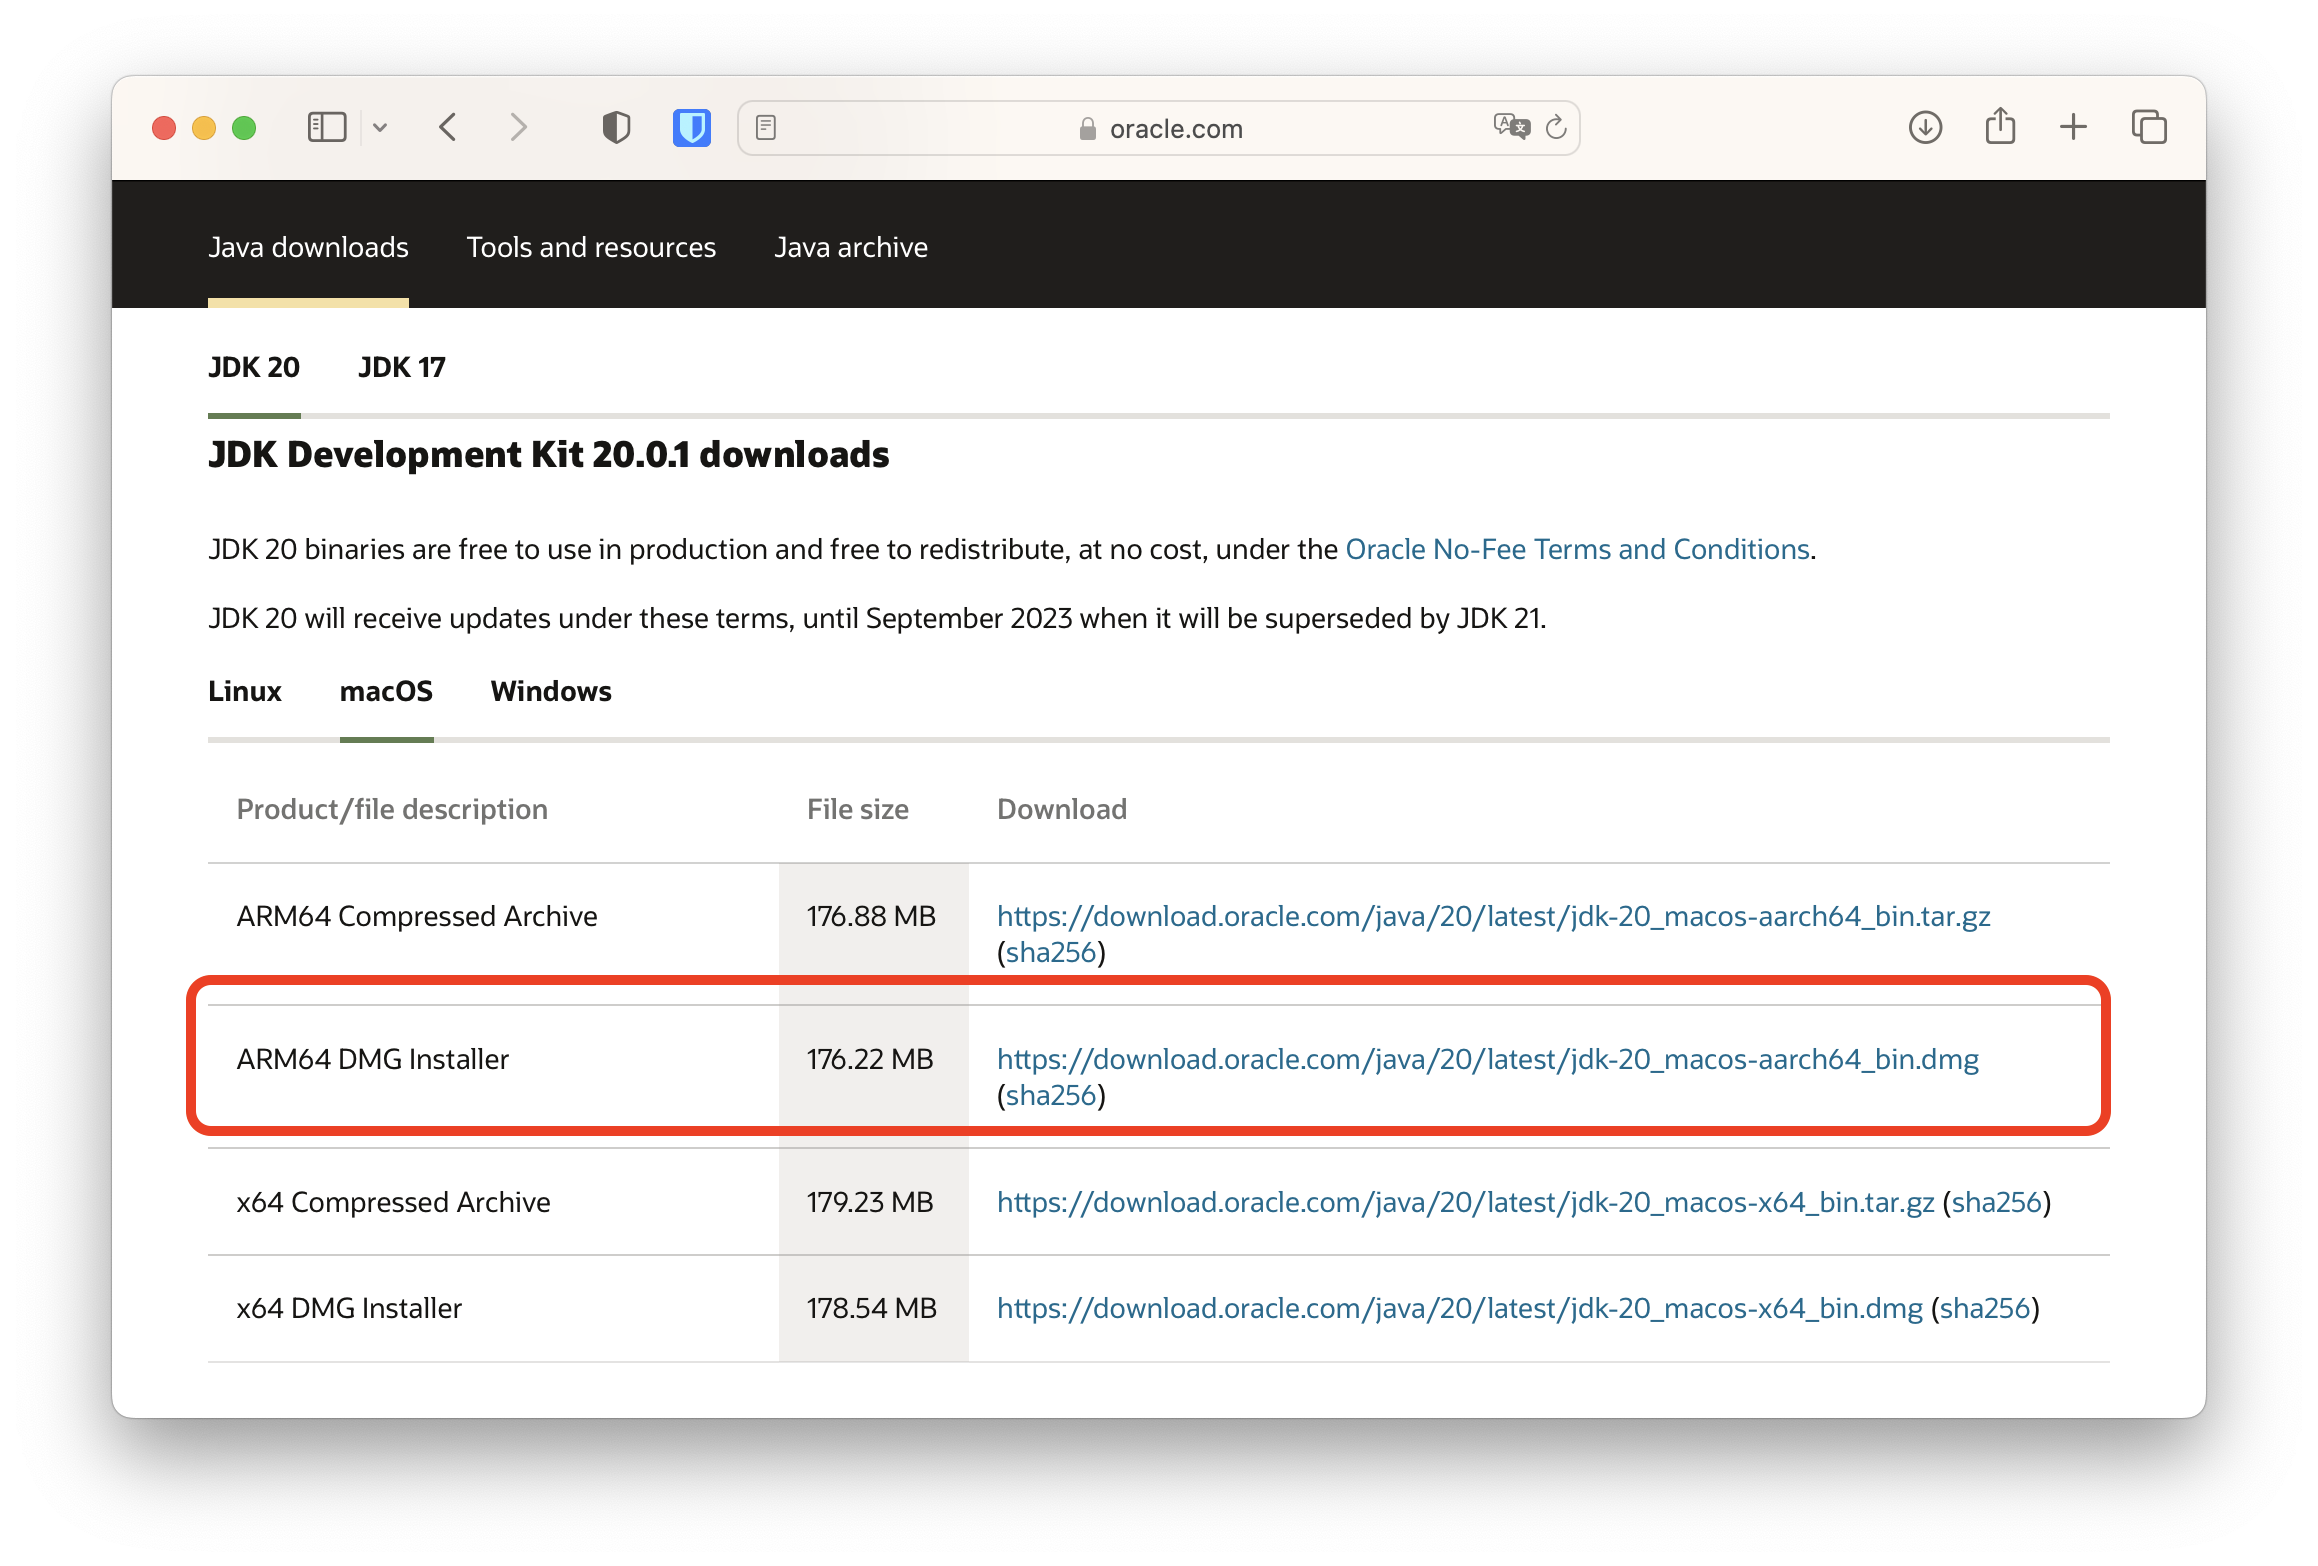
In my case I obviously install the JDK, which brings tools like the compiler (javac), the binary disassembler (javap), the debugger, etc., and every JDK installation includes JRE. I recommend checking this image of the Java component structure.
Installation:
- Go to Java SE Development Kit and download the JDK 20 version for macOS. In my case I chose the ARM64 DMG Installer
Once installed, we do our proof of concept from iTerm
$ mkdir -p ~/Desktop/hola
$ cd ~/Desktop/hola
$ cat > HolaMundo.java << EOF
public class HolaMundo {
  public static void main(String[] args) {
  System.out.println("Hola Mundo!");
 }
}
EOF

$ javac HolaMundo.java
$ ls -l
total 16
-rw-r--r--@ 1 luis  staff  423 22 abr 15:22 HolaMundo.class
-rw-r--r--@ 1 luis  staff  111 22 abr 15:21 HolaMundo.java

$ java HolaMundo
Hola Mundo!
Here are some useful references:
- The JDK installation notes
- System information and requirements for installing and using Oracle Java on Mac OS X
- Article about the Manual update required for Java 8 on macOS.
Eclipse
You could use Visual Studio Code as an IDE but it’s most common to install Eclipse – it’s The platform for working with Java, and much more, really with open source, cross-platform programming tools for developing Applications.
It has typically been used to develop IDEs (Integrated Development Environments), like Java’s own (Java Development Toolkit - JDT).
Installation:
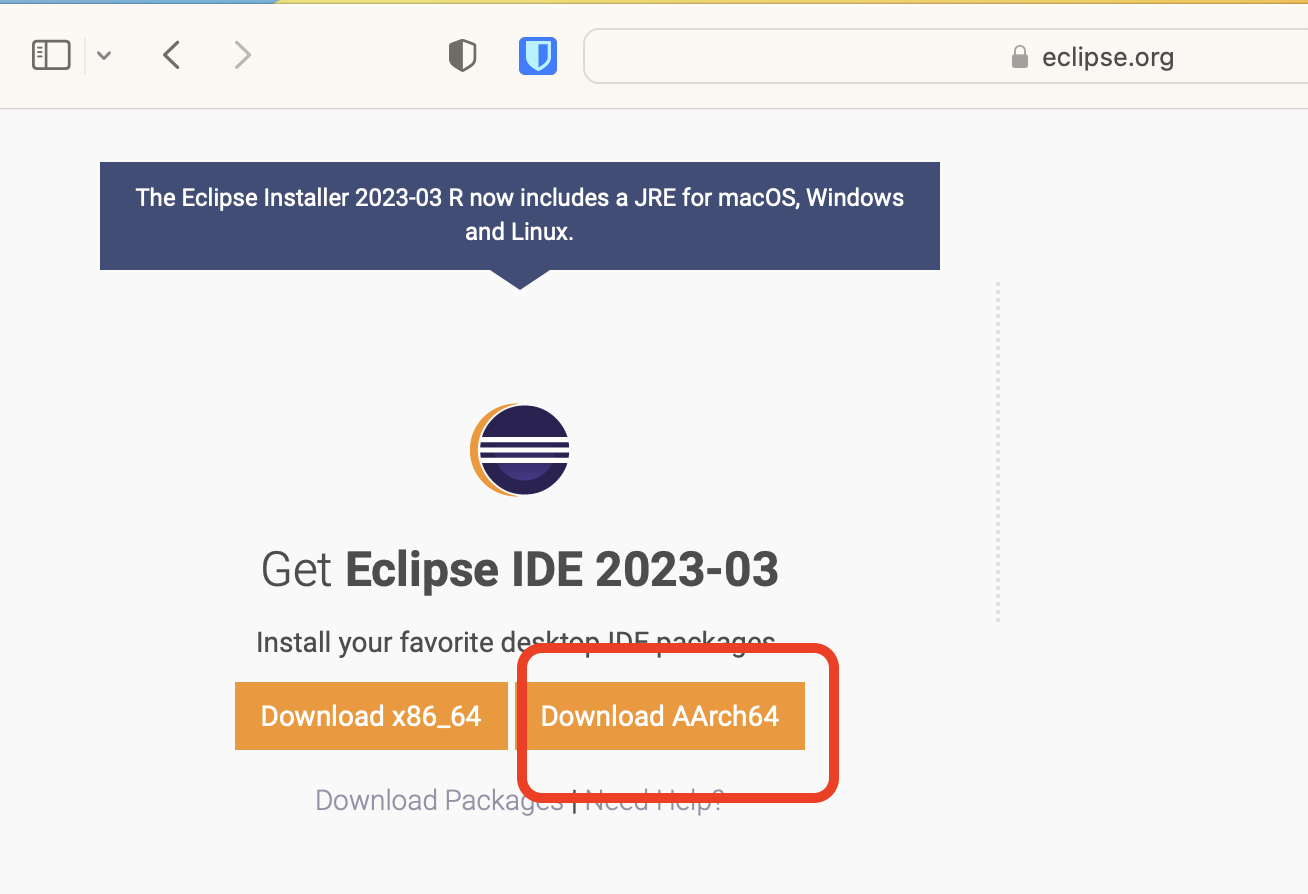
- Go to Eclipse and download the Eclipse Installer.
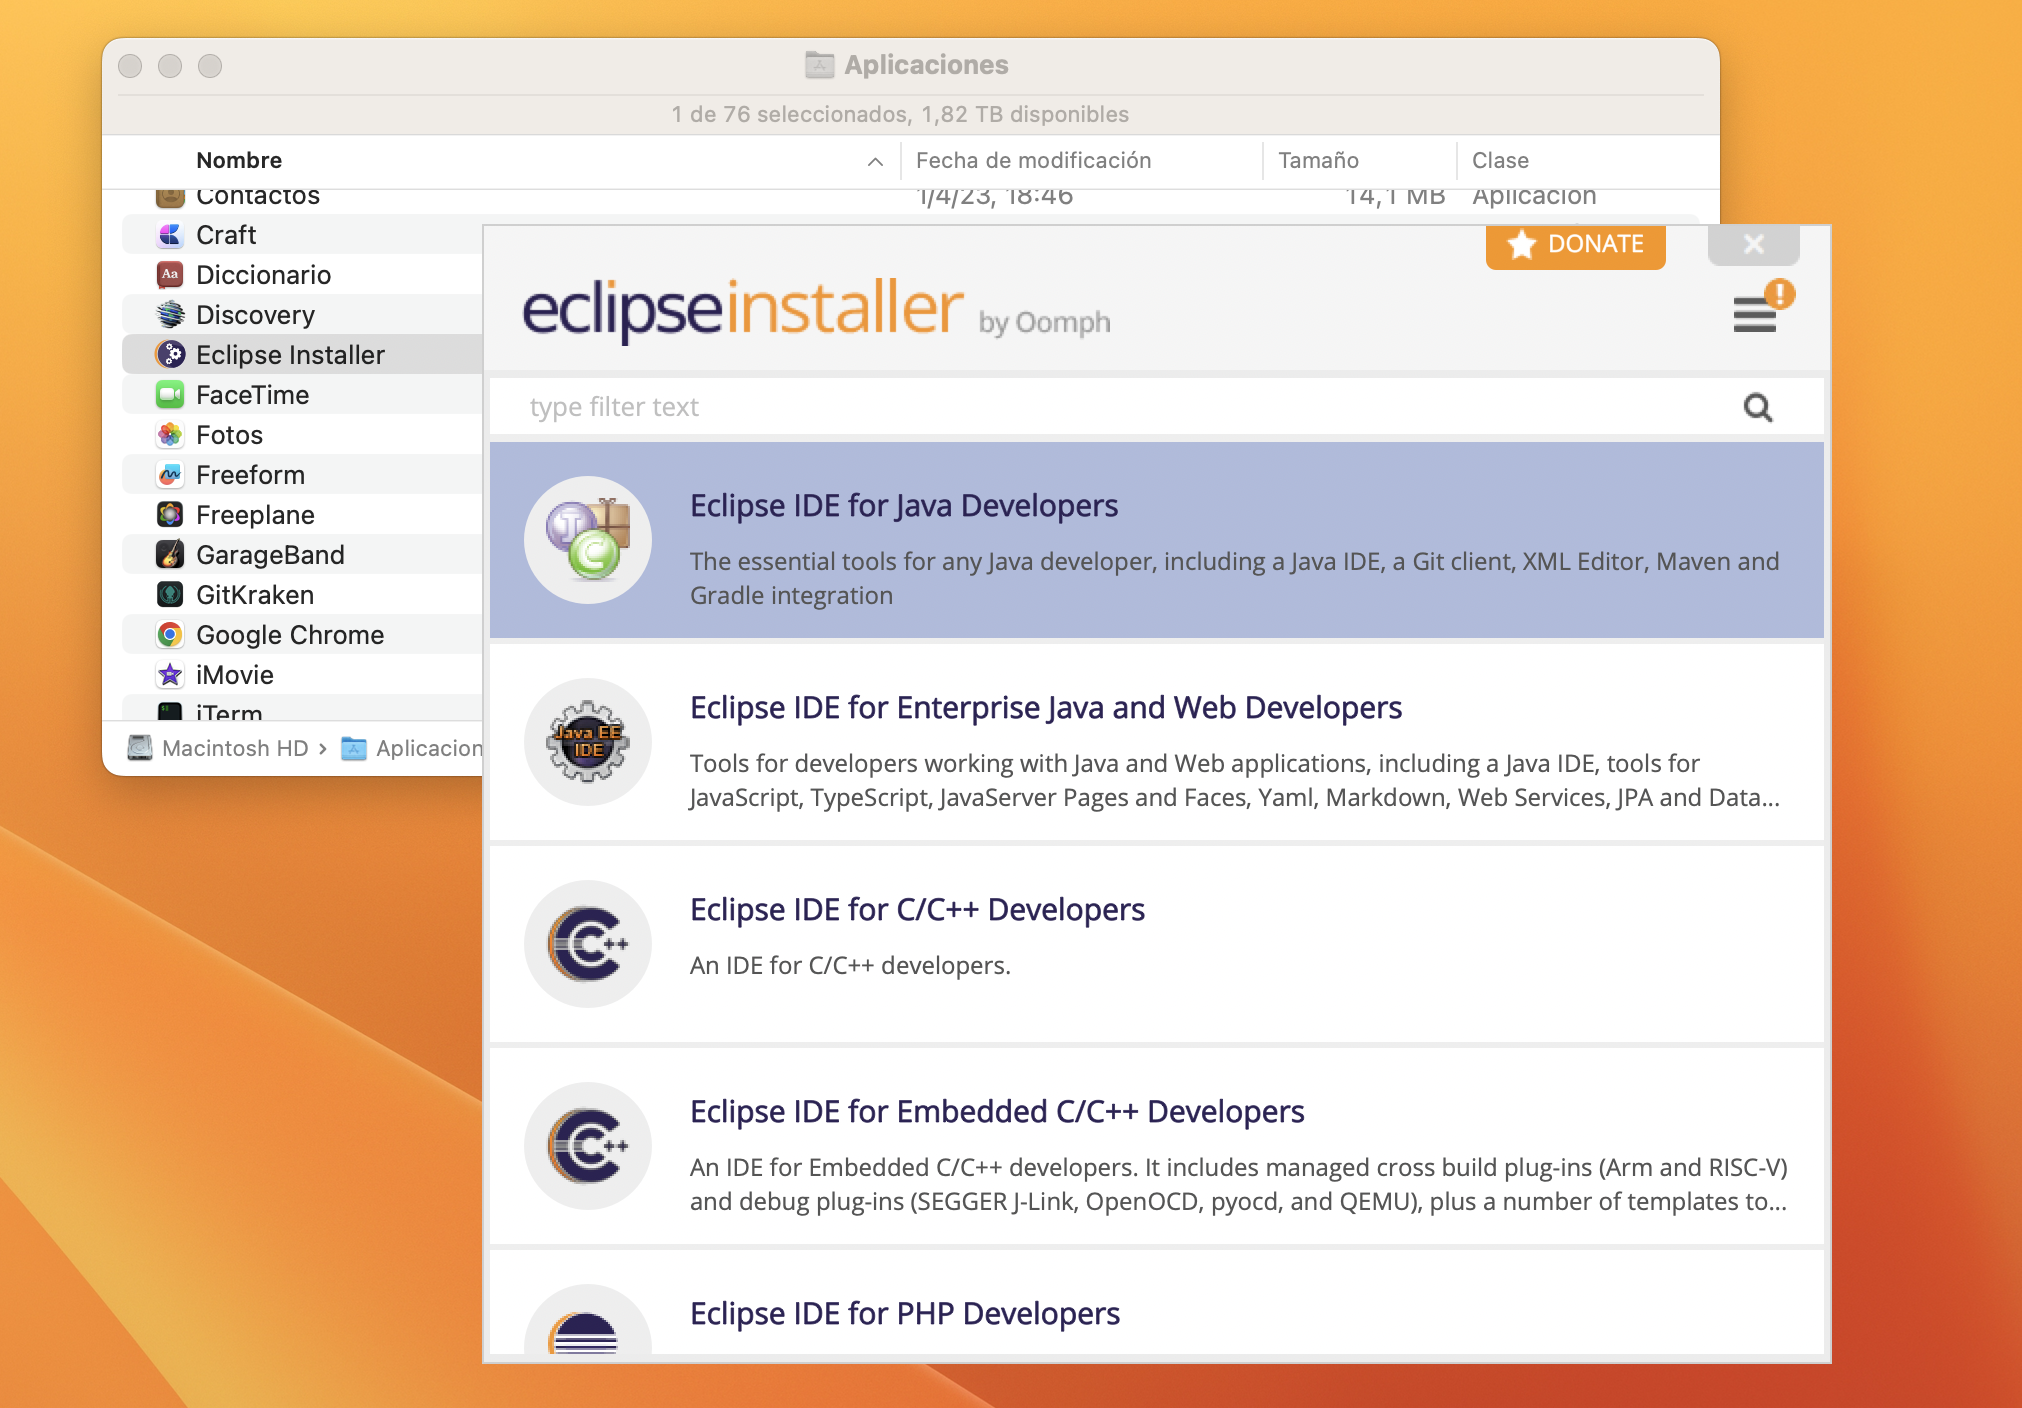
- Copy it to Applications, you can install other options now or later
- Run it from Applications
- Install “Eclipse IDE for Java Developers”.
A tip:
- A post I wrote about how to work with Eclipse + Java on a Git repository.
Python
Python is an interpreted, versatile, and easy-to-learn programming language. What I like most is that it’s very readable and supports multiple paradigms like object-oriented, functional, and imperative programming. Many tools need it and it has many use cases. Although I don’t use it much myself, I always install it.
Pip is a fundamental tool for managing Python packages. It’s the system used to install and manage third-party libraries from the Python Package Index (PyPI), Python’s official repository.
venv venv is a module included in Python that allows creating virtual environments. A virtual environment is an isolated space on the system where you can install Python packages and libraries independently, without affecting or being affected by other Python installations on the system.
Installation:
brew install python <--- (installs python3 and pip3)
Exit Terminal and re-enter. Verify that when running python3 and pip3 the Homebrew version is being executed
luis ❯ where python3
/opt/homebrew/bin/python3
/usr/bin/python3
luis ❯ where pip3
/opt/homebrew/bin/pip3
/usr/bin/pip3
luis ❯ python3 --version
Python 3.13.5
luis ❯ /opt/homebrew/bin/python3 --version
Python 3.13.5
luis ❯ pip3 --version
pip 25.1.1 from /opt/homebrew/lib/python3.13/site-packages/pip (python 3.13)
Although it might seem a bit obsessive, it’s important. Keep in mind that macOS comes with Python3 but an older version (3.9.x).
Homebrew places executables in /usr/local/ on Intel Macs and in /opt/homebrew on ARM Macs. If needed, you can create aliases.
# Add to the end of ~/.zshrc
# Mac ARM
alias python="/opt/homebrew/bin/python3"
alias pip="/opt/homebrew/bin/pip3"
# Mac Intel
#alias python="/usr/local/bin/python3"
#alias pip="/usr/local/bin/pip3"
I recommend always using a virtual environment (venv), to avoid filling your system globally with libraries. I always do a proof of concept when I install Python.
Prepare the project directory and the libraries it will use:
proyecto ❯ python3 -m venv myenvtest
proyecto ❯ source myenvtest/bin/activate
proyecto ❯ where python3  <== IMPORTANT, I CHECK THAT IT CHANGED MY PATH +---------------+
/Users/luis/Desktop/proyecto/myenvtest/bin/python3 <== AND PUTS THE VENV DIRECTORY FIRST <--+
/opt/homebrew/bin/python3
/usr/bin/python3
proyecto ❯ python3 -m pip install requests idna
proyecto ❯ python3 -m pip freeze > requirements.txt
I create a Python program called test.py
# test.py
# Test script to check internet connection

import requests

try:
    response = requests.get('https://httpbin.org/ip', timeout=5)
    if response.status_code == 200:
        data = response.json()
        ip = data.get('origin', 'IP not found')
        print(f'Your IP address is: {ip}')
    else:
        print(f'Error: HTTP response {response.status_code}')
except requests.exceptions.RequestException as e:
    print(f'Connection error: {e}')
I run the program
proyecto ❯ python3 ./test.py
Your IP address is: 9.13.11.48
You now have python installed and working. We can delete the test directory.
cd ~/Desktop
rm -fr proyecto
Integration with Visual Studio Code
Here are some recommendations for integrating Visual Studio Code and Python
- Install this extension in your VSCode -> Python extension
| If you have plenty of time, a good article: Advanced Visual Studio Code for Python Developers |
Ruby
macOS already comes with Ruby, but I’m going to install the latest version with Homebrew in parallel. I need Bundler and Jekyll (see below) to work on my blog locally (more info here). Ruby is an interpreted, reflective, object-oriented programming language, created by Japanese programmer Yukihiro “Matz” Matsumoto, who began working on Ruby in 1993 and publicly released it in 1995.
Installation:
brew install ruby
Ruby doesn’t automatically link to Homebrew’s installation directory after installation because it could conflict with the Ruby that comes with macOS. In my case I do want this new Ruby to be executed, so I add its PATH in the .zshrc file and also the location where I’ll install future “gems” (~/.gems/bin).
# LuisPa: Adding Ruby and future Gems paths to my .zshrc file
# Mac ARM version
export PATH="/opt/homebrew/opt/ruby/bin:~/.gems/bin:$PATH"
# Mac Intel version
#export PATH="/usr/local/opt/ruby/bin:~/.gems/bin:$PATH"
To install gems without needing to be root (i.e., without sudo) and have everything installed in my user directory, I create the ~/.gems directory and modify ~/.zshrc:
mkdir ~/.gems
- Add to the end of
~/.zshrc
export GEM_HOME=~/.gems
export PATH=~/.gems/bin:$PATH
| Remember to exit iTerm and re-enter or run source ~/.zshrc to find the new executables |
Jekyll and Bundler
I need these to work on my blog locally. Jekyll is a simple generator for static websites with blog capabilities (you create markdown files and it generates the HTML). It’s written in Ruby by Tom Preston-Werner (GitHub co-founder) and it’s blazingly fast. Bundler is a software package manager that facilitates working with Jekyll and its dependencies.
Installation:
gem install jekyll bundler
| Note 1: They’re installed in /Users/luis/.gems/bin/jekyll, so it’s very important that you updated your PATH in the previous step. |
| Note 2: After installation I get a message: A new release of RubyGems is available: 3.4.10 -> 3.4.12 and it suggests running gem update --system 3.4.12. I ignore it – I’ll follow the update processes that brew does when appropriate |
Once I have everything above installed, I do a proof of concept:
jekyll new test
  New jekyll site installed in /Users/luis/test.
cd test
bundle add webrick
bundle exec jekyll serve
From a browser I connect to http://127.0.0.1:4000/ and see that it works!
Node.js
Node.js is a cross-platform, open source, server-side runtime environment based on JavaScript, asynchronous, with event-driven I/O architecture based on Google’s V8 engine. It was created with the focus of being useful for building highly scalable network programs, such as web servers.
I could install Node.js from its official site, but that requires sudo. If I install it with Homebrew I have it in userspace, don’t have to touch the PATH, and it’s also easier to install packages with NPM.
Installation:
brew install node
node -v
  v19.9.0
npm -v
  9.6.3
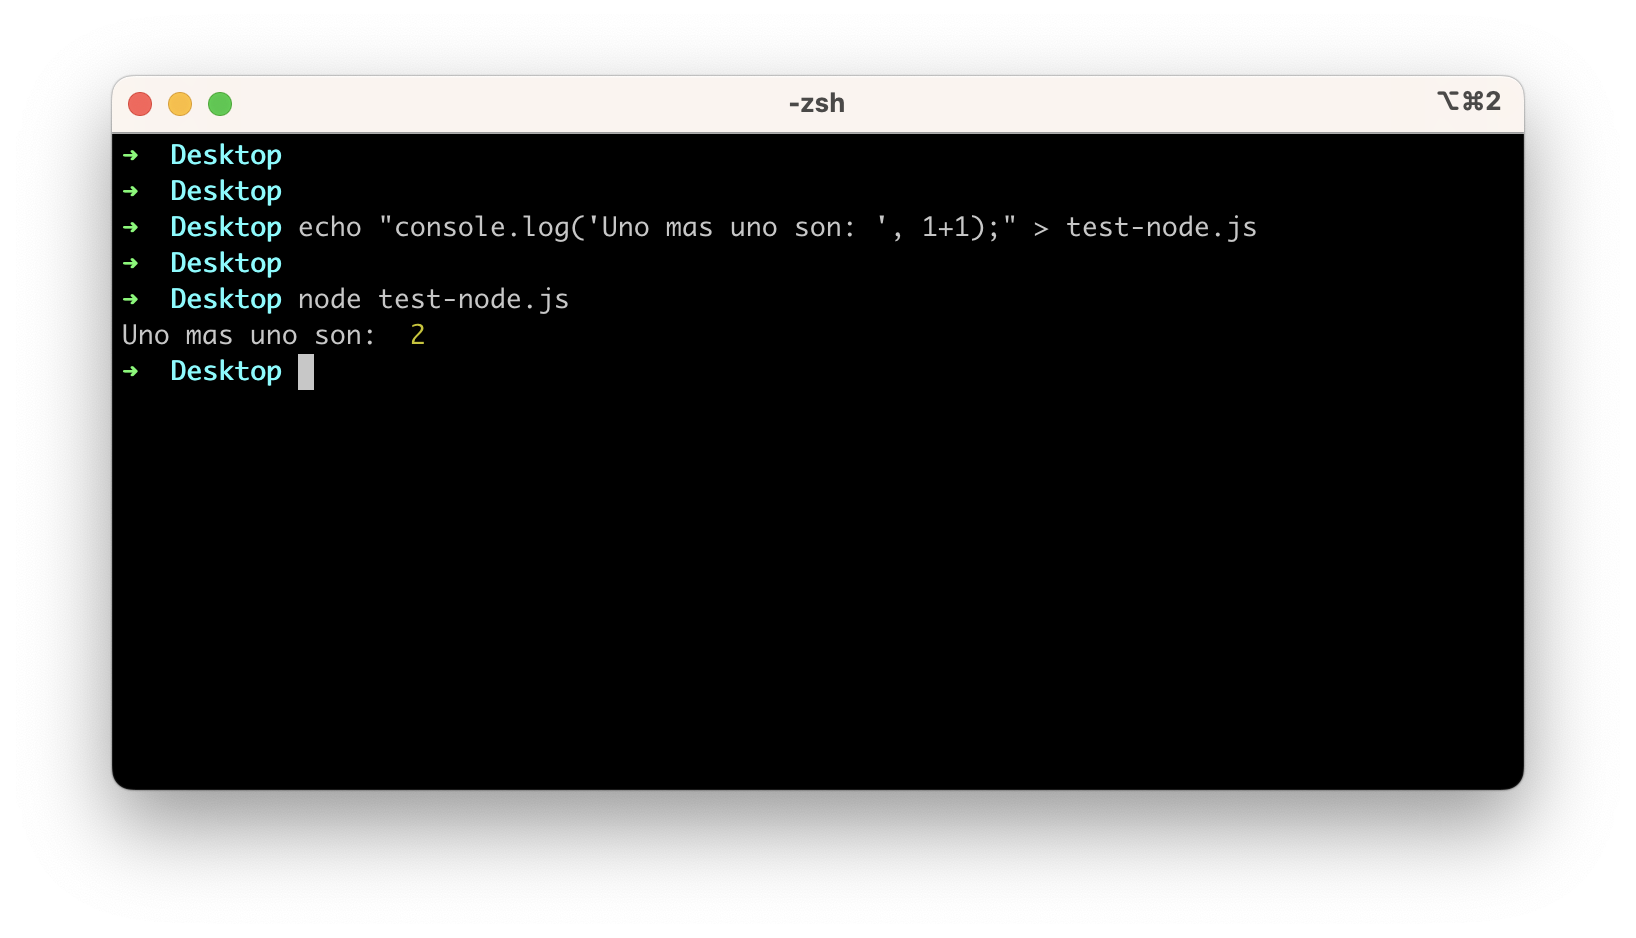
Let’s do a super simple example:
MongoDB
MongoDB is a NoSQL, document-oriented, open source database system. Instead of storing data in tables as done in relational databases, MongoDB stores BSON data structures (a specification similar to JSON) with a dynamic schema, making data integration in certain applications easier and faster.
I install MongoDB 6.0 Community Edition on macOS using Homebrew (source). I use a tap, which only needs to be done once. It consists of adding an (external) repository to the list of locations Homebrew installs from.
Prepare the installation:
brew tap mongodb/brew
brew update
Installation (includes the mongod server, the mongos sharded cluster query router, and the mongosh shell):
brew install mongodb-community@7.0
| Intel | ARM | |
|---|---|---|
| Configuration | /usr/local/etc/mongod.conf | /opt/homebrew/etc/mongod.conf |
| Log | /usr/local/var/log/mongodb | /opt/homebrew/var/log/mongodb |
| Data | /usr/local/var/mongodb | /opt/homebrew/var/mongodb |
Now let’s run MongoDB
- Start or Stop MongoDB as a macOS service using
brew
brew services start mongodb-community@7.0

brew services stop mongodb-community@7.0
If macOS won’t open mongodb or mongosh for security reasons: Preferences -> Security and Privacy pane > General > mongod Open Anyway or Allow Anyway
Check that it started and listens on localhost on the default port 127.0.0.1:27017
netstat -na|grep -i 27017
tcp6       0      0  ::1.27017              *.*                    LISTEN
tcp4       0      0  127.0.0.1.27017        *.*                    LISTEN
a3f97c9f1c2bb4f1 stream      0      0 a3f97cad866b9521                0  0 0 /tmp/mongodb-27017.sock
And we can monitor the Log
tail -f /opt/homebrew/var/log/mongodb/mongo.log

An example program
Here’s a reference to a small GitHub project where you can test npm and mongod.
Jupyter Lab
Jupyter Lab is a web application that allows coding, execution, and “documentation”. The latter is one of the most interesting parts of the project – you can have documentation and code together and have it execute.
I’ve documented the process in another, older post. You can skip the Python part since this one is more up to date, but the rest may be useful: Python and JupyterLab on macOS.
VirtualBox and Vagrant
| Note: This section has only worked for me on a Mac with an Intel chip, so you’ve been warned – for now I haven’t found how to emulate a Linux or Windows ARM with VirtualBox and Vagrant installed on a Mac with Apple Silicon (ARM) |
VirtualBox is virtualization software that allows installing additional operating systems, known as “guest systems” or “virtual machines”, within your “host” system (in my case macOS), each with its own virtual environment. You can create virtual machines based on FreeBSD, GNU/Linux, OpenBSD, OS/2 Warp, Windows, Solaris, MS-DOS, Genode, and many others.
Vagrant lets you create and configure virtual development environments that are lightweight and reproducible, by creating virtual machines. It natively uses VirtualBox as its hypervisor.
We can install both to set up virtual Servers to accompany our software development.
Be sure to read the post Vagrant for Development.
HTTPie
I recommend the HTTPie tool if you’ll be working with APIs. It helps you work with your APIs in a simple and intuitive way. They have a graphical version and a CLI version.
The process to install it on Mac:
- From the Downloads page, go to Download for MAC and install the GUI version
Examples:
- Hello World
https httpie.io/hello
- Custom HTTP method, HTTP headers, and JSON data
http PUT pie.dev/put X-API-Token:123 name=John
- Form submission
http -f POST pie.dev/post hello=World
- View the request being sent using one of the output options
http -v pie.dev/get
- Build and print a request without sending it using offline mode
http --offline pie.dev/post hello=offline
- Use the GitHub API to post a comment on an issue with authentication
http -a USERNAME POST https://api.github.com/repos/httpie/cli/issues/83/comments body=HTTPie is awesome! :heart:
- Upload a file using redirected input
http pie.dev/post < files/data.json
- Download a file and save it via redirected output
http pie.dev/image/png > image.png
- Download a file wget-style
http --download pie.dev/image/png
- Use named sessions to persist certain aspects of communication between requests to the same host
http --session=logged-in -a username:password pie.dev/get API-Key:123http --session=logged-in pie.dev/headers
- Set a custom host header to work around missing DNS records
http localhost:8000 Host:example.com
Others
Here’s a list of programs I usually install on my laptop. You can install several at once, putting more than one on the command line (separated by spaces).
Installation:
brew install <program(s)>
| Program | Description |
|---|---|
| ffmpeg | A complete, cross-platform solution for recording, converting, and streaming audio and video. |
| iperf3 | For network testing. The use case is creating TCP and UDP data streams and measuring network performance. |
| jq | Filter, search, and pretty-print JSON output instead of a single line. |
| knock | Client for “Port Knocking”, a technique for securing your server. |
Maintenance
We usually forget to maintain what we install, so knowing how to do updates and repairs is important. I usually update periodically, at least once a month, even if I don’t install anything new. I check that everything is up to date. Programs not mentioned in this section update automatically from AppStore or their own GUI options.
Updates
brew update && brew upgrade # Standard homebrew update
Repairs
brew update && brew update
brew doctor                # Homebrew self-diagnosis tool.
brew --version             # Check the version
brew list                  # See what's installed
brew cask list             # See what casks are installed
brew leaves                # Top-level installed (most useful)
gem cleanup && gem pristine --all # Update homebrew when you need to repair problems with the gem command