In this post I cover how to customize VSCode. I work with GitHub in a cross-platform, multi-account environment and want to sync my settings, use the same extensions, and leverage licenses. I explain the multi-account topic, synchronization of my global and per-project preferences (settings), and extensions.
I normally use Windows, Linux, and macOS, and I’ve chosen VSCode as my editor/IDE. The goal is to have a unified work experience – launch VSCode on any operating system, clone a personal or professional project, keeping the same extensions and settings, and even using the options to connect to a host, tunnel, WSL, etc.
That said,
- VSCode does not support multi-account with Git providers and I have a professional account and a personal one (in my case with GitHub)
- For what I explain here to work, I rely on Git multi-account
- My global
settings.jsonmust be valid for Linux, macOS, and Windows. - My
<project>.vscode/settings.jsonare project-specific, but when cloning on different OSes I also make sure they’re compatible across different operating systems.
Keyboard Shortcuts
With VSCode you can do everything from the keyboard. It already comes with a subset of commands mapped to keyboard shortcuts. If you want to learn these default shortcuts, print the PDF for Windows, macOS, or Linux and keep it handy.
Multi-Account Workflow
Let me share my case and how I’ve solved it. You should know that VSCode only allows logging in to GitHub with a single account.
- I start without being connected to anything, from the user icon (bottom left)
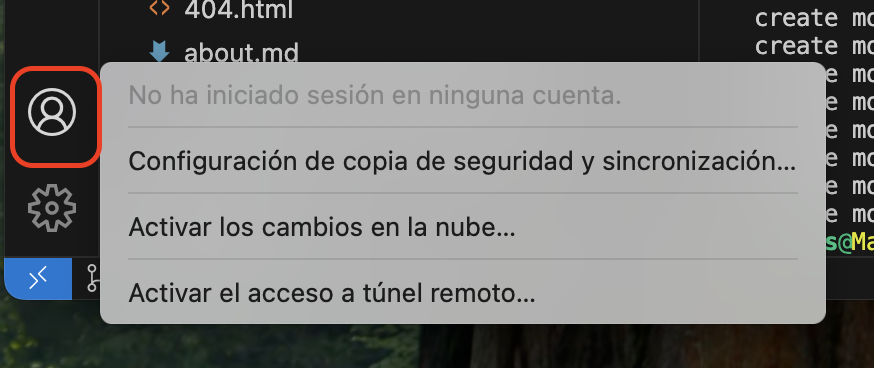
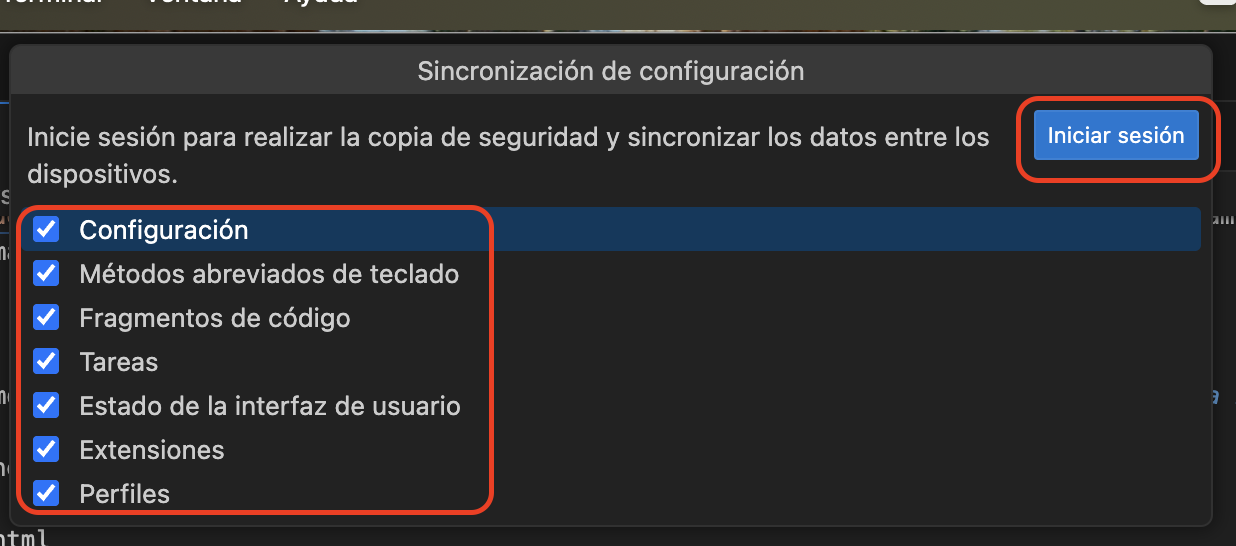
- I go to Backup and Sync Settings > Sign In (I leave everything enabled)
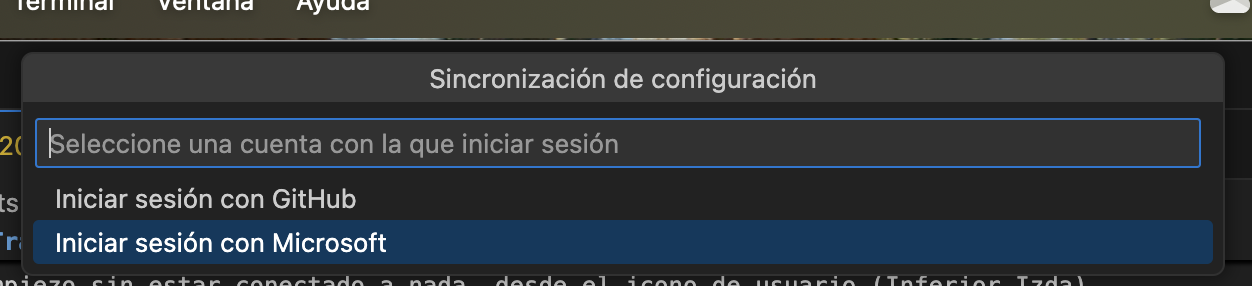
- Step 1: I use my free Microsoft Account (personal) for synchronization. I use a personal Microsoft account for syncing, and for GitHub topics I’ll use a Professional account later.
- Step 3 - VSCode login to GitHub with my professional account. Here I want to use the account with the most licenses, to activate more features. In my case, the professional one where I have access to GitHub Copilot and GitHub Actions, for example.
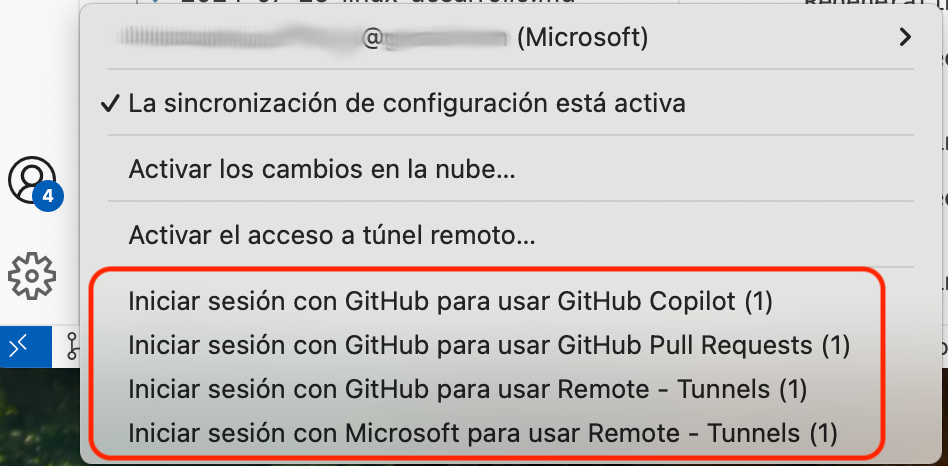
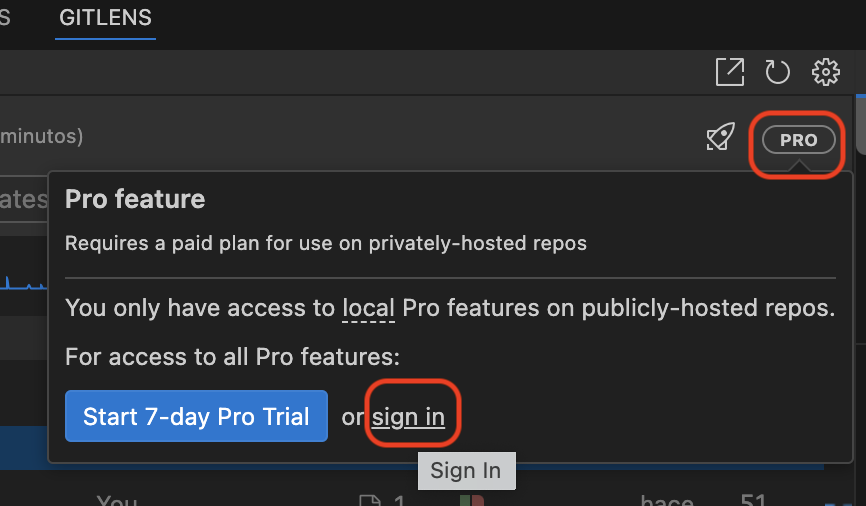
- Step 4 - Login with specific Extensions using their credentials. If you have a software license for a product, you can usually log in from its extension. Here’s an example with my GitKraken license (Extension
eamodio.gitlens).

- Step 5: I properly configure Git multi-account workflow. Check that post – I describe how to do it there.
Synchronization and Backup
VSCode synchronization (step 1 above) enables a consistent work experience across different devices and operating systems. It syncs settings, extensions, code snippets, and keyboard shortcuts across all machines where I have VSCode installed.
Enable synchronization: Go to
Manage > Backup & Sync Settings. It will ask you to Sign In using your GitHub (or Microsoft) account. In my case I use Microsoft as mentioned above. It uses that account (behind the scenes) to maintain backups/synchronization.Select what to sync: You can choose which aspects of your configuration you want to sync: general settings, extensions, keyboard shortcuts, etc. Additionally, you can perform periodic backups: Although synchronization is automatic, it’s recommended to make manual backups of important settings (like the
settings.jsonfile) in case you need to restore a previous configuration.
When enabling it, you may have conflicts – it will offer you ways to resolve them.
Global Configuration
To understand my configuration and examples, my username across all environments is luis and all my development projects are under HOME/00.git
I’m leaving my global settings here for reference. You can access them with Ctrl+Shift+P or CMD+Shift+P > Preferences or Settings. The directories where it’s stored depend on the OS
- My VSCode global “settings.json” file
- Windows -
C:\Users\luis\AppData\Roaming\Code\User - macOS -
/Users/luis/Library/Application Support/Code/User - Linux -
/home/luis/.config/Code/User
- Windows -
| Note: Comments are not allowed in the JSON specification, however VSCode (like other environments) does accept them. On GitHub you’ll notice they’re marked in red as errors – I’ve left them to better understand the file. |
Per-Project Configuration
Depends on each project. I’m leaving links to gists with some examples – the file is always at <project>/.vscode/settings.json
- Project heavily tied to Linux, GitHub, and templates
- Node.js with ESLint project
- Web development project with Prettier and linting configurations
- Complex example for a Golang microservices Dockerized project
- Complex example for a C++ on Windows 11 for development with MSVC and CLANG project
VSCode Extensions
VSCode is an extremely powerful and flexible tool, largely thanks to its extension ecosystem. Extensions allow you to customize and extend the editor’s functionality to suit the specific needs of each project and developer. There are thousands of extensions available in the VSCode marketplace.
The choice of extensions is a very personal matter. What works well for one developer may not be as useful for another, depending on the type of projects you work on and your personal preferences regarding tools and workflows.
My Extension List
This is very personal – here are the ones I use in Visual Studio Code, Cursor, Antigravity, and any derivative of the former. They help me have an efficient and pleasant development environment.
Here’s my list of Extensions and the load_extensions_vscode.sh script that automates their import. For the script to work on Windows, use Git Bash.
I use the C++ engine (LLVM), clangd, cmake-tools, and vscode-lldb – my personal golden trio. I don’t depend on Microsoft’s heavy IntelliSense.
For Artificial Intelligence I’m betting on Google (Gemini) and Anthropic (Claude Code), at least during 2026.
For managing which projects or repositories to sync, I use project-manager and remote-repositories to jump between local and remote repositories like a pro.
Finally, some niche ones like rainbow-csv, protobuf, and mojom, which don’t get in the way when I’m not using them but are vital when I work with those files.
A useful command to see which extensions you have installed is:
code --list-extensions --show-versions > extensiones_actuales.txt
To install extensions using the integrated terminal:
code --install-extension alefragnani.project-manager
To uninstall an extension:
code --uninstall-extension solomonkinard.git-blame