Dualboot means having two operating systems on the same computer and choosing which one to boot during the boot phase. My goal is to prepare my PC for dualboot and install Windows 11 Pro. Normally you install Windows first and then Linux, but in my case I already have Linux (Ubuntu) working perfectly and using the entire 4TB disk.
I’m going to “add” Windows to enable dualboot. I describe the entire process, how I did it, how I resized the hard drive, added Windows and customized the boot menu.
Windows post series
- Set up a PC for Dualboot Linux / Windows and install Windows 11 Pro.
- Configure a decent Windows 11 by removing the bloatware.
- Set up Windows for software development, CLI, WSL2 and tools.
- Install VMWare Workstation Pro on Windows 11 with a Windows 11 Pro VM.
- Install Windows 11 VM on Proxmox to have a Windows 11 Pro on a Proxmox Host.
First Steps
The specs of my PC Slimbook Kymera ATX
- Motherboard Gigabyte Z790 UD AX with BIOS F11d and an Intel Core i9-14900K CPU
- Memory: 96GB (2x48GB) DDR5 6000MT/s / x2 Channel
- Disks: 1 x 4TB nvme (main) + 2 data disks of 2TB SDD
- System with UEFI and GPT partitioning scheme
- I already have Ubuntu 24.04 installed (Kernel: 6.8.0-41-generic)
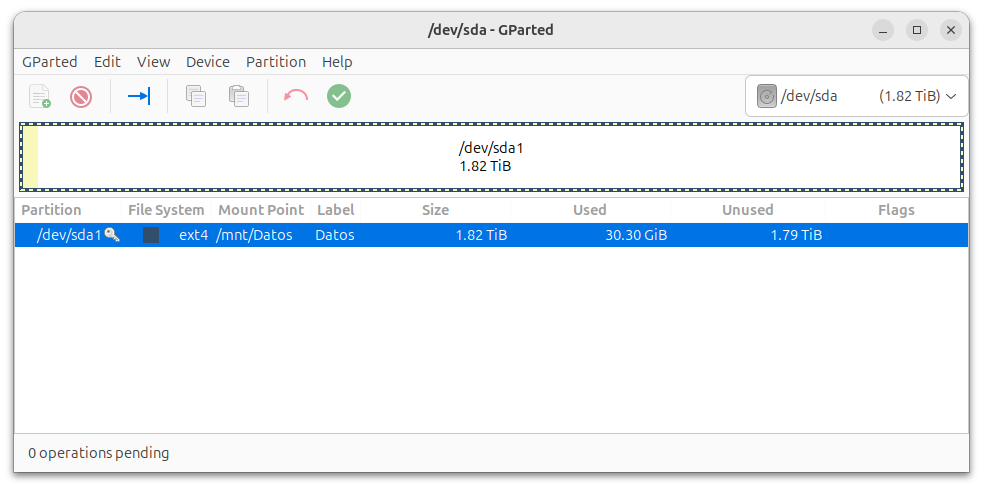
Details of the main disk, currently with only linux:
Requirements
These are the requirements I set to do the whole process properly.
- USB for Ubuntu Live (min. 8GB)
- USB for Windows 11 (min. 8GB)
- Hardware with UEFI support
- GPT partition table, not MBR
- Internet connection to install Windows (preferred)
- Linux backup (optional but recommended)
I could use a single USB, but it’s more convenient to have two. If you only have one, first create the Ubuntu Live, boot from it, prepare the partitions, reboot into Linux, burn Windows to your USB and boot from it to install.
Backup
If you make a mistake messing with partitions, you’ll lose data. Having a backup on an external disk is almost mandatory. Don’t say I didn’t warn you.
Use whatever system you prefer. In my case, when I do things like this I usually use clonezilla and make a full copy of the main disk. In this case it’s so large (4TB) that I didn’t have another one of that size lying around, so I saved the main files to an external disk.
Create USB with Ubuntu Live
I’ll use it only to shrink the existing partition and make room for Windows. I can’t do it from Linux itself because it’s mounted. I download the Ubuntu ISO from Download Ubuntu Desktop (Desktop 24.04 LTS (6GB)).
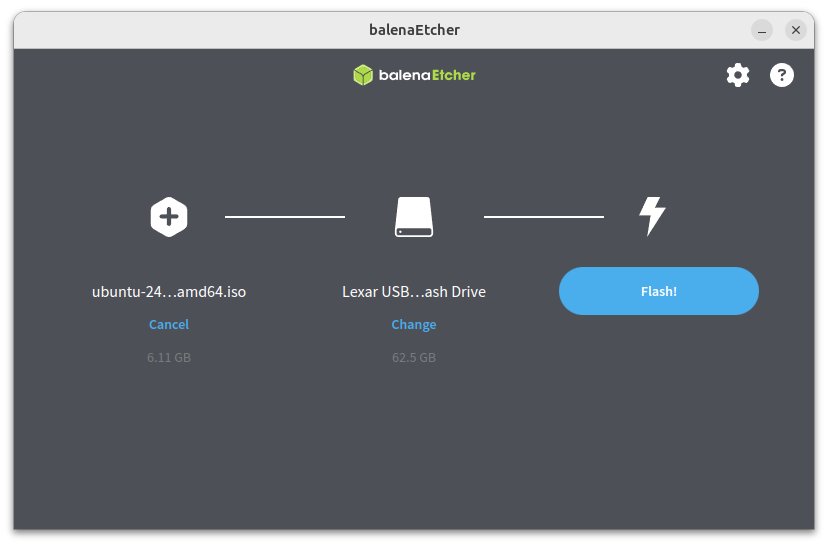
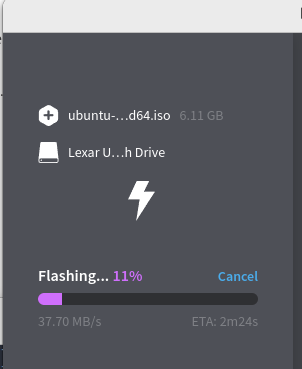
I could have used Startup Disk Creator (which comes with Ubuntu), but I prefer to burn the USB with Balena Etcher (external guide). I download Etcher for Linux x64 (64-bit) (zip),
unzip ../Downloads/balenaEtcher-linux-x64-1.19.21.zip
cd balenaEtcher-linux-x64
sudo chown root:root chrome-sandbox
sudo chmod 4755 chrome-sandbox
./balena-etcher.sh
Important, know the device name of your USB. In my case /dev/sdc.
# lsblk -p -o NAME,VENDOR,MODEL,SIZE,TYPE,SERIAL
NAME             VENDOR   MODEL                    SIZE TYPE SERIAL
/dev/loop0                                        10,1M loop
/dev/loop1                                        63,9M loop
/dev/loop2                                        74,2M loop
/dev/loop3                                        74,2M loop
/dev/loop4                                        13,9M loop
/dev/loop5                                        38,8M loop
/dev/sda         ATA      CT2000MX500SSD1          1,8T disk
└─/dev/sda1                                        1,8T part
/dev/sdb         ATA      CT2000MX500SSD1          1,8T disk
└─/dev/sdb1                                        1,8T part
/dev/sdc         Lexar    USB Flash Drive         58,2G disk  <-- !!! this one
/dev/nvme0n1              Samsung SSD 990 PRO 4TB  3,6T disk
├─/dev/nvme0n1p1                                   300M part
└─/dev/nvme0n1p2                                   3,6T part
Important: make sure to choose the correct device, the USB one and not another.
Create Live USB with Windows
First I download Windows 11, from the official downloads site. ISO section, option Windows 11 (multi-edition ISO for x64 devices). I select the Product language and start the download (approx. 6.3GB).
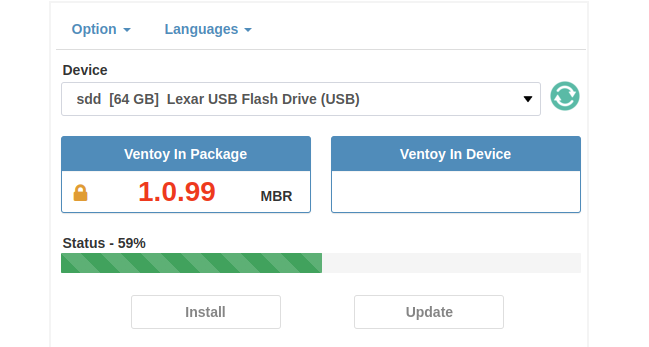
To transfer it to a USB it’s straightforward if you already have Windows (instructions here). In my case I do it from my linux with Ventoy (a guide).
When installing Ventoy on the USB, it makes it bootable and creates two partitions, one for itself (for Ventoy to boot) and another to copy the Windows ISO. I download the latest version from Ventoy.
cd Downloads
tar xfz ventoy-1.0.99-linux.tar.gz
cd ventoy-1.0.99
sudo ./VentoyWeb.sh
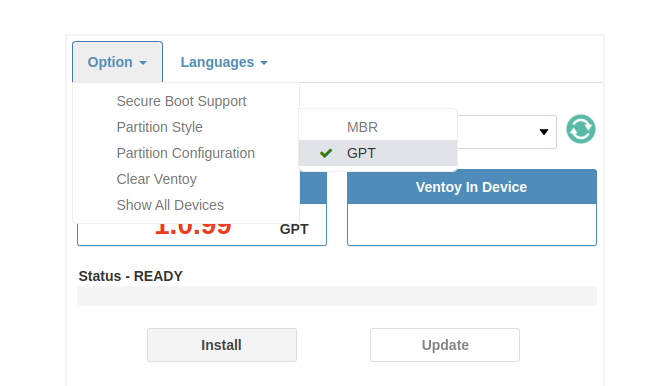
I connect to http://127.0.0.1:24680. In Option I disable Secure Boot and select GPT as partition type.
I select the device path where I have the USB (in my case now it’s /dev/sdd) and click Install.
I copy the Windows ISO to the second “Ventoy” partition.
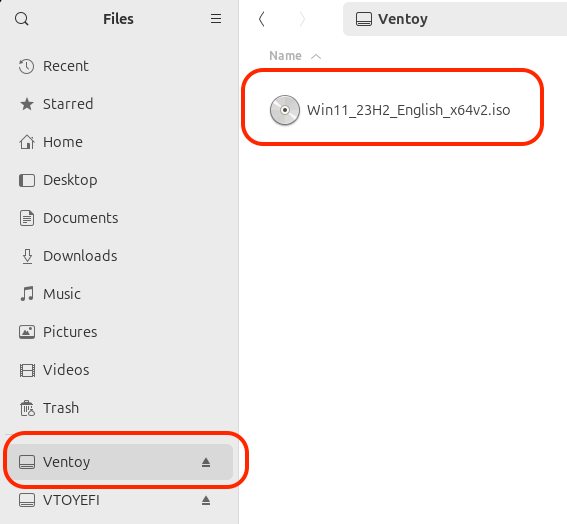
This is how the USB looks
I eject both partitions (Ventoy, VTOYEFI), we’re done, the second Windows USB is ready.
Free Up Disk Space
I boot with the Ubuntu Live USB. I ask the BIOS to boot from it. All computers offer a boot menu by pressing some key, like F2/F7/F10/F12/ESC, depending on your BIOS.
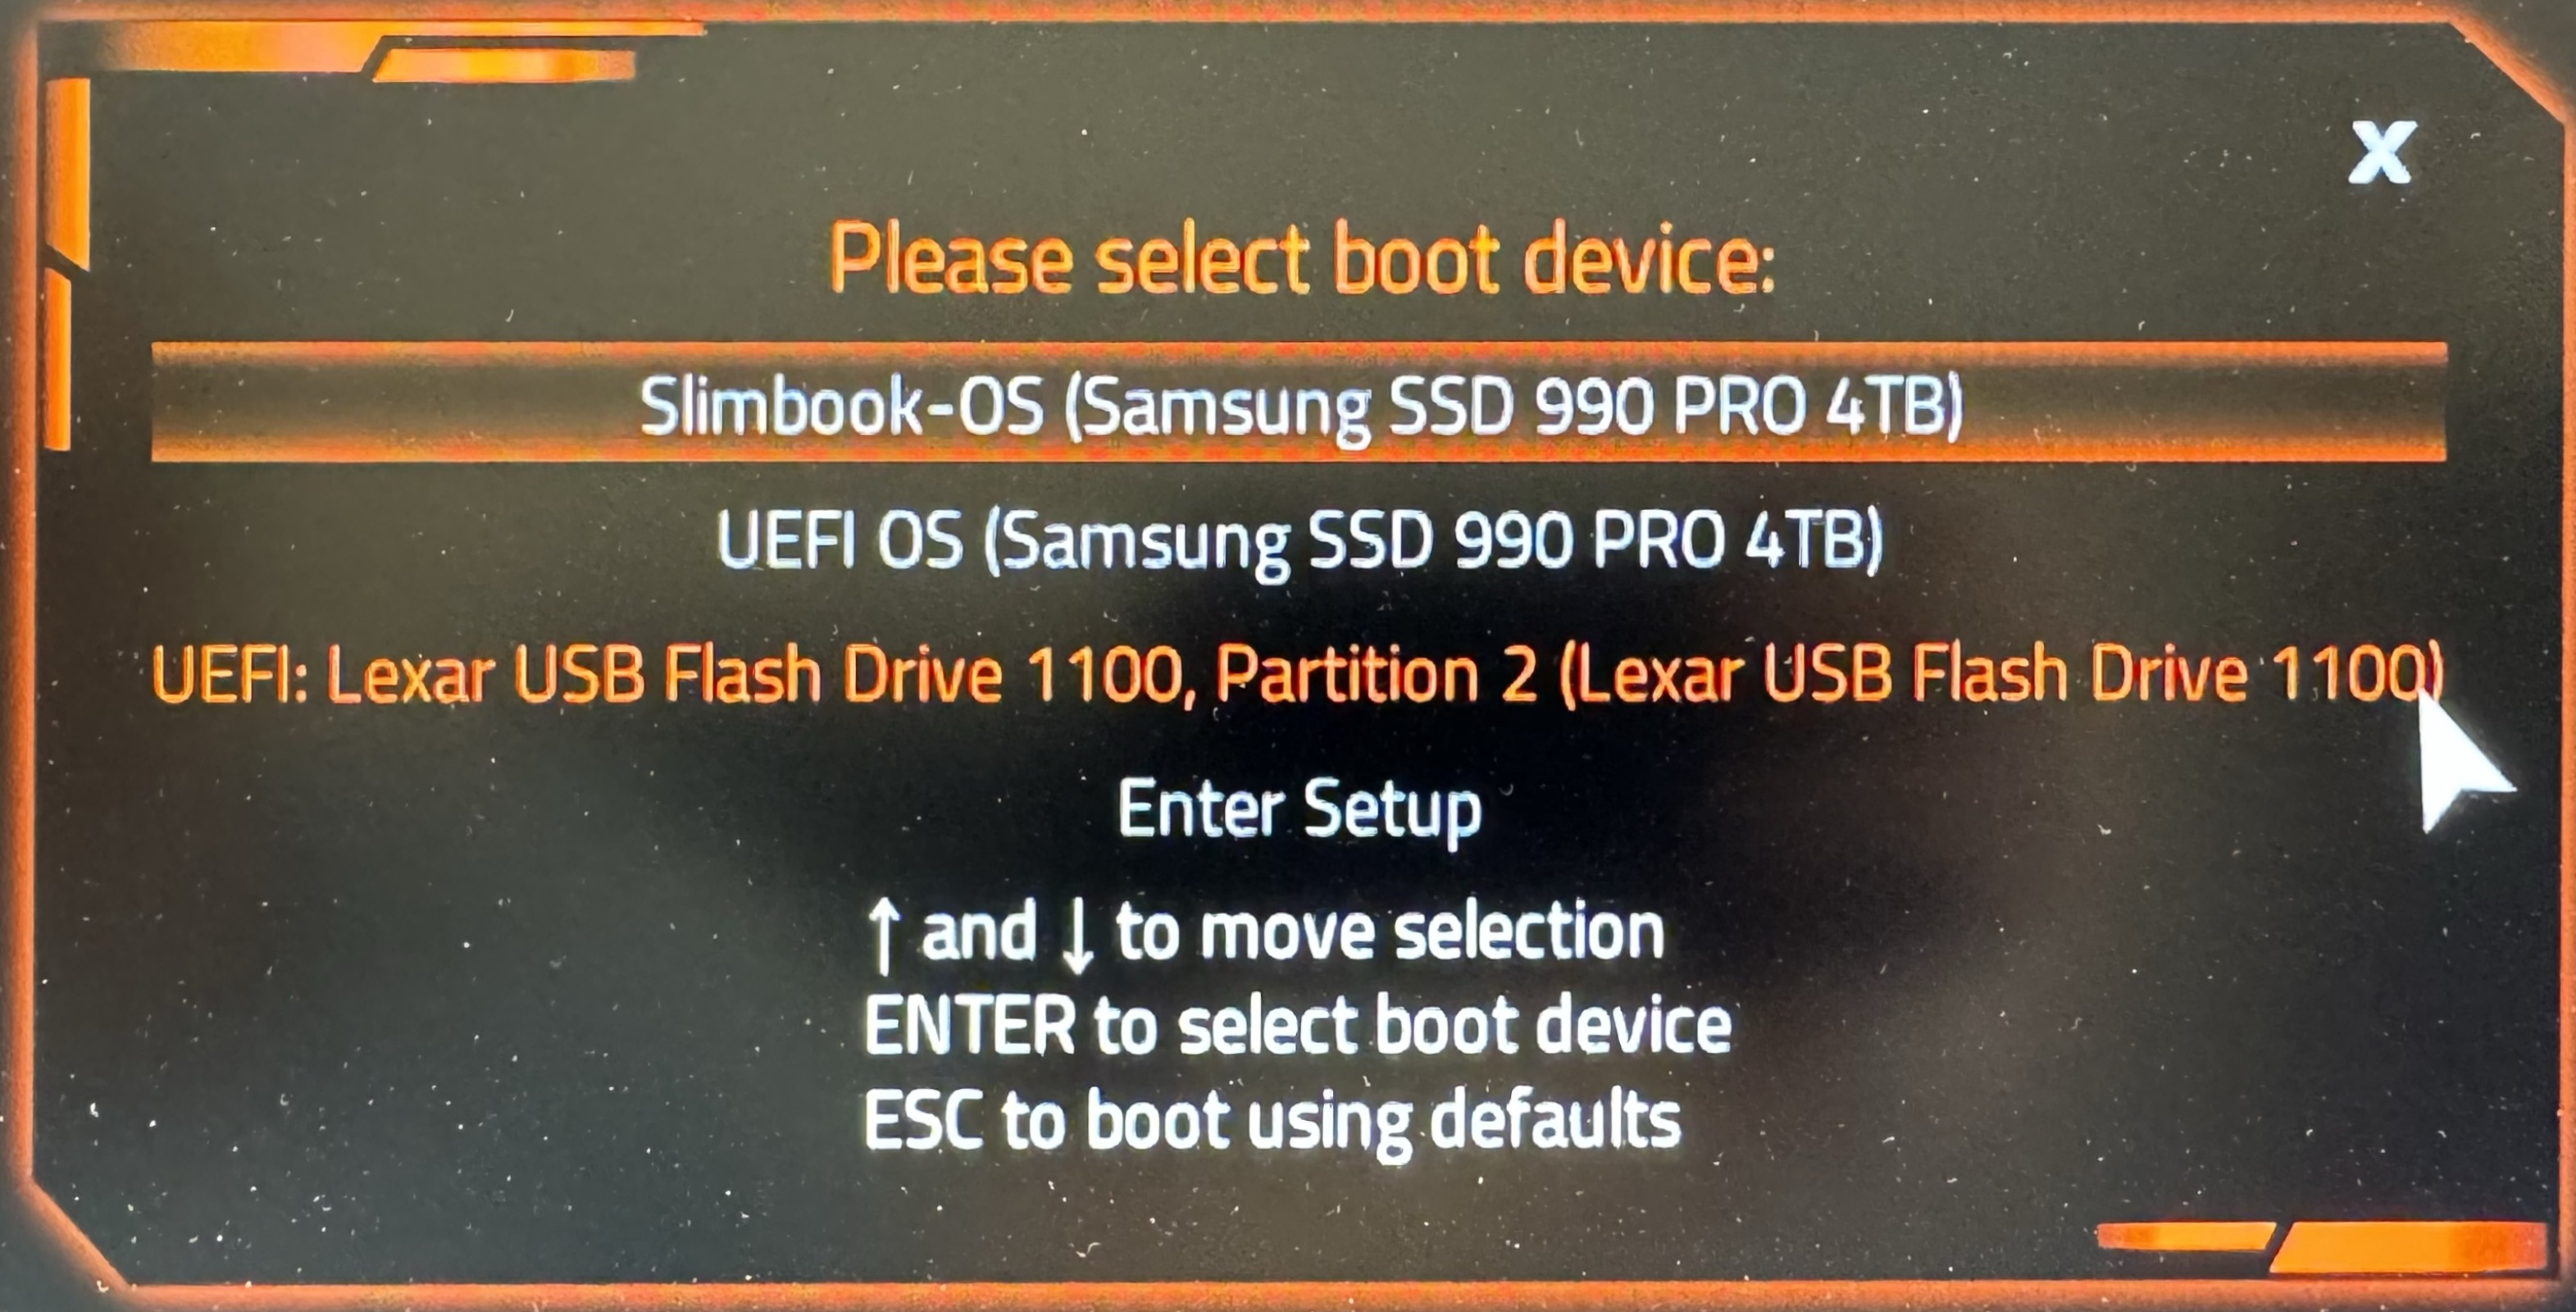
I select the USB, press Enter. A menu appears, I select Try or Install Ubuntu, set the language, accessibility, keyboard, internet connection, skip updating the installer and select Try Ubuntu. Once I have Ubuntu running, I launch the Disks application.

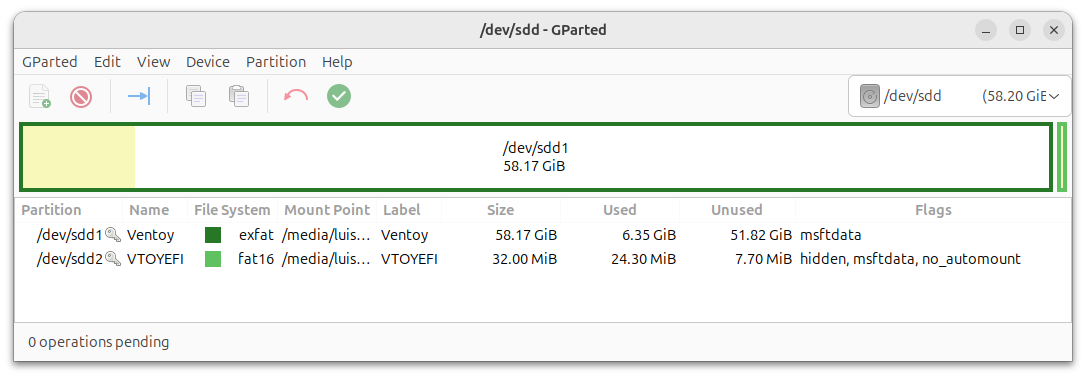
I select my main hard drive and the partition where Linux is, which is the one I need to shrink.
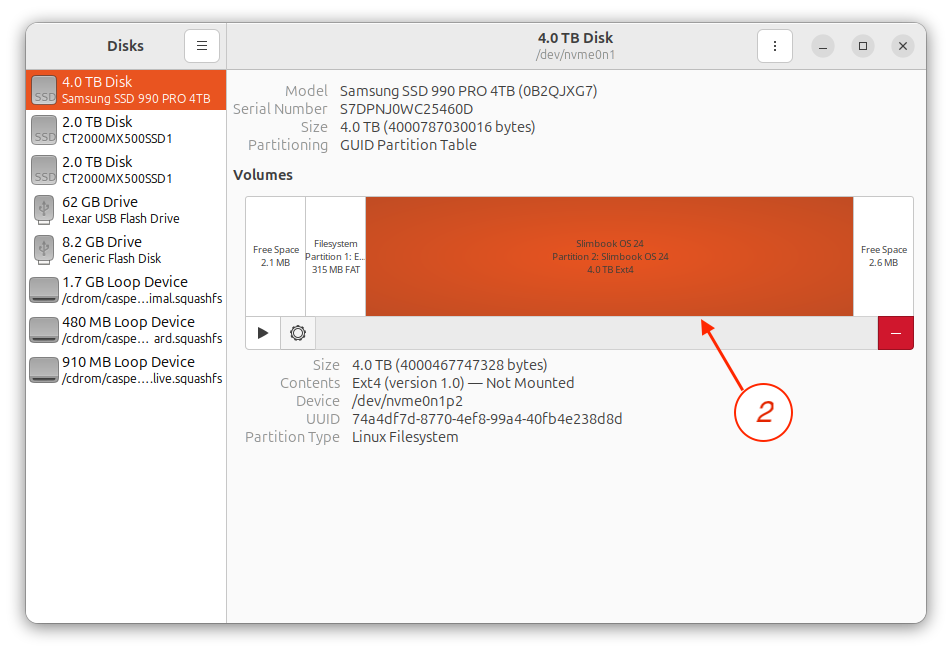
I select resize.
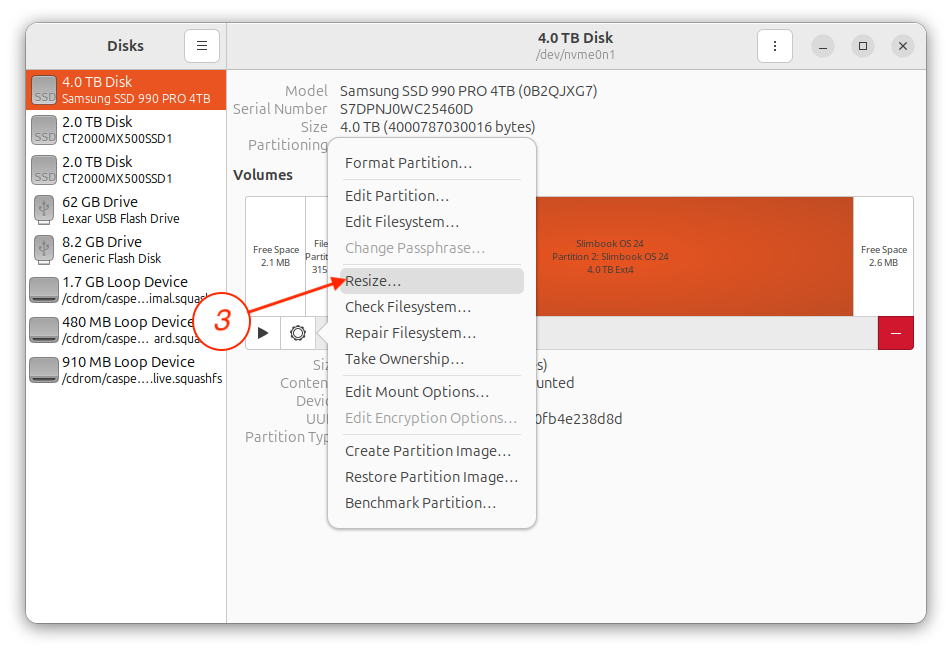
I enter the new value (half the disk), click Resize, click Authenticate (no password required)

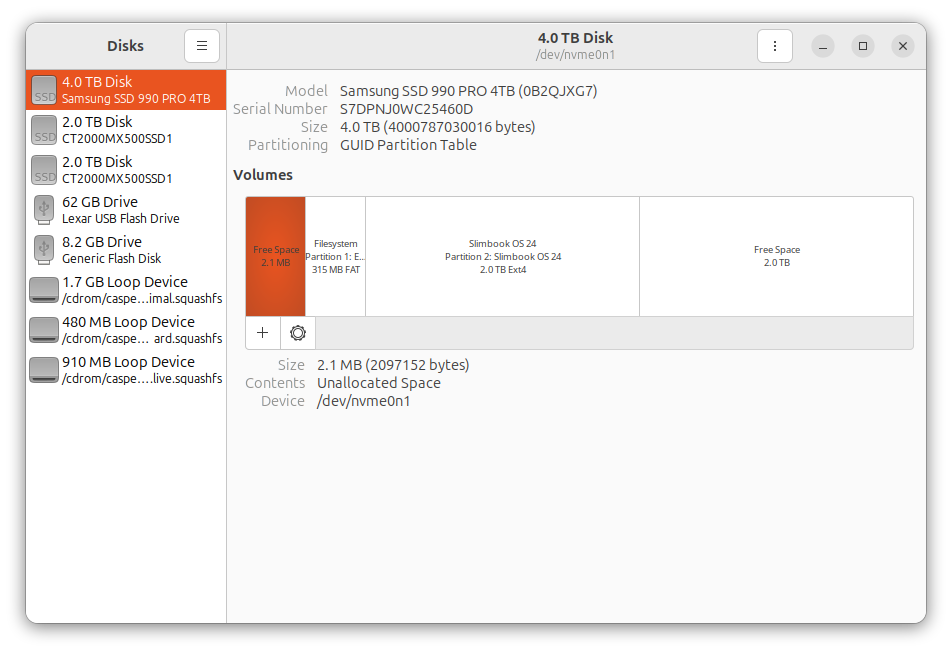
The resizing process starts (takes a while) and when it finishes it looks as expected
I reboot the machine, remove the Ubuntu USB and to be safe, verify that it can still boot from the resized partition. I’m now ready to install Windows.
Install Windows
Now it’s time to install Windows, be patient, it takes quite a while – as far as I can tell nothing has changed in 25 years. I insert the USB with Ventoy + the Windows 11 ISO. I repeat the process, reboot the computer, press my key for the BIOS to show the Boot options, select the USB.

I press Enter on the ISO, select Boot in normal mode, see the Windows logo. I choose language and keyboard, Install now, skip the license topic, I’ll activate it later. I choose Windows 11 Pro, Install Windows Custom, it offers to install on the only empty partition Unallocated Space. From here it copies the files and when done it boots, continues installing. Note: in the past it didn’t always do this correctly (it would boot from the USB again which is incorrect), I had to enter the BIOS and select the hard drive.
As I was saying, with this computer everything goes smoothly, it shows Getting ready, reboot, finishes asking for country, keyboard, updates and another reboot. I give my machine a name, reboot, asks how I’ll use it (personal or work). I’d like to skip this part but it’s impossible (there’s a trick but I didn’t follow it). I select “Personal”, log in with my Microsoft account and continue configuring it as a new machine. I create a PIN and say no to location, find device, diagnostics, inking, typing, tailored experiences, ads ID, etc. I skip the phone part, ask it not to make backups, not to import anything from another browser. It does a final update that takes a while, more reboots, ends up finishing and we can enter Windows.
I set Windows 11 aside and go back to Linux to finish the dualboot. Note: you can see in the post A decent Windows how I configure and customize it.
Let’s Set Up Dual Boot
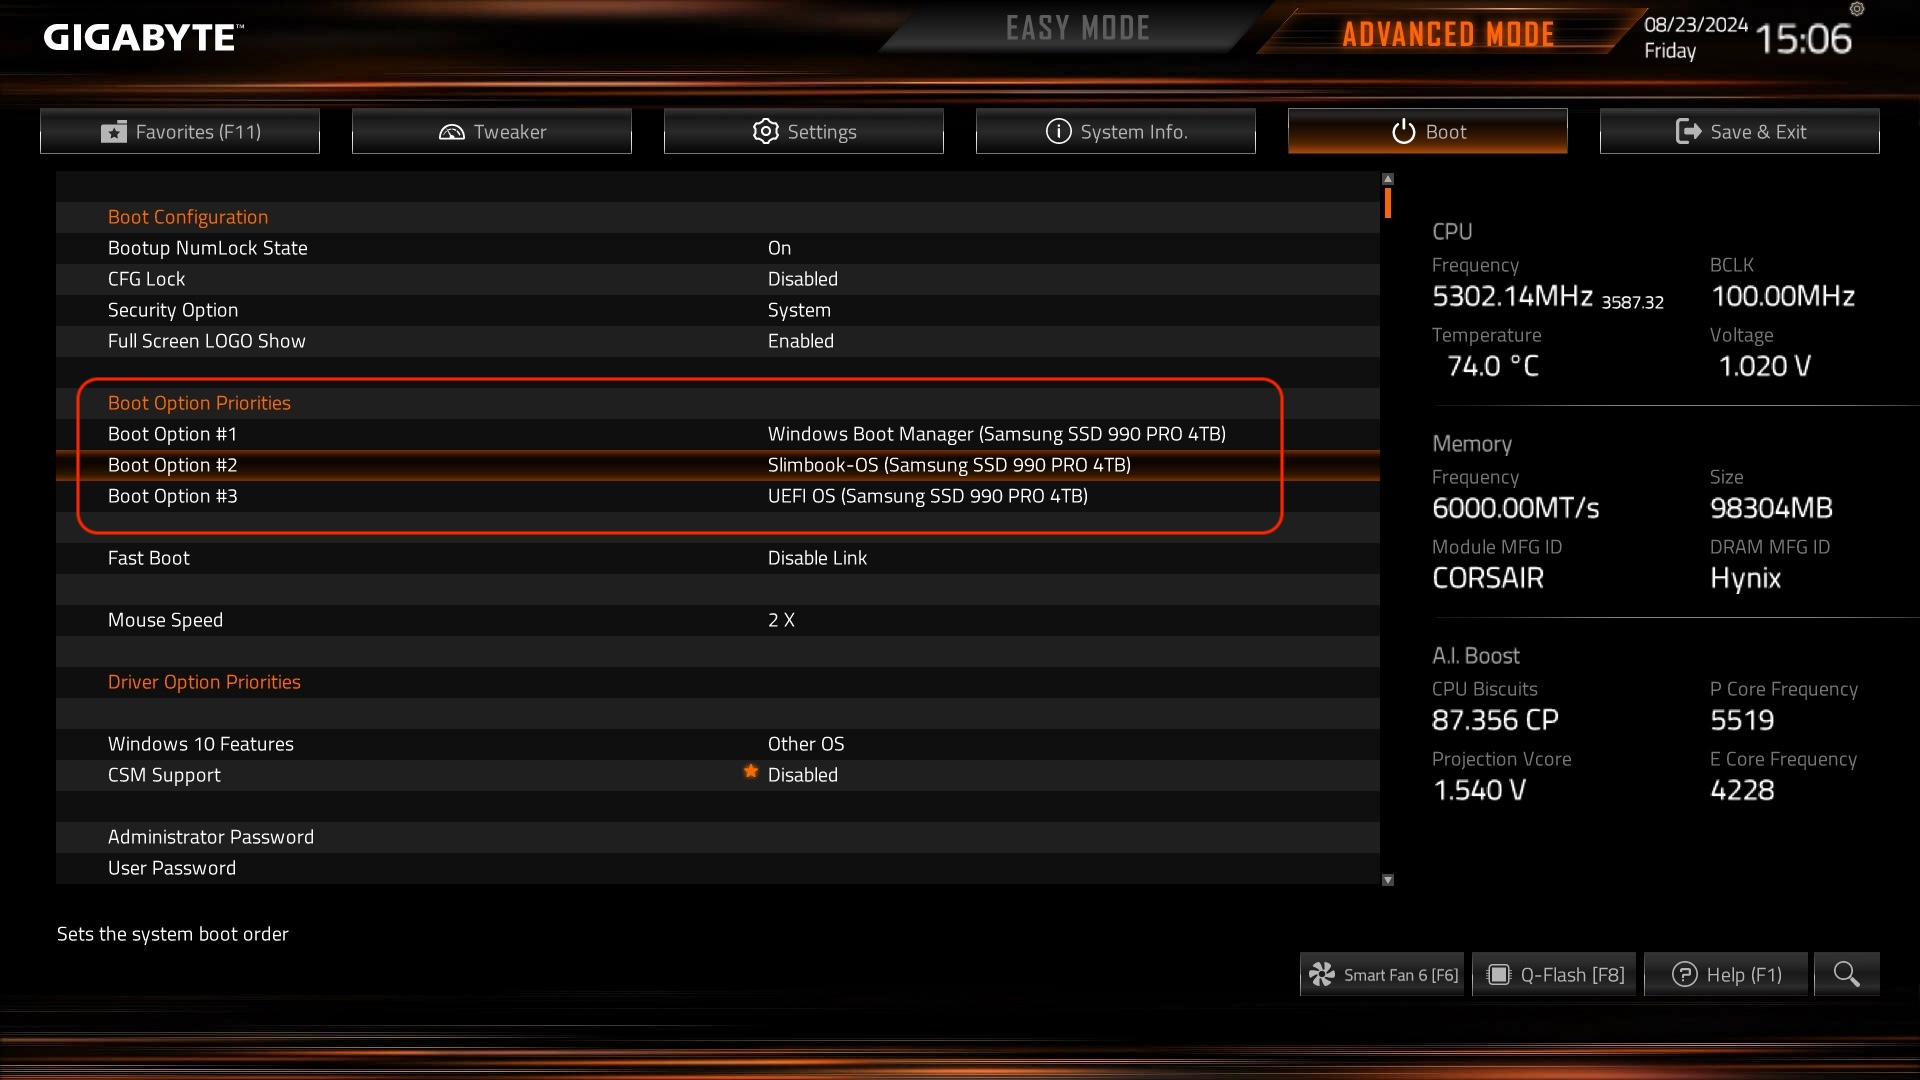
I now have Windows. In the BIOS it stays as the first system to boot from. This doesn’t suit me. I’m going to reconfigure the BIOS to boot with Linux and I’ll configure grub to show me a selection menu (I don’t like the Windows boot manager).
I restart the system, enter BIOS Setup, change the boot sequence. This is how it was, I moved Ubuntu up to make it first.
Add Windows to Grub
Once in Linux and as root I’m going to configure grub. I start by confirming that os-prober detects the new bootable Windows partition:
os-prober

/dev/nvme0n1p1@/EFI/Microsoft/Boot/bootmgfw.efi:Windows Boot Manager:Windows:efi  <-- !! Correct
I edit /etc/default/grub, uncomment the line GRUB_DISABLE_OS_PROBER=false, so that update-grub uses os-prober and adds an additional menu entry to the file /etc/boot/grub/grub.cfg
cat /etc/default/grub | grep PROBER

GRUB_DISABLE_OS_PROBER=false
I run update-grub to add the Windows partition to the configuration file (/boot/grub/grub.cfg) as a boot menu element.
update-grub

:
Sourcing file `/etc/default/grub'
Warning: os-prober will be executed to detect other bootable partitions.
:
Found Windows Boot Manager on /dev/nvme0n1p1@/EFI/Microsoft/Boot/bootmgfw.efi
:
Note: I then re-commented this line #GRUB_DISABLE_OS_PROBER=false in /etc/default/grub and ran update-grub again, I no longer need it to detect anything.
I reboot the machine and see the new menu
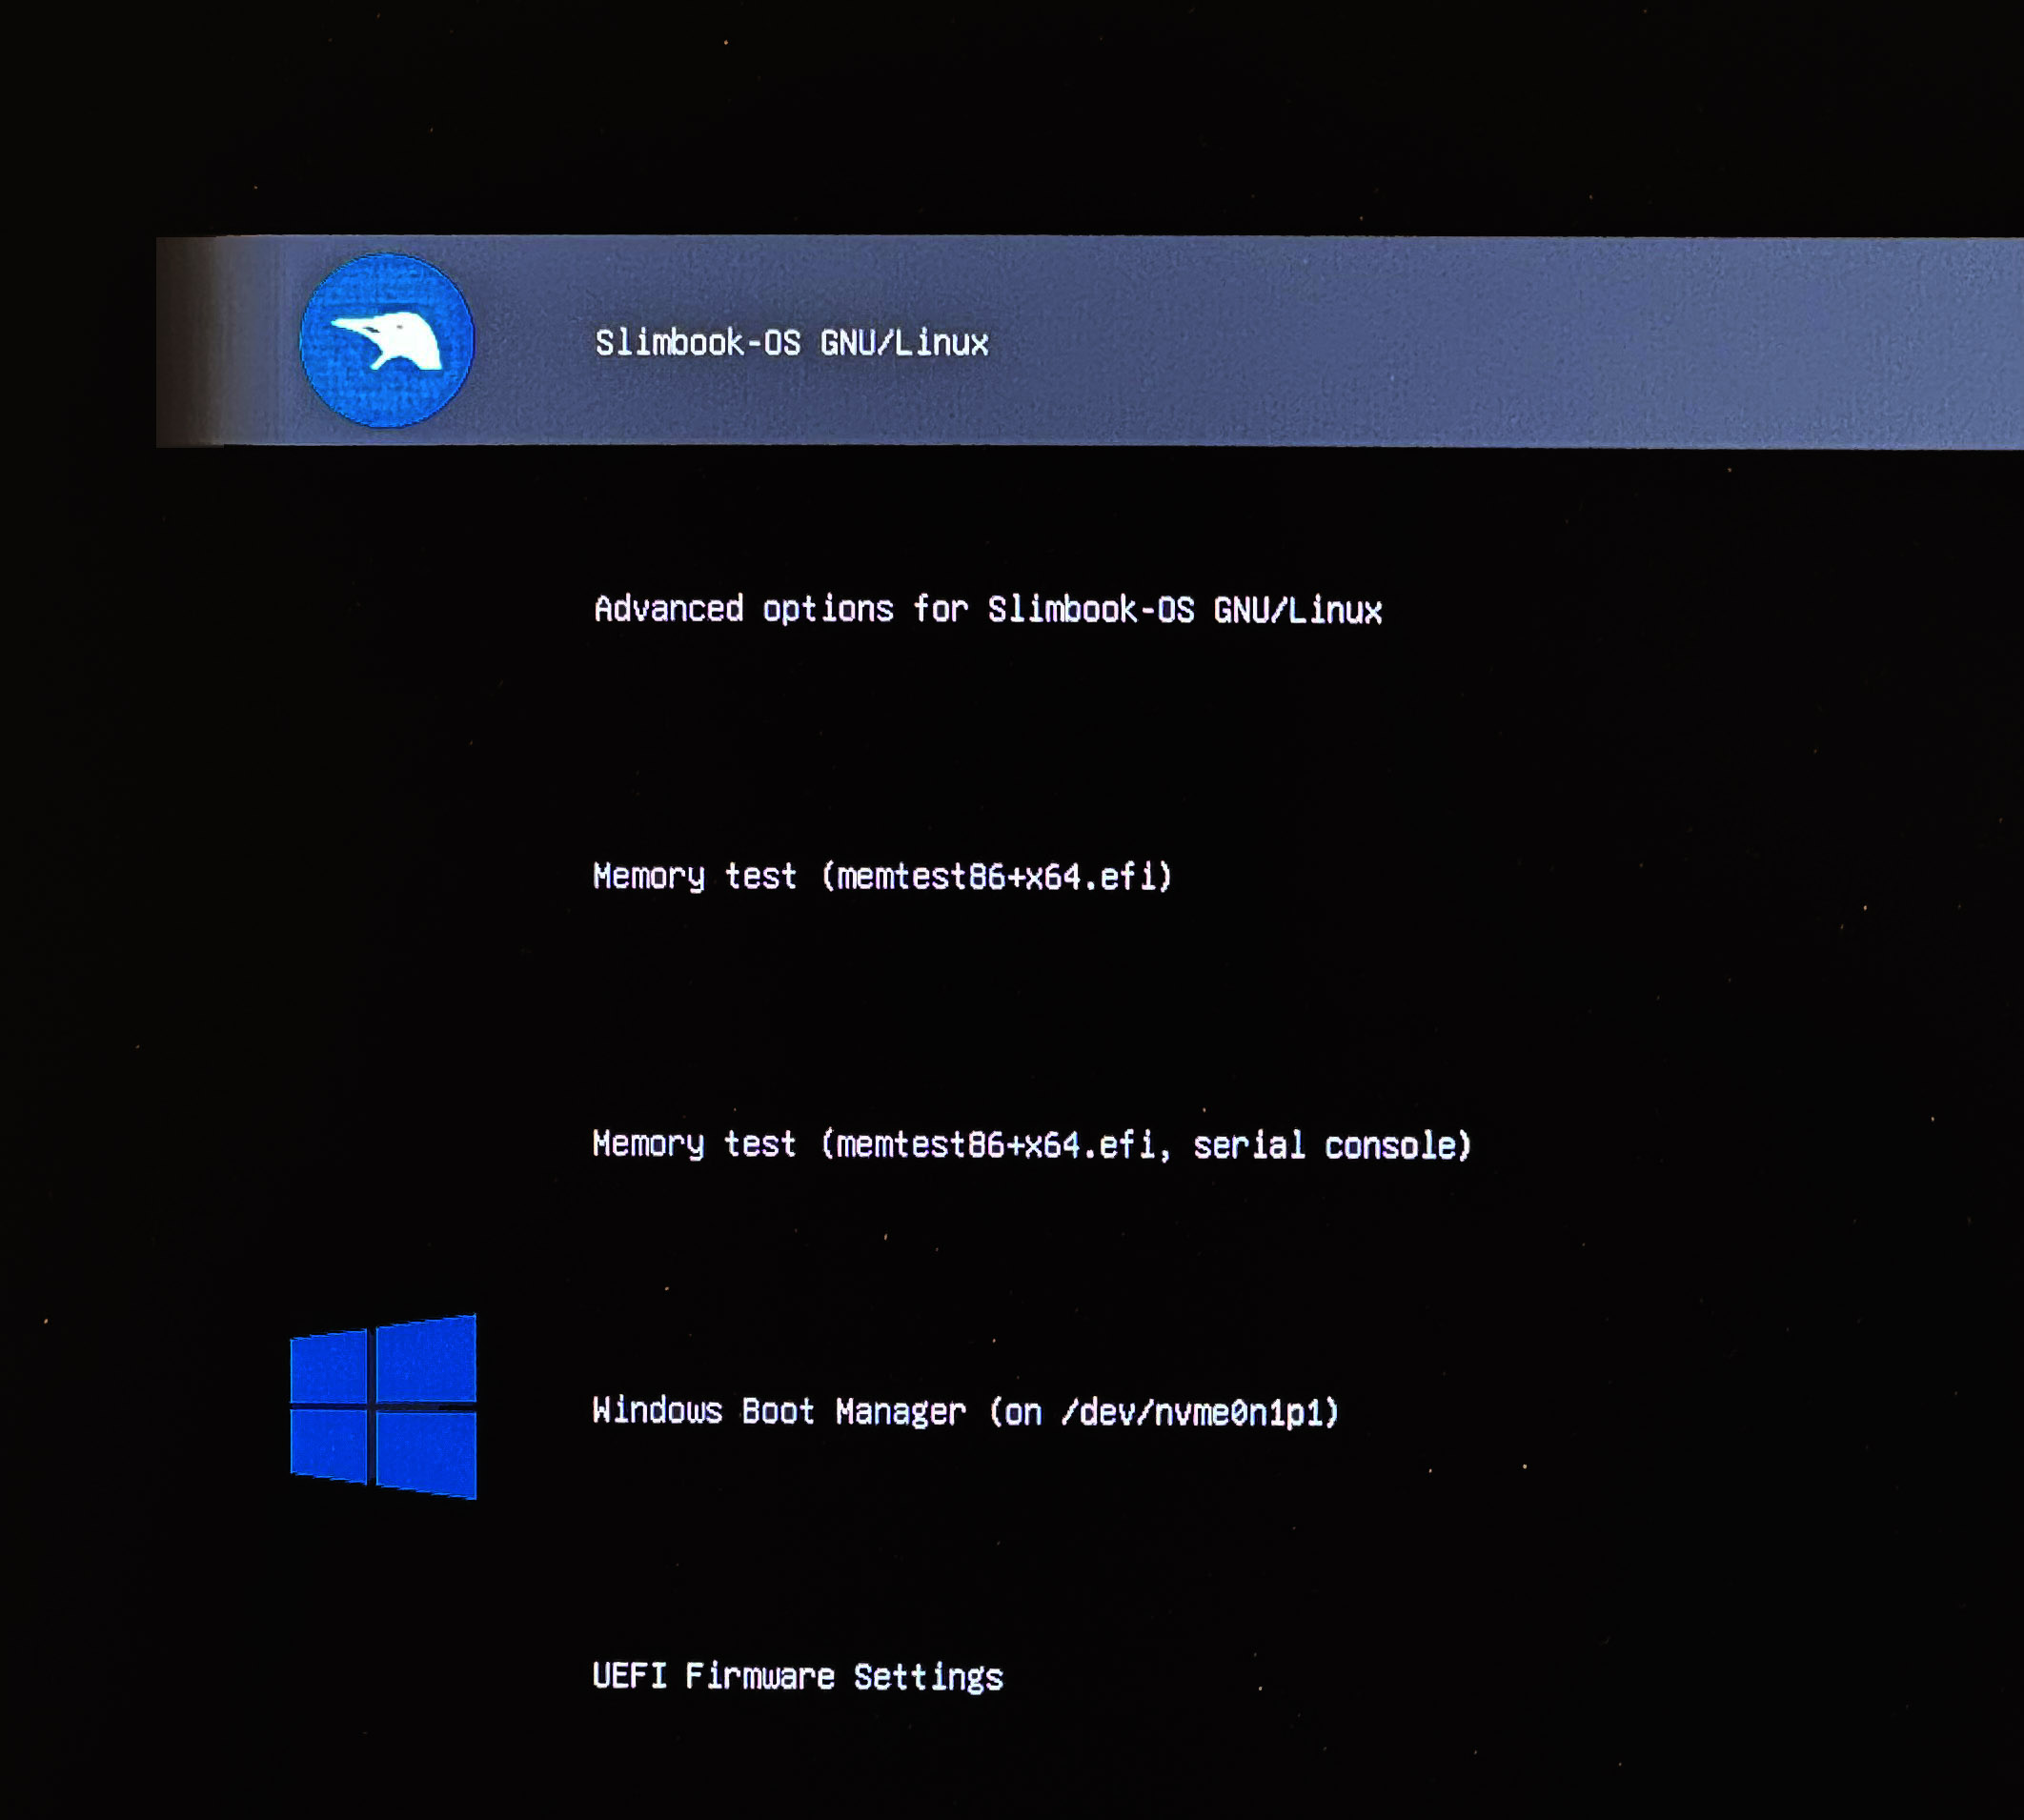
We have different options but I prefer to clean up this menu, I boot back into Linux to install an app called Grub Customizer
sudo apt update && sudo apt upgrade -y && sudo apt full-upgrade -y
apt install software-properties-common
add-apt-repository ppa:danielrichter2007/grub-customizer
apt-get update
apt install grub-customizer
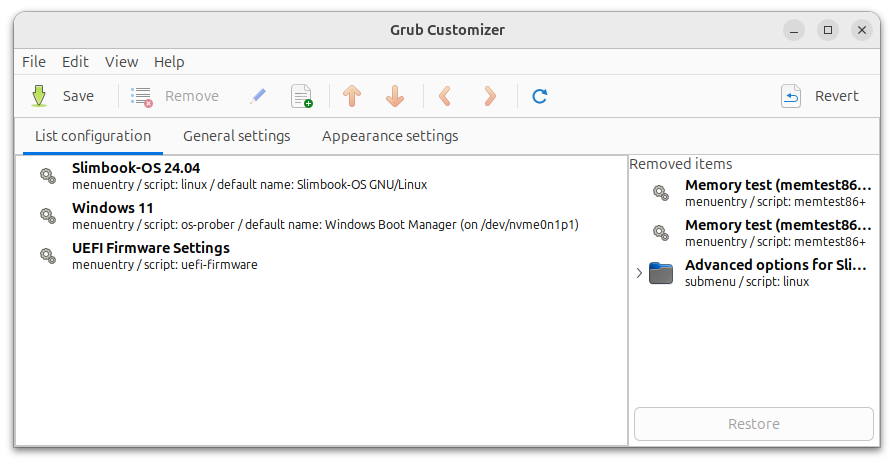
I run grub-customizer from my user via CLI; it asks for the root password and shows me all the entries I saw in the boot menu. I remove the ones I won’t use (advanced options, memtest), change the titles,
In General Settings I set auto-boot to 5 sec and in Appearance Settings the resolution to 1920x1080.
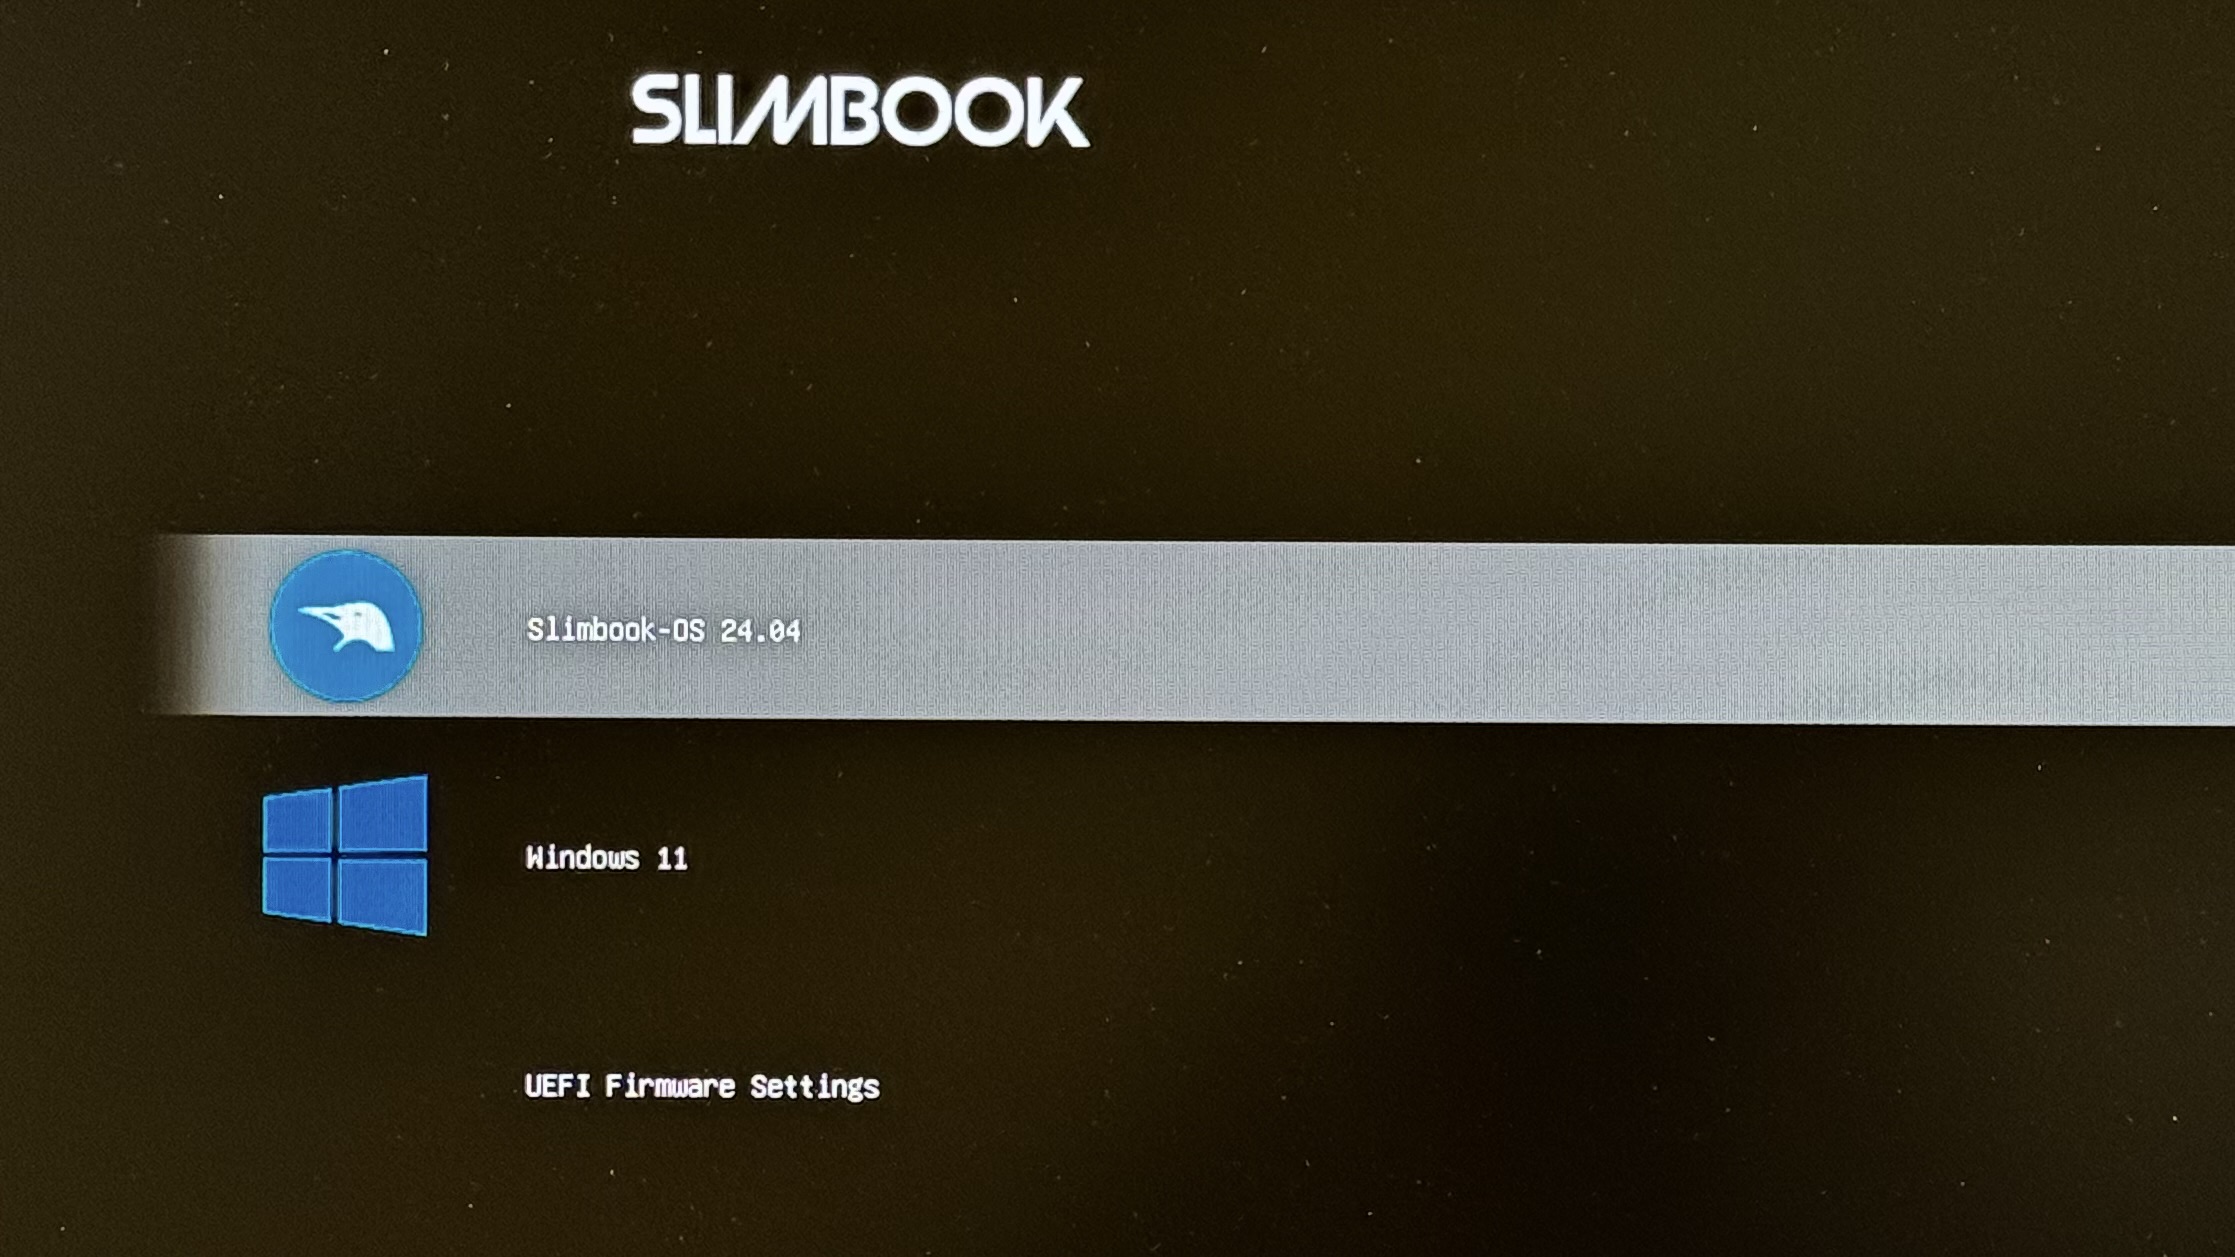
After saving, I reboot to verify.
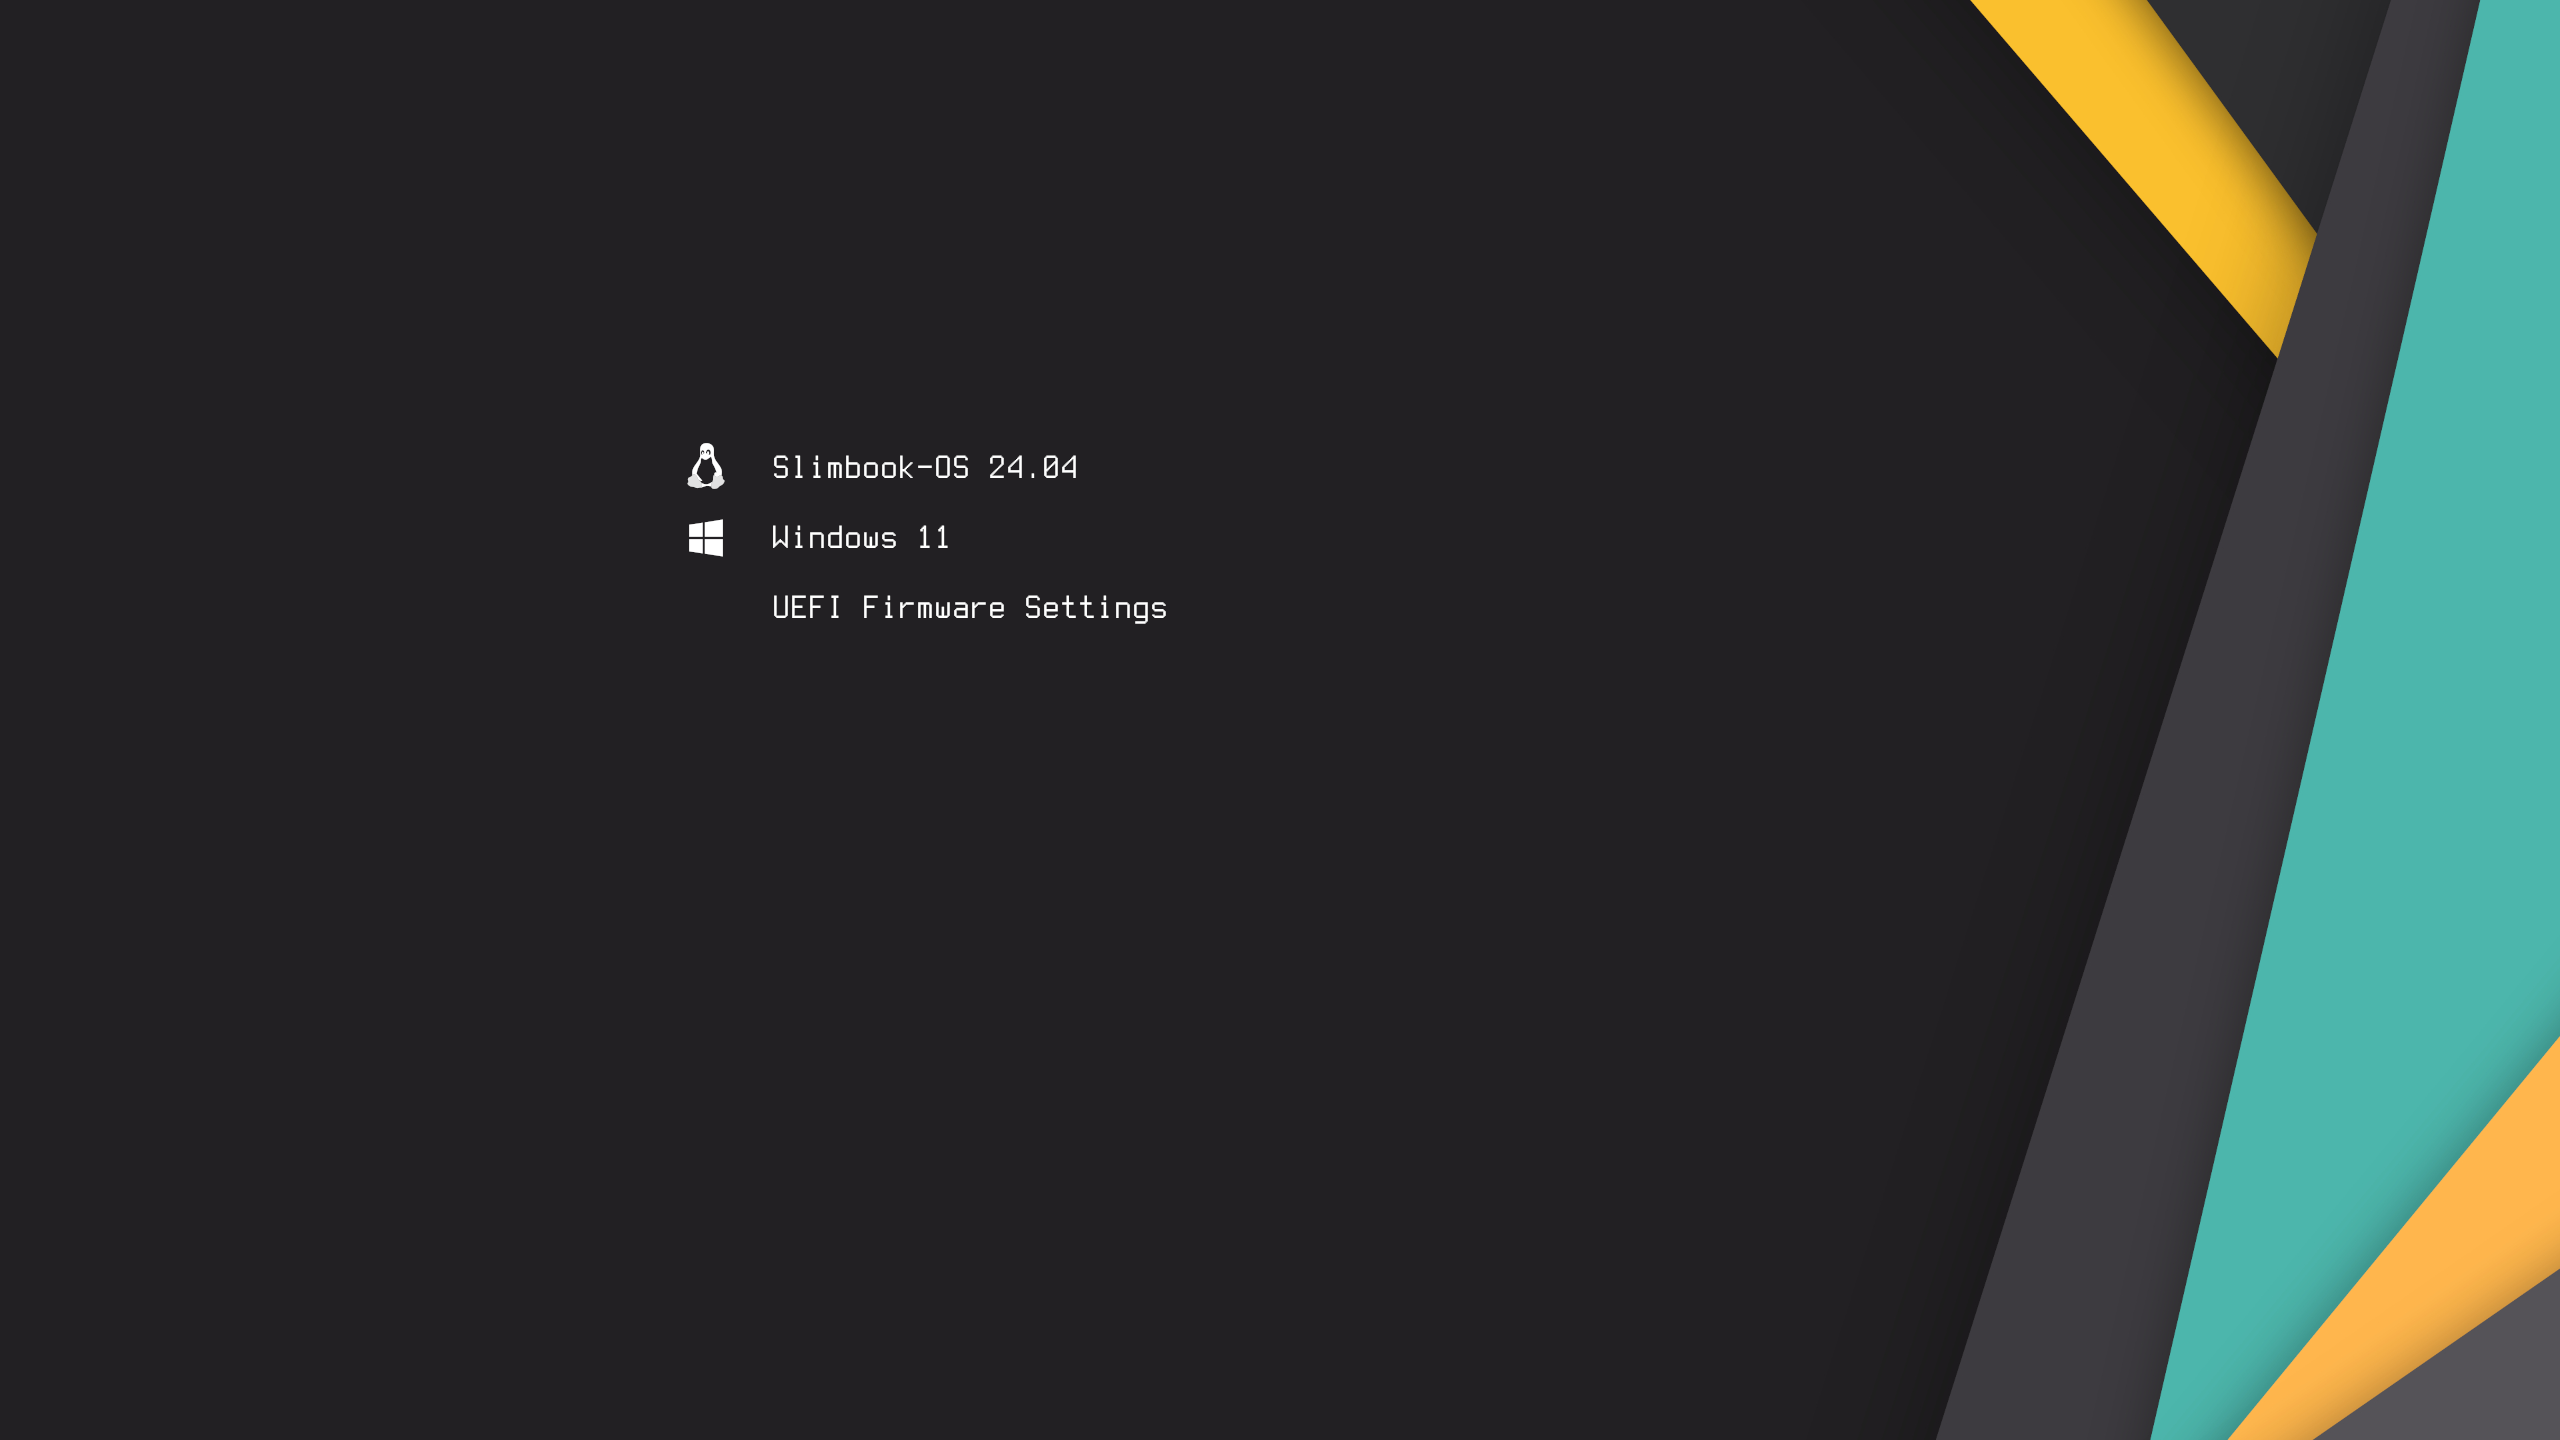
Customize Grub
Grub allows you to apply themes and customize the appearance of its boot manager. If you want a boot menu that is visually appealing and easy to navigate, you can customize with themes. A good source is Gnome-Look.org. In my example I downloaded Stylish-1080p.tar.xz from here.
mkdir -p /boot/grub/themes
cd /boot/grub/themes
tar xvf Stylish-1080p.tar.xz
I modify under /etc/default/grub.d, remove the one that came with my system and add the new one
rm /etc/default/grub.d/slimbook.cfg

cat /etc/default/grub.d/tema-grub.cfg

GRUB_THEME="/boot/grub/themes/Stylish/theme.txt"
I’ll leave here some changes I made at the end to the file /etc/default/grub for reference.
GRUB_DEFAULT="0"
GRUB_TIMEOUT="5"
GRUB_DISTRIBUTOR="Slimbook-OS"
GRUB_CMDLINE_LINUX_DEFAULT="quiet splash"
GRUB_CMDLINE_LINUX=""
GRUB_GFXMODE="1920x1080x32"
GRUB_GFXPAYLOAD_LINUX="1920x1080x32"
GRUB_INIT_TUNE="1000 334 1 334 1 0 1 334 1 0 1 261 1 334 1 0 1 392 2 0 4 196 2"
GRUB_ENABLE_BLSCFG="false"
I run the update and reboot
update-grub
reboot -f
Done, I now have dualboot. I continue with my next post, about how to configure and leave my Windows 11 as decent as possible.
About Dualboot and the Clock
Before finishing, here’s something you may need. When doing Dual Boot between Windows and Linux you may encounter an old and well-known problem where one of the two shows the wrong time.
The reason is that, by default, Windows tends to interpret the PC’s Hardware clock (RTC) as having your LOCAL time, while Linux tends to interpret the PC’s Hardware clock as having UTC time (which is how it should be).
- If the BIOS has LOCAL - Windows is happy, but Linux gets confused, shows the wrong time, unless NTP is properly configured (getting time from the internet).
- If the BIOS has UTC - Linux is happy, but Windows gets confused, shows the wrong time, unless NTP is working (careful! it doesn’t always happen)
If you do nothing and trust NTP and it works, apparently everything will be fine, but the reality is that it’s wrong, there’s no coherence. In fact this can mislead you in the future.
What should you do? There are several options and various articles out there (example here and here)
What I do in my case is be coherent: I set UTC in the BIOS and make a change in Windows.
- I set UTC time in the PC Hardware in BIOS. This is the recommendation, all Operating Systems internally use UTC always, file timestamps in the File System are always UTC. What it displays is another thing, which depends on the configured Timezone. Therefore, on my PC, I enter BIOS, and since I’m in Madrid in summer, I set it 2 hours behind. You can see the current UTC time here
- Linux: I do nothing, it’s what it expects and it adapts correctly, whether NTP is well or poorly configured.
- Windows: I tell it that the PC Hardware has universal time (UTC), not LOCAL.
regeditHKEY_LOCAL_MACHINE\SYSTEM\CurrentControlSet\Control\TimeZoneInformation- Add a string
RealTimeIsUniversalwith value1 - Reboot the machine
- On both, configure NTP Client, to synchronize their clocks with internet NTP servers
- On both, configure my Timezone, in my case to
Europe/Madridwith daylight saving time support.