In this post I explain how I configure a Windows 11 that I’m going to use for software development, testing or demos. I don’t need frills since it won’t have sensitive data, I want its essence, bare-bones, with few applications, some browsing and that’s it. In the end it became a technical exercise – removing everything I can, ads, Edge, extras, installing minimal drivers, a local account, having it boot and be available as soon as possible.
Note: a year later I decided to create a new decent Windows 11 (2025).
Windows post series
- Set up a PC for Dualboot Linux / Windows and install Windows 11 Pro.
- Configure a decent Windows 11 by removing the bloatware (New version).
- Set up Windows for software development, CLI, WSL2 and tools.
- Install VMWare Workstation Pro on Windows 11 with a Windows 11 Pro VM.
- Install Windows 11 VM on Proxmox to have a Windows 11 Pro on a Proxmox Host.
Introduction
What is debloating or removing bloatware? It refers to pre-installed applications and services in an operating system that, while not essential, consume resources and can affect system performance.
They are usually included due to commercial agreements/interests or to promote certain services, but in many cases they are unnecessary for the user. Bloatware in Windows is like junk in the sea: a mix of unnecessary elements that only get in the way, take up space and slow everything down. The debloat process consists of identifying and removing it, freeing resources and optimizing system performance.
There are tools that allow you to automate this entire process through scripts, making the task easier and ensuring a deeper cleanup. Here are some of the most recognized projects in the technical community – I don’t recommend any because honestly I haven’t used them yet.
- Chris Titus debloater: Comprehensive Windows utility that simplifies program installation, bloatware removal, custom tweaks and system update management. Executable from PowerShell with administrator privileges.
- Tiny 11 Builder. Automates the creation of an optimized Windows 11 image, removing unnecessary components to improve performance and reduce resource usage. The latest version has been completely revamped, allowing its use with any version, language or Windows 11 architecture, thanks to the PowerShell implementation.
- Win11Debloat: Another one that seems designed specifically for Windows 11. Facilitates the removal of unnecessary applications, disables telemetry and makes other adjustments to improve system performance.
- Windows10Debloater: This set of PowerShell scripts allows you to disable features, improve privacy and remove pre-installed applications in Windows 10 and 11. It seems to be widely used and recognized for its effectiveness.
- Debloat Windows 10/11 by Andrew Taylor: This script automates the removal of unnecessary applications, disables non-essential services and makes adjustments to optimize Windows 10 and 11 performance.
As I said, I haven’t used any of them yet, but the day I do I’ll study them thoroughly, including the source code, follow the instructions and make a backup before running them, as some modifications can be irreversible and affect system stability.
First Steps
From here I focus on my manual process. It has less risk because you can see what I’m doing, but it’s much longer. I start from a fresh Windows 11 install. It might work for one you’ve been working with for a while, but I haven’t tested that. In my case I did it after installing Dualboot Linux Windows or VMWare on Windows, meaning freshly installed on bare metal or in a VM.
The basics before tackling the bloatware.
- I install one of these browsers: Vivaldi, Chrome, Brave and Firefox, Opera.
- I downloaded it from Edge (saying no to everything it proposes by the way)
- During installation it offers to change the default browser.
Settings > Apps > Default apps> Google Chrome.- I set Chrome as the default
- I take the opportunity to change all extensions (the ones it lets me) to Chrome.
| Note: Why don’t I use Edge? I know Edge uses WebView2, which is based on Chromium (open source project), uses Blink as its rendering engine and V8 as its JavaScript engine. So far so good, it seems like the best option for Windows, but therein lies its problem – it’s single-platform, very insular. In my case I want a single browsing platform with profile support, super compatible and cross-platform (Windows, Linux, MacOS). That’s where those projects I mention come in, which also all (except Firefox) use Chromium. For now I’m using Google Chrome, but keeping an eye on Vivaldi, which is honestly an impressive piece of work. |
- I install 7-Zip from 7-Zip.org, it’s a classic.
Keyboard and Mouse
- This is very specific to my case, so skip it if it doesn’t apply.
- During the dualboot installation I used wired USB Mouse/Keyboard and after finishing I added a Logitech Mouse (with a USB dongle) and the Logitech K380 keyboard via Bluetooth
Start > Settings > Bluetooth & devices > Add device > Bluetooth
- At the end of the post I explain why and how I install an Apple Magic Trackpad 2
Windows Activation
On my bare metal Windows I bought a license, but for VMs or lab equipment there’s the famous Microsoft Activation Script (MAS). It’s not that I recommend it, it’s just there, accessible and public. I’m only sharing what’s already out there on the internet.
- Option 1: Buy a digital copy of Windows 11 Pro retail from an authorized retailer. It’s cheap and affordable, you receive an email with the product key.
Start > Settings > System Activation > Change product key, I add the received key and it’s activated.
- Option 2: Microsoft Activation Script (MAS), an open-source activator for Windows and Office that includes HWID, Ohook, TSforge, KMS38 and Online KMS activation methods.
- Following their documentation, this is how you license a Windows 11 Pro VM:
- Right-click on the start menu ->
Terminal (admin) - Run the following command:
irm https://get.activated.win | iex - Among the activation options, select
(1) HWID for Windows activationand it’s activated.
- Right-click on the start menu ->
- Following their documentation, this is how you license a Windows 11 Pro VM:
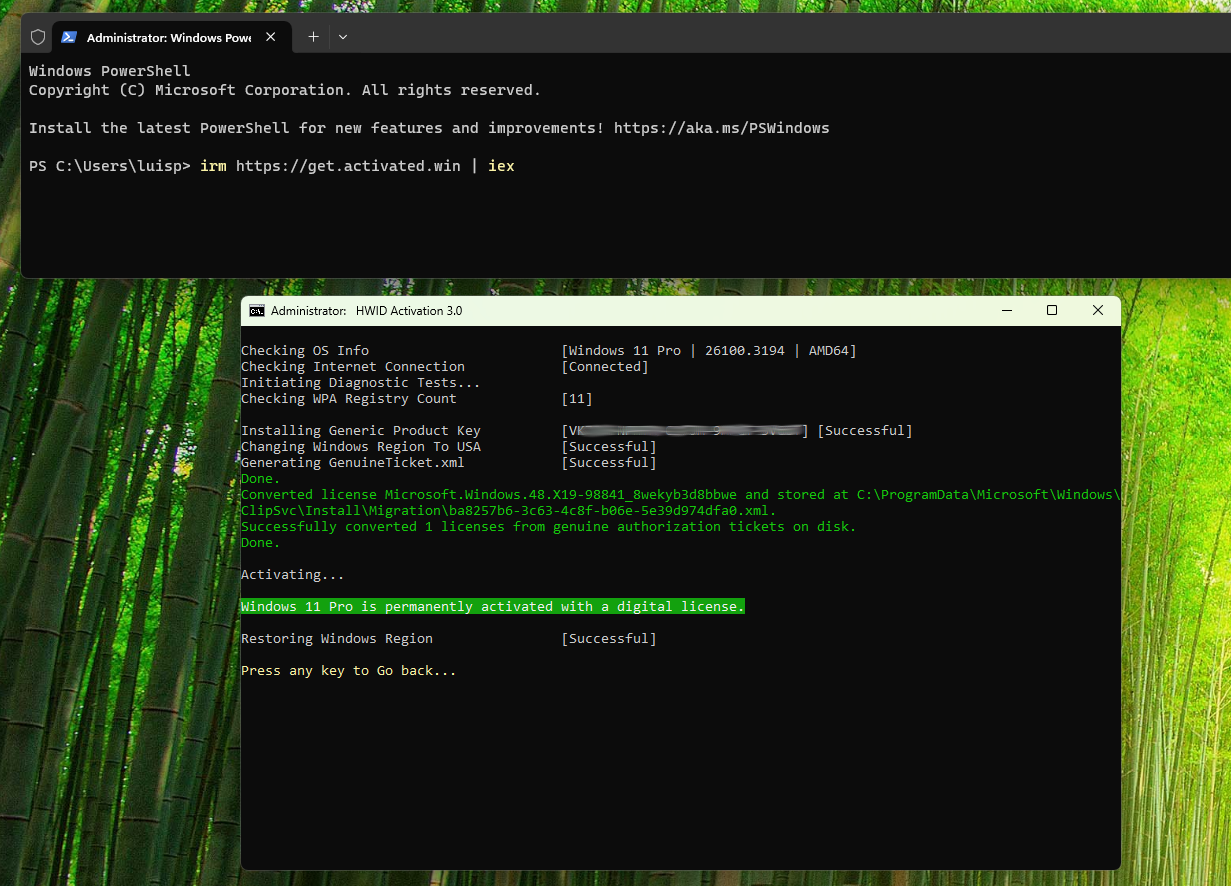
To check activation status: Start > Settings > Activation
Manual Debloat
I start with security changes
- Start > Settings > Privacy & Security
- Security > Windows Security >
Open Windows Security: Everything On - Security >
Location: Everything Off - Security >
Windows Permissions: All OffGeneral, Speech, Inking, everything OffDiagnostics: everything off and Feedback frequency: Never.- Activity,
Search permissions, Searching Windows: everything off
- Security >
App Permissions: Location Off, the rest at default values
- Security > Windows Security >
- Start > Settings > Apps
Startup> Remove all, especially Edge- Exception: leave Security notification icon
- Exception: leave VMWare Tools Core Service if installing in a Windows VM.
Default apps> Microsoft Edge : Verify everything is ChromeApps for Websites> everything off
Configure it to not ask every time I want to launch an App
Start > search for "User Account Control settings"> Never notify
Remove the PIN, I don’t want it. This will force me (for a while) to log in with my Microsoft account but I’ll immediately change that too.
- Start > Settings > Accounts >
Sign-in options- Disable
For improved security, only allow Windows Hello sign-in... - Remove PIN > Remove. It asks for my Microsoft user password.
- In
If you've been away, when should Windows ...I set it to “Never”, so it doesn’t ask for login when waking up.
- Disable
Change my user’s Home and switch to local user login. During installation it forced me to do 2 things I don’t like: 1) use a Microsoft account with a registered email. 2) it created the short username with the first 5 characters of that email, so it ended up as luisp and my user’s HOME at C:\Users\luisp\.
- [Optional] Change the HOME directory name (guide)
- Enable the Administrator
net user Administrator /active:yes
- Reboot the computer, log in with Administrator without password
- CMD >
wmic useraccount get name,SID regedit->HKLM\SOFTWARE\Microsoft\Windows NT\CurrentVersion\ProfileList\S-1* -> ProfileImagePath- Explorer -> Rename the HOME
- CMD
mklink /d "C:\Users\luisp" "C:\Users\luis"
- CMD >
- Enable the Administrator
Switch to local account
- Switch to Local Account, instead of using a Microsoft Account to log into the machine
Start > Settings > Account > Account Settings > Your Info- Switch to local account,
Microsoft Account>Sign in with local account: I create a userluis, set a password.
- If I’m on a Virtual Machine with VMWare Workstation, I can take the opportunity to enable Autologin on the VM
- With the VM running: VMWare Workstation Pro > right-click on the VM >
Settings>Options>Autologin. - Once it asks for the username/password (same as the local account), I reboot the VM and see it does autologin!
- With the VM running: VMWare Workstation Pro > right-click on the VM >
PowerShell 7.
- By default the machine comes with
CMDandPowerShell 5(to check the PS version I used the command:$PSVersionTable) - From PowerShell Tags I download the latest version from the “Downloads” link (
PowerShell-7.4.5-win-x64.msi) and install it.
Remove ads and miscellaneous
Some I’ve marked as [Optional] because in subsequent Windows installations I stopped doing them
- Remove Ads from Lock Screen
- Start > Settings > Personalization
- Personalize your lock screen: I select a photo
- Get fun facts, tips, tricks, and more on your lock screen: uncheck the box
- Start > Settings > Personalization
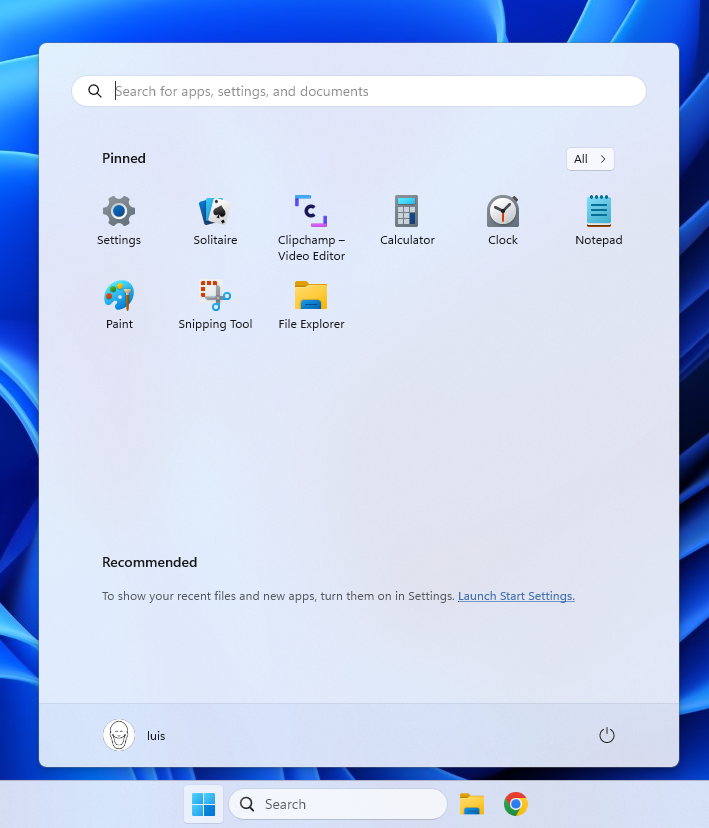
- Remove Ads/Apps from Start
- Start > Right-click on the icons I want to Unpin or “Uninstall” (for example in my case I removed Xbox, Spotify, …)
- Remove Ads from search
- Start > Settings > Privacy and Security > “Search Permissions”, I make sure everything is off
- Remove Ads from Widgets
- Start > Settings > “Personalization” > “Taskbar”
- Under “Taskbar items” remove Widgets
- Start > Settings > “Personalization” > “Taskbar”
- Remove Widget content
- Press Windows+W key, opens Widgets
- Click on the Profile Icon (top right), Sign-out button.
- Run Local Group Policy Editor
gpedit.mscComputer Configuration\Administrative Templates\Windows Components\Widgets>Allow Widgetsdisabled.- Reboot. After booting you’ll see that Windows+W has stopped working!
- Remove Ads from Explorer
- Window + E > three horizontal dots > Options > View > Uncheck “Show sync provider notifications” > Apply and Ok.
- Remove Notification Ads
- Start > Settings > System > Notifications > Additional Settings > Uncheck all three options that appear
- Remove “Device Usage Settings” (already done, I verify)
- Start > Settings > Personalization > Device Usage > Remove all.
- Remove suggested content (already done, I verify)
- Start > Settings > Privacy and Security > General > Make sure “Show me notifications in the Settings app” is disabled
- Remove Ads from Diagnostic Data (already done, I verify)
- Start > Settings > Privacy and Security > Diagnostics & feedback > Tailored experiences > Let Microsoft use your diagnostic data - Off
- In fact I have all options under Diagnostics & feedback set to Off
- [Optional] Remove the Recycle Bin from the Desktop
- Start > Settings > Personalization > Themes > Desktop icon settings > Uncheck the Recycle Bin checkbox
- Add the recycle bin to Explorer (so it appears in “This PC”)
regedit->HKLM\SOFTWARE\Microsoft\Windows\CurrentVersion\Explorer\MyComputer\NameSpace- New Key:
{645FF040-5081-101B-9F08-00AA002F954E} - Reboot
- Customize the Taskbar
- Right-click icons on the taskbar and one by one remove icons I don’t use.
- Start > type “Start settings” >
- Layout > More pins
- Show recently added apps > Off
- Show recommendations .. > Off
- Show account notifications > Off
- Show recently opened > Off
- Remove the US keyboard that was installed by default.
- Start > Settings > Time & Language > Language & Region > Preferred Languages > “…” > Options > Keyboards > Remove US (keep only the Spanish one)
- [Optional] Add “Turn off display” to the desktop context menu
- Follow this guide from here
Update the operating system
- It’s about time, Start > type “Update” > Check for Updates > Do all the updates/reboots it asks for.
Uninstall Apps
Having things regulated in Europe has its benefits :-), in Europe it’s possible to uninstall Edge and other applications from the Operating System itself.
- No comment. Start > Settings > Apps > Installed Apps
- Microsoft Edge > Uninstall, reboot the machine
- Microsoft Edge Update > Can’t Uninstall
- Microsoft Edge WebView2 > Can’t Uninstall
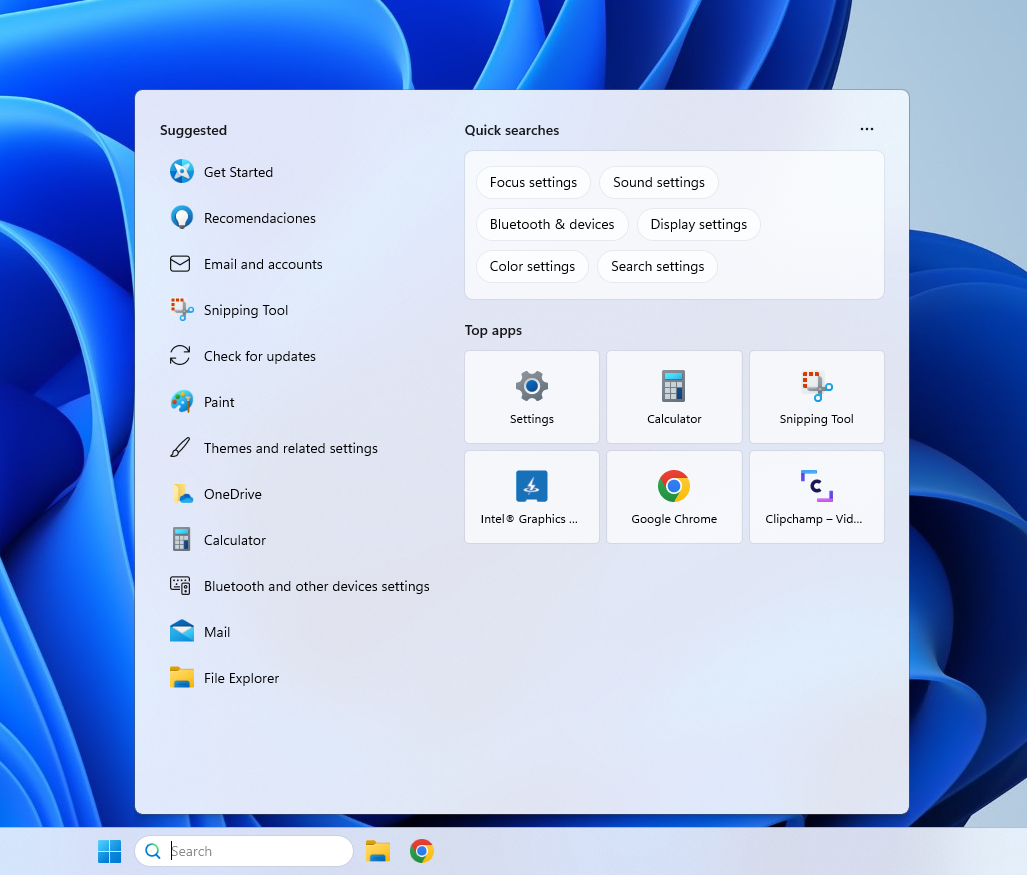
If I now go into “search” I’m already starting to see the effects, less and less bloatware.
- [Optional] When installing Windows in a Virtual Machine, at this step I also remove applications I’ll never use
- Microsoft News, Microsoft Bing, Microsoft To Do, Microsoft Outlook,
- Weather, Xbox, Xbox Live, Microsoft Teams, Microsoft 365 Office.
File Explorer. Show hidden files and directories, file extensions, etc.
- Start > Settings >
System>For developers- Enable developer mode if it wasn’t already.
- Enter >
File ExplorerShow file extensions: OnShow hidden and system files: OnShow full path in title bar: OnShow empty drives: On
Enable File Sharing. This is something I’ll need, so I configure it
- Start > Settings >
Network and Internet>Advanced network settingsAdvanced Sharing SettingsFile & Printer sharing: OnPublic folder sharing: On
- Start > Settings > System > About
Advanced System Settings> Computer Name > Change > “I make sure it’s in WORKGROUP”
- Enable SMB1.0
- Start > search “Control Panel”
Programs>Programs and featuresTurn Windows features on or off- Enable SMB 1.0/CIFS File Sharing Support.
Windows Firewall
- I configure it to minimize alerts and notifications. In my case the computer is connected to a private network but by default the installation set it as Public
- Start > Settings > Network & Internet > Ethernet (and also WiFi)
- Change both to
Private Network
- Change both to
- Start > Settings > Network & Internet > Ethernet (and also WiFi)
- Configure the Windows Firewall to minimize alerts and notifications
- Start > search “Control Panel” > System & Security > Windows Defender Firewall > Advanced Settings"
- Review inbound and outbound rules to block or allow specific applications as needed.
- Start > search “Control Panel” > System & Security > Windows Defender Firewall > Change notification settings"
- Disable notifications, uncheck the boxes for “Notify me when Windows Defender Firewall blocks a new app”
- Start > search “Control Panel” > System & Security > Windows Defender Firewall > Advanced Settings"
Installing PowerToys
Microsoft PowerToys are a set of utilities for power users to enhance and optimize their Windows experience to increase productivity. I install from the official page. Some that I like include advanced paste, editing the hosts file.
An interesting use case is keyboard remapping. I have a post where I describe how I use Barrier to mimic KVM functionality, at the end of which I cover the remapping topic.
Visual Studio Code: Also needs no introduction, a source code editor that includes an integrated terminal. I can open different integrated terminals within the same VS Code window, like CMD, PowerShell, Git Bash or WSL.
It supports a wide variety of programming languages and a huge number of extensions to enhance its functionality. I install from the official Visual Studio Code site.
Going the Extra Mile
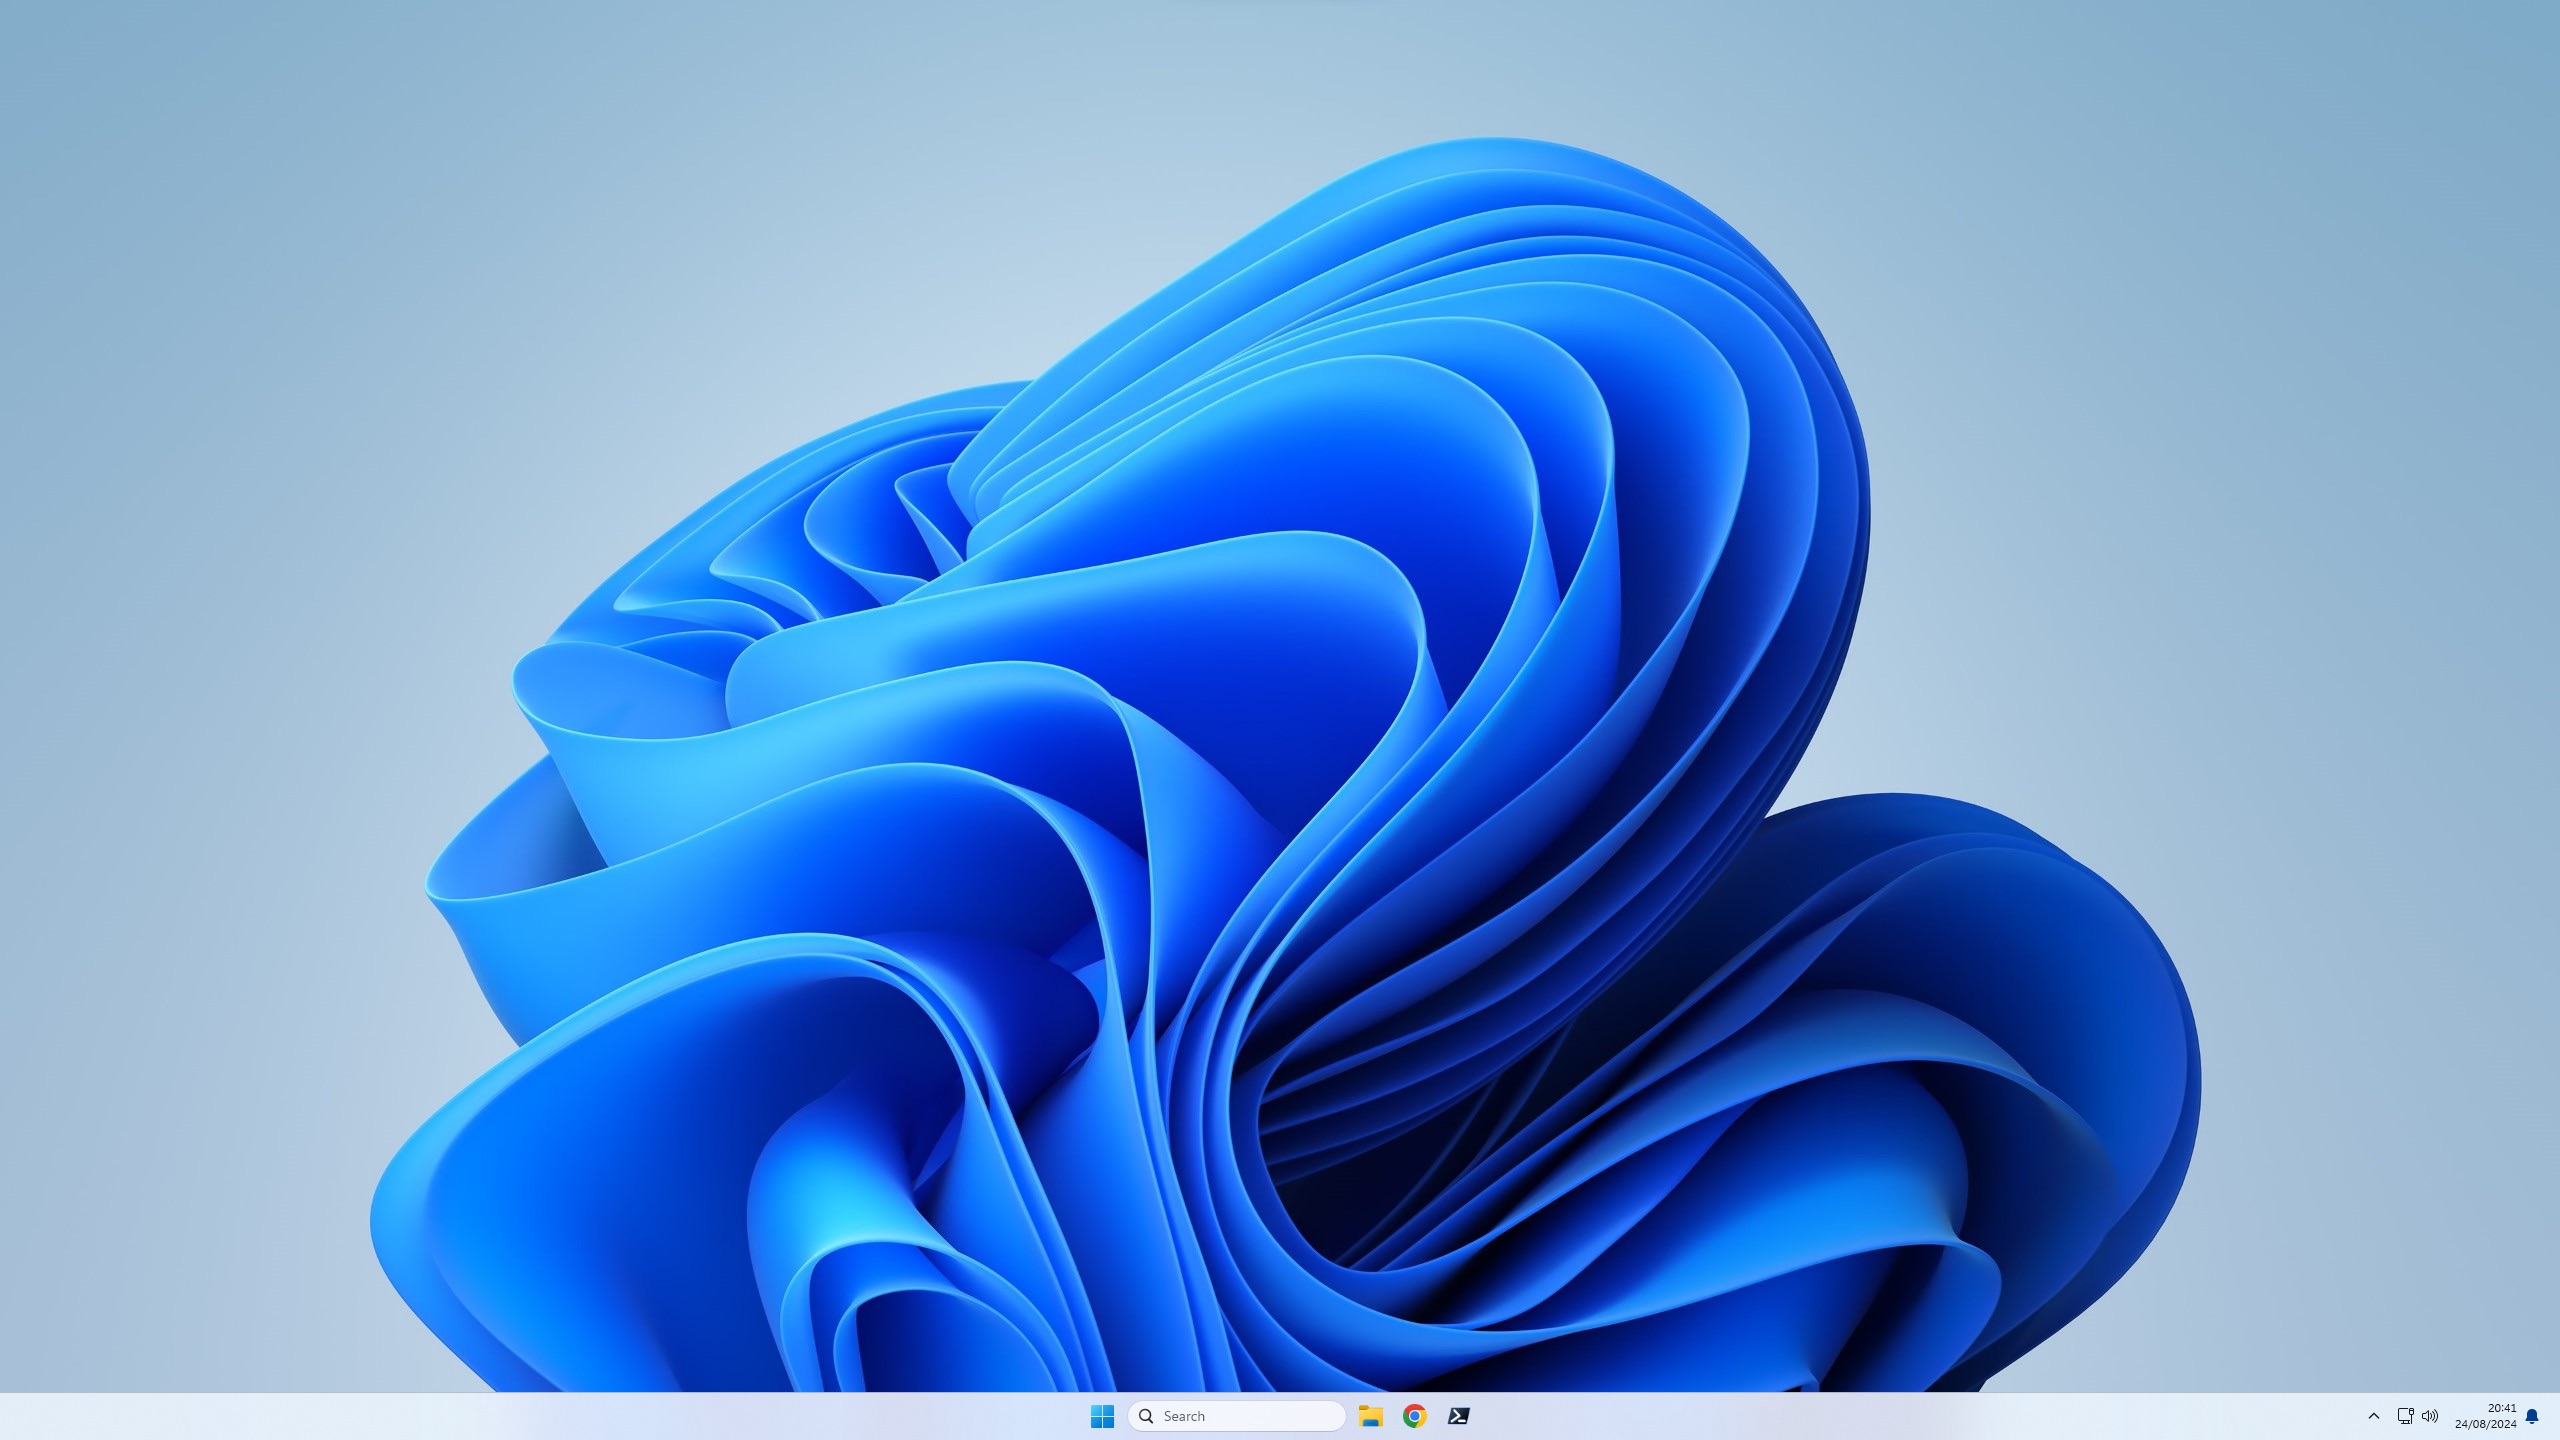
Following the steps above I get a much cleaner, faster Windows 11 free of distractions. In addition to the optimizations mentioned, here are some additional tweaks that can take you one step further – keep in mind that from here on it’s a personal decision.
Disable Cortana
- Search for “gpedit.msc” in the start menu and open the Local Group Policy Editor.
- Navigate to “Computer Configuration > Administrative Templates > Windows Components > Search”.
- Double-click “Allow Cortana” and select “Disabled”. Apply the changes to disable Cortana.
Remove more pre-installed applications
- Remove pre-installed applications (bloatware or crapware) via PowerShell.
- What to uninstall? Depending on your PC manufacturer you can check out Should I Remove It? which is not bad and gives you guidance.
- You can use PowerShell as administrator. Command to list all installed applications
Get-AppxPackage | Select Name, PackageFullName
- Then, use this command to uninstall the applications you don’t need
Get-AppxPackage *AppName* | Remove-AppxPackage
Disable telemetry and data collection
- With what I did before regarding Diagnostics & feedback it should be sufficient, but I confirm by opening
gpedit.msc, checking if it exists:Computer Configuration > Administrative Templates > Windows Components > Data Collection and Preview Builds- If
Allow Telemetryexists, I select “Disabled”. This ensures Windows doesn’t collect data about my usage.
Disable unnecessary services
- Open
services.mscfrom the start menu.- Identify services I don’t need (for example, “xbox*”, etc.). Double-click on the service, change the “Startup type” to “Disabled” and apply the changes.
With these additional recommendations, the system will be ready to offer a more direct user experience, without unnecessary distractions or interruptions.
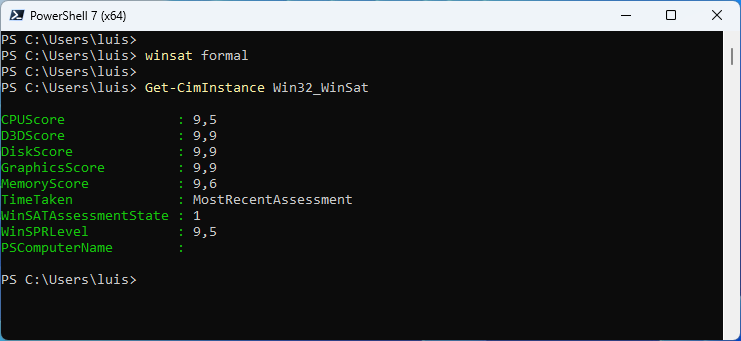
I run the Windows System Assessment Tests (WinSAT) used to analyze the performance of various system components, such as CPU, memory, disk and graphics.
C:\Users\luis> winsat formal
C:\Users\luis> Get-CimInstance Win32_WinSat
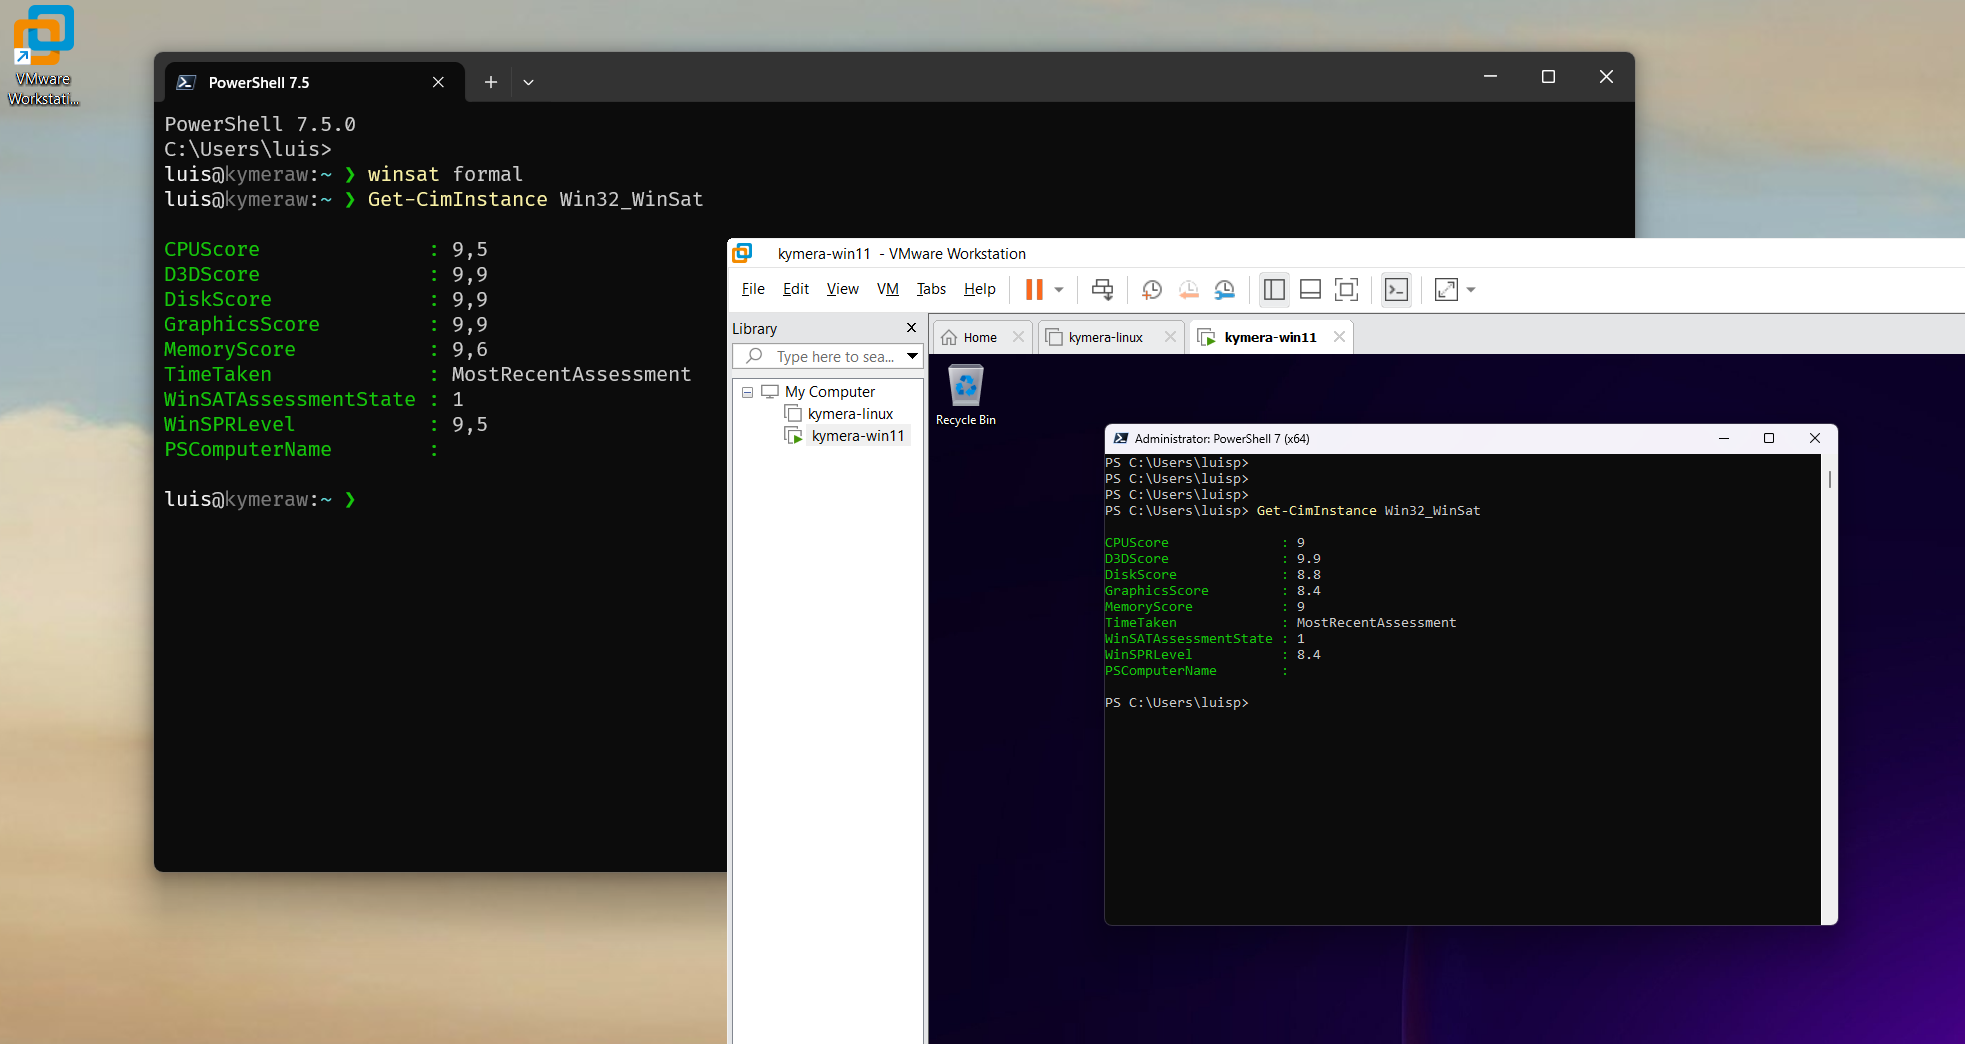
I followed the same steps to optimize a Windows virtual machine running on an optimized Windows, as you can see the virtual machine performance is very decent.
Maintenance: Useful Commands
Before finishing the post, here are some useful commands that I run as administrator
chkdsk: Checks the hard drive status and shows us a report with the necessary information. It also fixes problems and can even recover lost information.dism /online /cleanup-image /restorehealth: Connects to the Windows Update service to download and replace any important missing or corrupt files.sfc. Analyzes the integrity of all system files and fixes problems with them. WARNING!!: Microsoft has a known issue that has gone unresolved for years. In fact it happened to me. When running it for the first time:sfc /SCANNOWfinds a problem in the filebthmodem.sysand removes it.- It indicates it found corruption and if you look at its log
\Windows\Logs\CBS\CBS.logyou’ll see it refers toCorrupt File: bthmodem.sys. - Run
dism /online /cleanup-image /restorehealthto resolve the issue.
- It indicates it found corruption and if you look at its log
Customizations
I’ll wrap up the post here, what follows are some things I did in my case that I want to have documented.
Installing Barrier for Software KVM
What I describe now has nothing to do with a “decent” Windows, so you can skip it. It’s for me to remember how I solved a need. I work with two computers (Mac mini and PC with dualboot Windows / Linux), each with its own monitor. My goal is to have a software KVM to share the Keyboard and Mouse.
- I install Barrier.
- During installation it asks
Enable autoconfig and install Bonjour, I say Yes.
- During installation it asks
| Note: Ideally I’d configure the Mac as Server to use its keyboard and trackpad (with all its bells and whistles). But, the AltGr Keys \|@#[]{}~ and < > can’t be generated on the PC. I’ve dedicated many hours investigating this topic and can’t find the solution. |
The best option I’ve found is using the PC as Server (Windows or Linux). I installed an Apple Magic Trackpad 2 so the experience (controlling the Mac from the PC’s keyboard/mouse) is as similar as possible.
Drivers for Magic Trackpad 2
Again, another need I took the opportunity to document, because I went through quite an ordeal to get it working. There are multiple articles on the internet about how to use the Apple Magic Trackpad 2 on a PC with Windows. What worked for me is the following, which I got from here:
- I specifically download the Apple 6.1.8000.6 version from 07/4/22 from the official Apple site
- Extract with 7-Zip to subdirectory
AppleBcUpdate - Connect the Magic Trackpad 2 via Bluetooth (not cable),
Setting > Bluetooth > Add device > Bluetooth, turn on the MT2 and pair it. - Install the Drivers, one after another, without rebooting (enable viewing
.inffiles in ExplorerView > Show > Filename extensions)- First the USB one, under the directory
ApplePrecisionTrackpadUSBright-click onApplePrecisionTrackpadUSB.inf-> Install - Then the Bluetooth one, under the directory
ApplePrecisionTrackpadBluetoothright-click onApplePrecisionTrackpadBluetooth.inf-> Install
- First the USB one, under the directory
- Reboot
- The Trackpad (Windows calls it Touchpad) works perfectly.
- You can access the precision settings in
Settings > Bluetooth & devices > Touchpad.
Important: if you installed old drivers or tested with third-party drivers, uninstall them before doing the steps above. It happened to me:
- List installed drivers and note the value of the Published Name column for the one you want to uninstall (in my case it was
oem19.inf)
dism /Online /Get-Drivers /Format:Table
:
-------------- | ------------------ | ----- | ----------------- | -------------------- | ---------- | ---------------
| Published Name | Original File Name | Inbox | Class Name | Provider Name | Date | Version |
| -------------- | ------------------ | ----- | ---------- | ------------- | ---- | ------- |
:
oem19.inf      | applewtp64.inf     | No    | HIDClass          | Apple Inc.           | 29/10/2011 | 5.0.0.0
:
- I uninstalled it with
pnputil /delete-driver oem19.inf /uninstall(you can add/forceif needed). I rebooted the machine before proceeding with the installation mentioned above.
Useful Tools
To finish, useful tools I always install:
- 7-Zip.org: Already mentioned, it’s a staple for me
- Clink: Enormously enriches CMD (
command.com) with a readline like Linux, adds multiple functionalities, colors, history. - Ccleaner Looks very good, although to access the “cool” stuff you need to buy the Professional license.
- BleachBit An Open Source alternative to CCleaner, which looks fantastic. It lacks the Registry and Performance Optimization parts.
- Before installing the latest version, you need to download the Visual Studio 2019 (VC++ 10.0) redistributable SP1 x86, this is the x86 version. Even though my system is 64-bit it doesn’t matter because it will use the x86 version dll.
- TCPView Free Microsoft tool (from the Sysinternals suite) that lets you see all active network connections on your Windows system in real time.
- Autoruns Free Microsoft Sysinternals tool that shows you everything that runs automatically when you start Windows. It’s much more powerful and complete than Task Manager or MSConfig.
- Sysinternals Suite If the previous two aren’t enough, you can install the big brother, the Sysinternals Suite, which includes them. They are the set of advanced tools originally created by Mark Russinovich and Bryce Cogswell, and now maintained by Microsoft. They are designed to diagnose, monitor, debug and deeply understand how Windows works.