I set up Windows 11 as a cross-platform development machine (Linux, macOS, and Windows), not Microsoft-only. Starting from a clean English install, tuned lightly (optionally after a dualboot). The post starts with the CLI and WSL2 and ends with the tools and programming languages.
Windows series
- Preparing a PC for Dualboot Linux / Windows and installing Windows 11 Pro.
- Configuring a decent Windows 11 by removing the cruft.
- Preparing Windows for software development: CLI, WSL2, and tools.
- Installing VMWare Workstation Pro on Windows 11 with a Windows 11 Pro VM.
- Installing a Windows 11 VM on Proxmox to run Windows 11 Pro on top of a Proxmox host.
Note: sibling posts for setting up each OS for development: macOS and Linux.
A note on PATH
On Linux and macOS modifying the PATH is straightforward. On Windows there are two: User and System, which are merged. Throughout the post the PATH gets modified several times — here’s the way:
Start > Settings > System > About > Advanced System Settings(or search “Environment Variables” inSearch).- Edit under
System variablesand/orUser variables. - My final PATH as an example: Gist.
CLI
For cross-platform development, the command line is fundamental. I install these CLIs:
- CMD (
cmd.exe): traditional Windows command line; scripts are the classic*.BAT, *.CMD. - PowerShell: Microsoft’s advanced scripting and command-line environment.
- Git for Windows: in addition to
git.exe, it ships Git Bash, a Bash-emulator terminal for Windows with native “linux” command executables under/c/Program Files/Git/usr/bin. - Windows Terminal: a modern app with multiple tabs for
CMD,PowerShell,WSL,Git Bash, etc. Highly customizable with support for themes and font configuration. Covered in detail below. - Windows Subsystem for Linux (WSL 2): runs a native Linux environment on Windows without needing a VM. You can install Linux distros (Ubuntu, Debian, etc.) and use a Unix shell (
zshorbash) along with the entire open-source Linux command-line toolchain (ls, cd, mkdir, cp, tar, sed, awk, nano, vi, etc.). Fully integrated with the Windows file system (except permissions).

PowerShell
More powerful than CMD, it supports more complex commands, scripts, and access to the .NET framework. Scripts end in *.PS1. Very useful for developers working exclusively with .NET, C#, in Microsoft-only environments, for automation, and for the DevOps CI world on Windows/Azure.
There are two executables:
Windows 11 ships with PowerShell 5.x (powershell.exe), known as “Desktop”. Runs exclusively on Windows.
- Based on the PowerShell 5.1 engine.
- Fully integrated with Windows, supporting all Windows-specific features, modules, and cmdlets.
- Runs on .NET Framework.
- Ideal for managing Windows environments, including Active Directory, Exchange, and other Windows-specific services.
PowerShell 7: (pwsh.exe), known as “Core”. Cross-platform (Windows, macOS, Linux).
- Based on the PowerShell 6.0+ engine.
- Designed to be more modular and lightweight, though it may lack some Windows-specific features and modules.
- Runs on .NET Core (now .NET 5+).
- Suitable for mixed environments, including cloud services and non-Windows systems.
Install PowerShell 7 > “Downloads” > latest .msi. From then on, it notifies you about updates — download, install, done.
luis@kymeraw:~ ❯ $PSVersionTable

Name                           Value
----                           -----
PSVersion                      7.5.1
PSEdition                      Core
:
PowerShell startup profiles ($PROFILE):
PowerShell loads up to four profile files in this order, unless the -NoProfile parameter is used:
| Order | Scope | Host type | Path |
|---|---|---|---|
| 1 | Global | All hosts | $PSHOME\Microsoft.PowerShell_profile.ps1 |
| 2 | Current user | All hosts | $HOME\Documents\PowerShell\profile.ps1 |
| 3 | Current user | Specific host | $HOME\Documents\PowerShell\Microsoft.PowerShell_profile.ps1 (or VSCode_profile.ps1, ConsoleHost_profile.ps1, etc.) |
| 4 | Global | Specific host | $PSHOME\Microsoft.PowerShell_profile.ps1(host-specific variant) |
$PROFILEis an automatic variable pointing to the current user/host profile ($HOME\Documents\PowerShell\Microsoft.PowerShell_profile.ps1). You can see all paths with:$PROFILE | Format-List *
I use a single file, always at $PROFILE. Here’s a link to my devcli project on GitHub with my latest version of the file — edit yours with code $PROFILE:
Improved terminal
Windows Terminal
Install Windows Terminal for multiple tabs across CMD, PowerShell, WSL, [Git Bash](https://git-scm.com/install/windows), or any other terminal out there. Customizable and with advanced features like themes and font configuration.
- Microsoft Store:
Start> search “Store” > search “Windows Terminal”. Install or Update. Start> search “Terminal”. Open settings > down-arrow >SettingsorCtrl + ,.- Configure console profiles:
- In the left pane, you’ll see profiles like
Windows PowerShell,CMD,Ubuntu, etc. Customize each one here. - Default shell: to always open a specific profile at startup, select it under “Startup” → “Default profile”.
- In the left pane, you’ll see profiles like
- Customize appearance:
- Theme, font, color scheme, and more per profile.
- Add more consoles (optional).
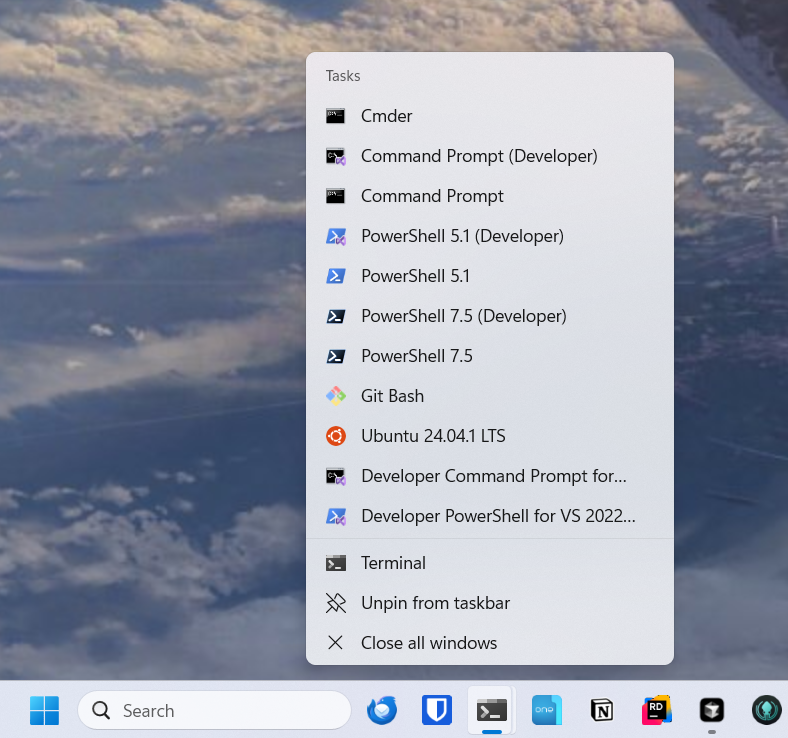
Pin Windows Terminal to the Taskbar: after launching, right-click the icon, “Pin to taskbar”.
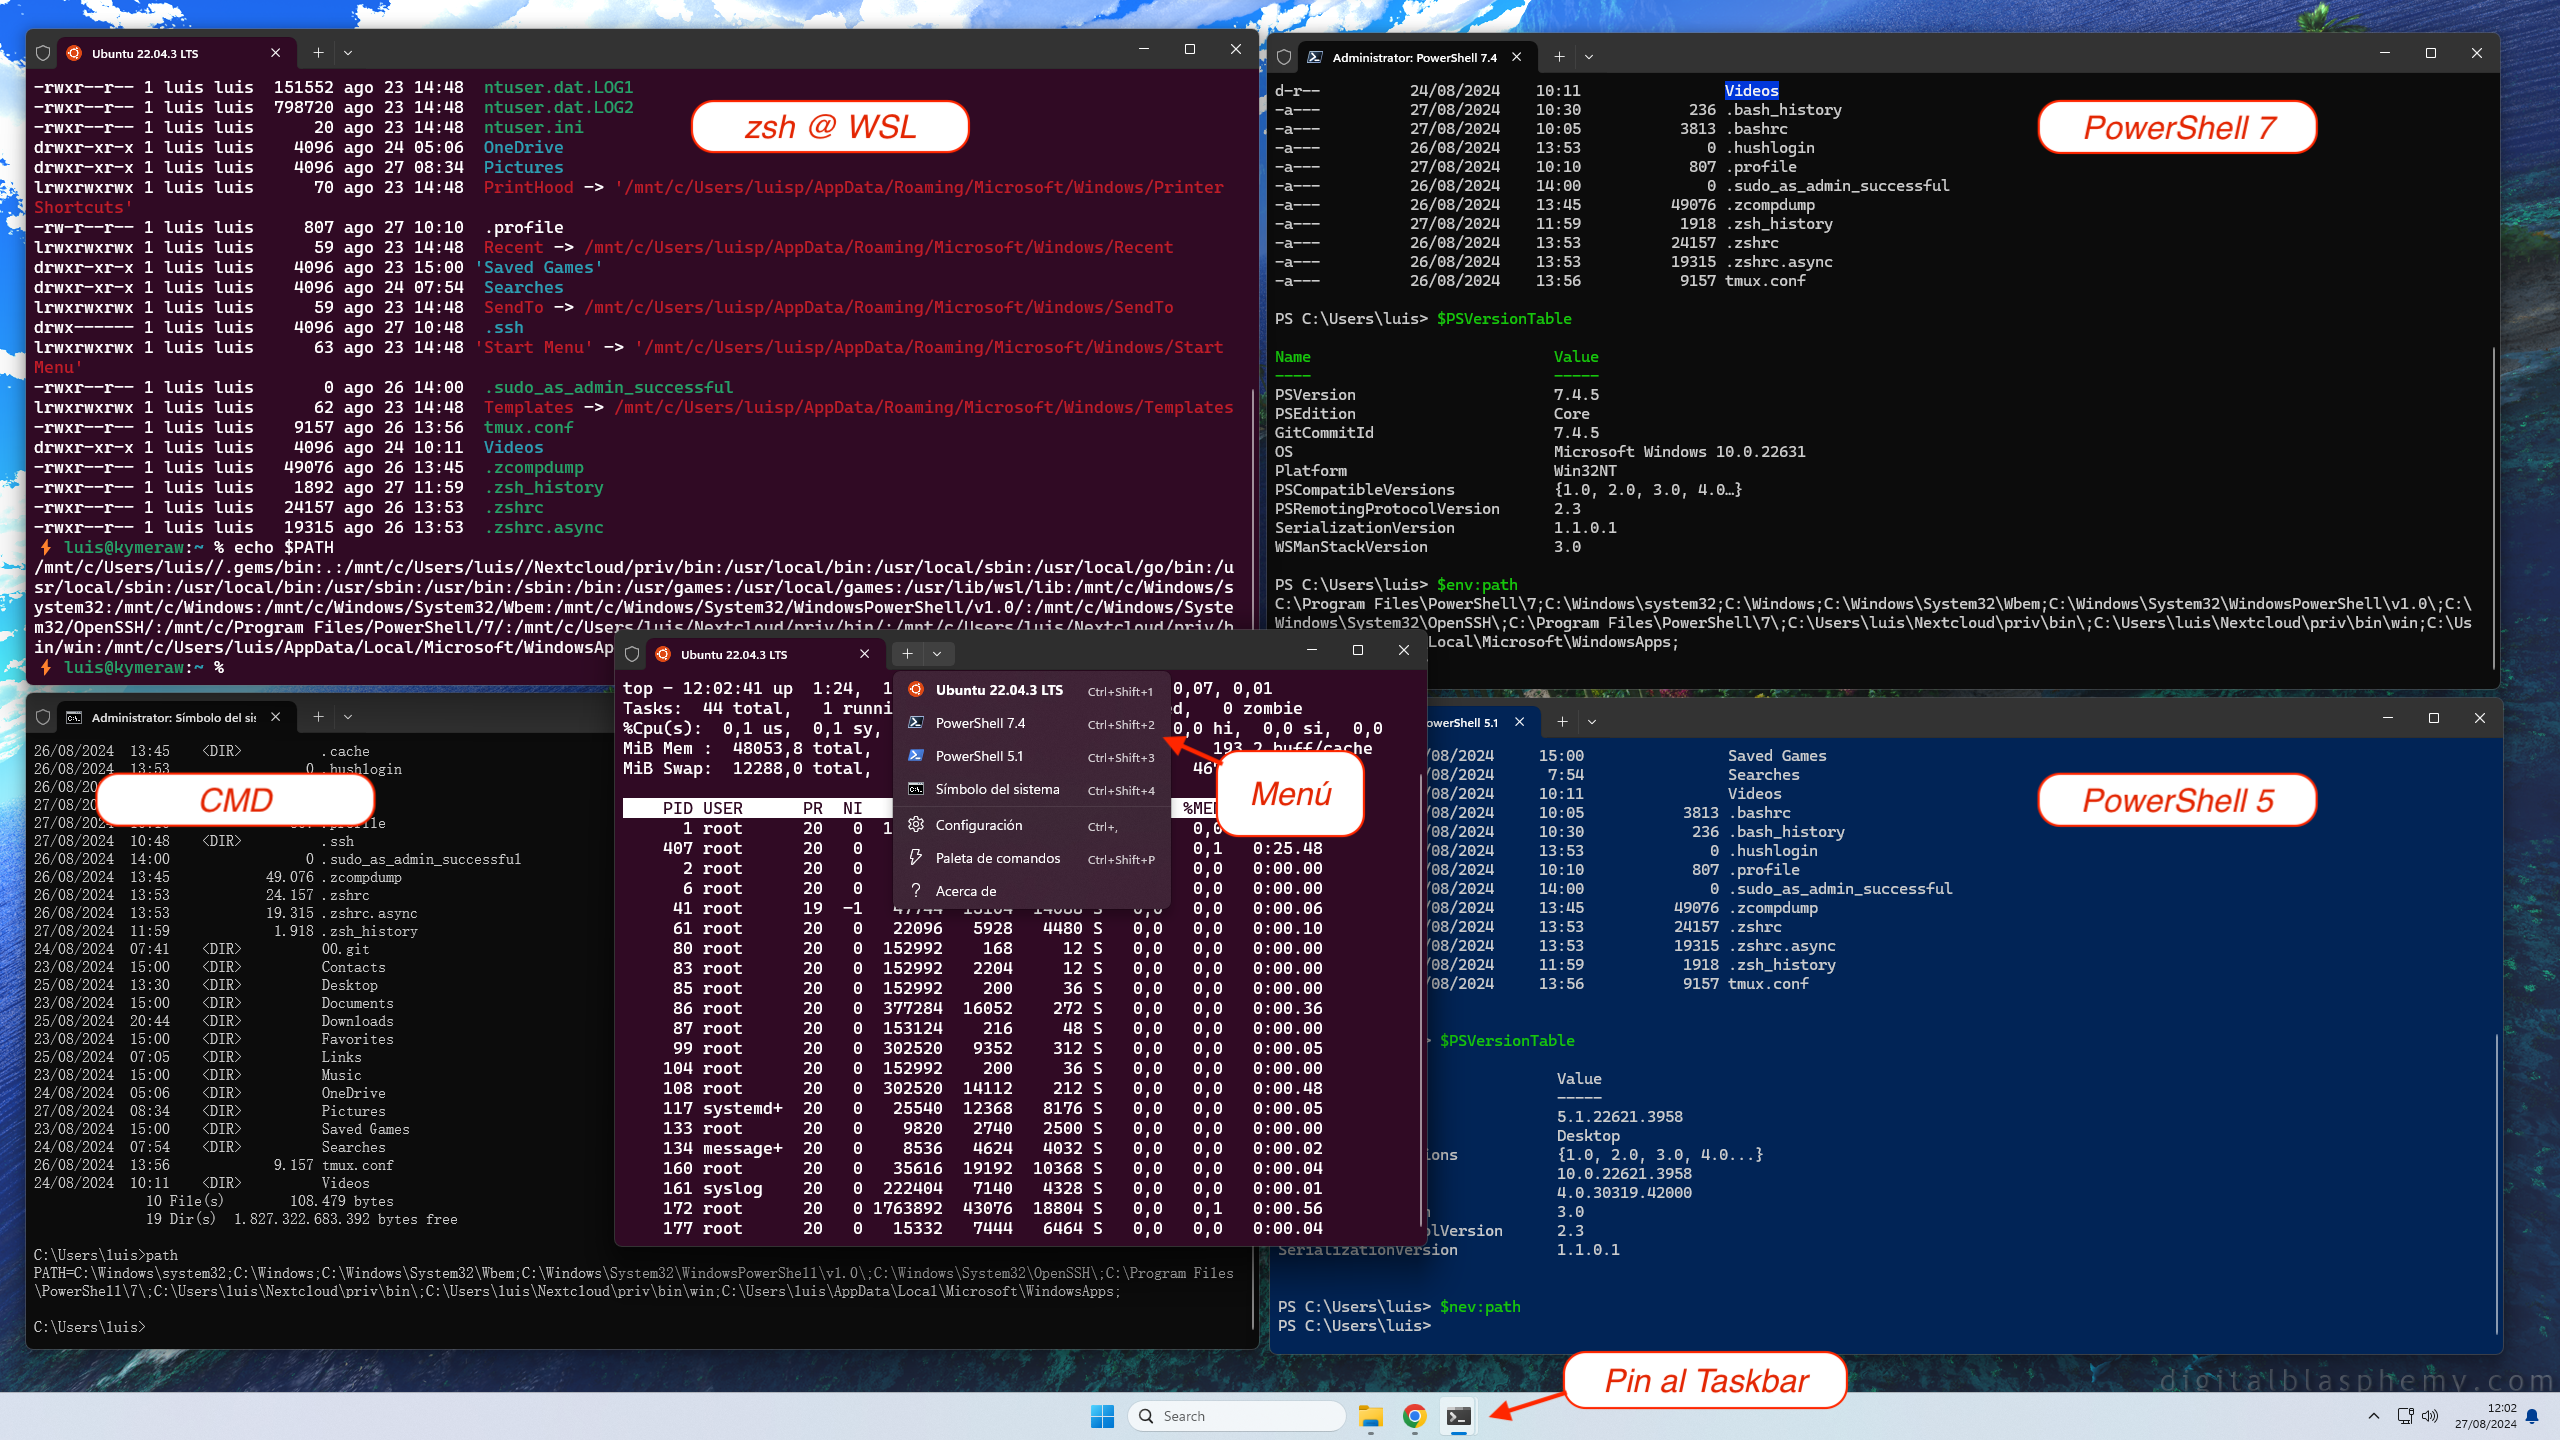
Using multiple tabs in Windows Terminal:
- Open new tabs:
+icon orCtrl + Shift + T. - Switch tabs:
Ctrl + Tab. - Close tabs:
Xicon orCtrl + Shift + W. - Detach a tab as an independent window: right-click the tab.
Working this way is more efficient and organized. I can open whichever console I need, with tweaked colors to tell them apart, and a different font for cmd.exe.
settings.json and state.json: most of the Windows Terminal customization is driven by two key files: settings.json (core customization, editable from the menu itself) and state.json (current terminal state).
Here’s my settings.json. Note: the uuids will be different on your machine — don’t copy-paste as-is or it won’t work.
Nerd Fonts
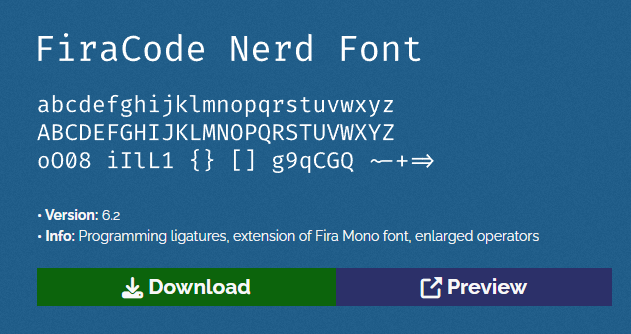
Install a Nerd Font — essential when working on the command line. From the official repo > Fonts Downloads. I like FiraCode. Download, unzip, select all the .ttf files > right-click > Install.
Set it as default in Windows Terminal: Settings → Profiles → Defaults → Appearance → Font Face FiraCode.
Oh My Posh
Install Oh My Posh, the definitive prompt — works best with large Git repos, even under WSL2. A prompt theme engine for any shell. I install it on every OS and CLI I work with. Follow the official install instructions:
- Windows PowerShell -
winget install JanDeDobbeleer.OhMyPosh -s winget. - Windows CMD - no native support, but works via Clink (explained in the next section).
- For WSL2 I use devcli — a script that auto-configures the CLI environment on Unix-based systems: Linux, macOS, and WSL2.
Oh-My-Posh uses themes; here’s a copy of mine: ~/.oh-my-posh.yaml.
For my theme to render properly I need to set this variable (followed by a reboot), since my theme references it:
setx OMP_OS_ICON "🪟"
Note: if you ever need to remove the variable:
Remove-ItemProperty -Path "HKCU:\Environment" -Name "OMP_OS_ICON".
Clink
Clink adds to CMD everything it’s missing: Linux-style readline, colors, history, scriptable prompt — and it integrates with Oh-My-Posh.
Follow the instructions to configure it and, most importantly, inject it into CMD so it starts automatically when cmd.exe launches.
  Computer\HKEY_CURRENT_USER\Software\Microsoft\Command Processor
    |
    +--> AutoRun   "C:\Program Files (x86)\clink\clink.bat" inject --autorun
Although Clink supports Scriptable Prompt, I use Oh-My-Posh on top of Clink.
Edit C:\Users\luis\AppData\Local\clink\oh-my-posh.lua, exit and reopen CMD.
load(io.popen('oh-my-posh init cmd'):read("*a"))()
Exit and reopen CMD and run:
clink config prompt use oh-my-posh
clink set ohmyposh.theme c:\Users\luis\.oh-my-posh.yaml
LSDeluxe
LSDeluxe (lsd) is a modern replacement for ls, written in Rust, with colors, icons (via Nerd Fonts), and tree view. Cross-platform. I install it on all my systems (Windows, macOS, Linux, and WSL2).
Install:
winget install lsd.PowerShell alias. See my
$PROFILEin the Terminal section above.
# Added to .\Documents\PowerShell\Microsoft.PowerShell_profile.ps1
# Replace the built-in ls alias with lsd https://github.com/lsd-rs/lsd
#
if (Get-Alias ls -ErrorAction SilentlyContinue) {
    Remove-Item Alias:ls -Force
}
function ls {
    lsd --group-directories-first @args
}
- CMD alias: I create
C:\Users\luis\cmd_aliases.cmd, then edit mycmd.exeshortcut (in Terminal) and change the target line:%SystemRoot%\System32\cmd.exe /k "C:\Users\Luis\cmd_aliases.cmd".
REM File C:\Users\Luis\cmd_aliases.cmd
@echo off
doskey ls=lsd --group-directories-first $
Colors: on Windows, configure them via the LS_COLORS variable with setx (requires a reboot — yes, a reboot). Example:
setx LS_COLORS "fi=00:mi=00:mh=00:ln=01;94:or=01;31:di=01;36:ow=04;01;34:st=34:tw=04;34:pi=01;33:so=01;33:do=01;33:bd=01;33:cd=01;33:su=01;35:sg=01;35:ca=01;35:ex=01;32:*.cmd=00;32:*.exe=01;32:*.com=01;32:*.bat=01;32:*.btm=01;32:*.dll=01;32:*.tar=00;31:*.tbz=00;31:*.tgz=00;31:*.rpm=00;31:*.deb=00;31:*.arj=00;31:*.taz=00;31:*.lzh=00;31:*.lzma=00;31:*.zip=00;31:*.zoo=00;31:*.z=00;31:*.Z=00;31:*.gz=00;31:*.bz2=00;31:*.tb2=00;31:*.tz2=00;31:*.tbz2=00;31:*.avi=01;35:*.bmp=01;35:*.fli=01;35:*.gif=01;35:*.jpg=01;35:*.jpeg=01;35:*.mng=01;35:*.mov=01;35:*.mpg=01;35:*.pcx=01;35:*.pbm=01;35:*.pgm=01;35:*.png=01;35:*.ppm=01;35:*.tga=01;35:*.tif=01;35:*.xbm=01;35:*.xpm=01;35:*.dl=01;35:*.gl=01;35:*.wmv=01;35"
Git for Windows
Git for Windows bundles git.exe and Git Bash, a Bash-emulator terminal for Windows. Another terminal option — similar in feel to a WSL2 Ubuntu shell, but using a terminal emulator and native Windows executables. More below.
The main goal is to have git.exe available from native CMD, PowerShell, and third-party apps. Installed at C:\Program Files\Git.
Note: it includes
C:\Program Files\Git\bin\bash.exe, but there’s alsoC:\Windows\System32\bash.exeon the system — mind the PATH order. The second one is WSL2’s bash launcher for your installed Linux distro.
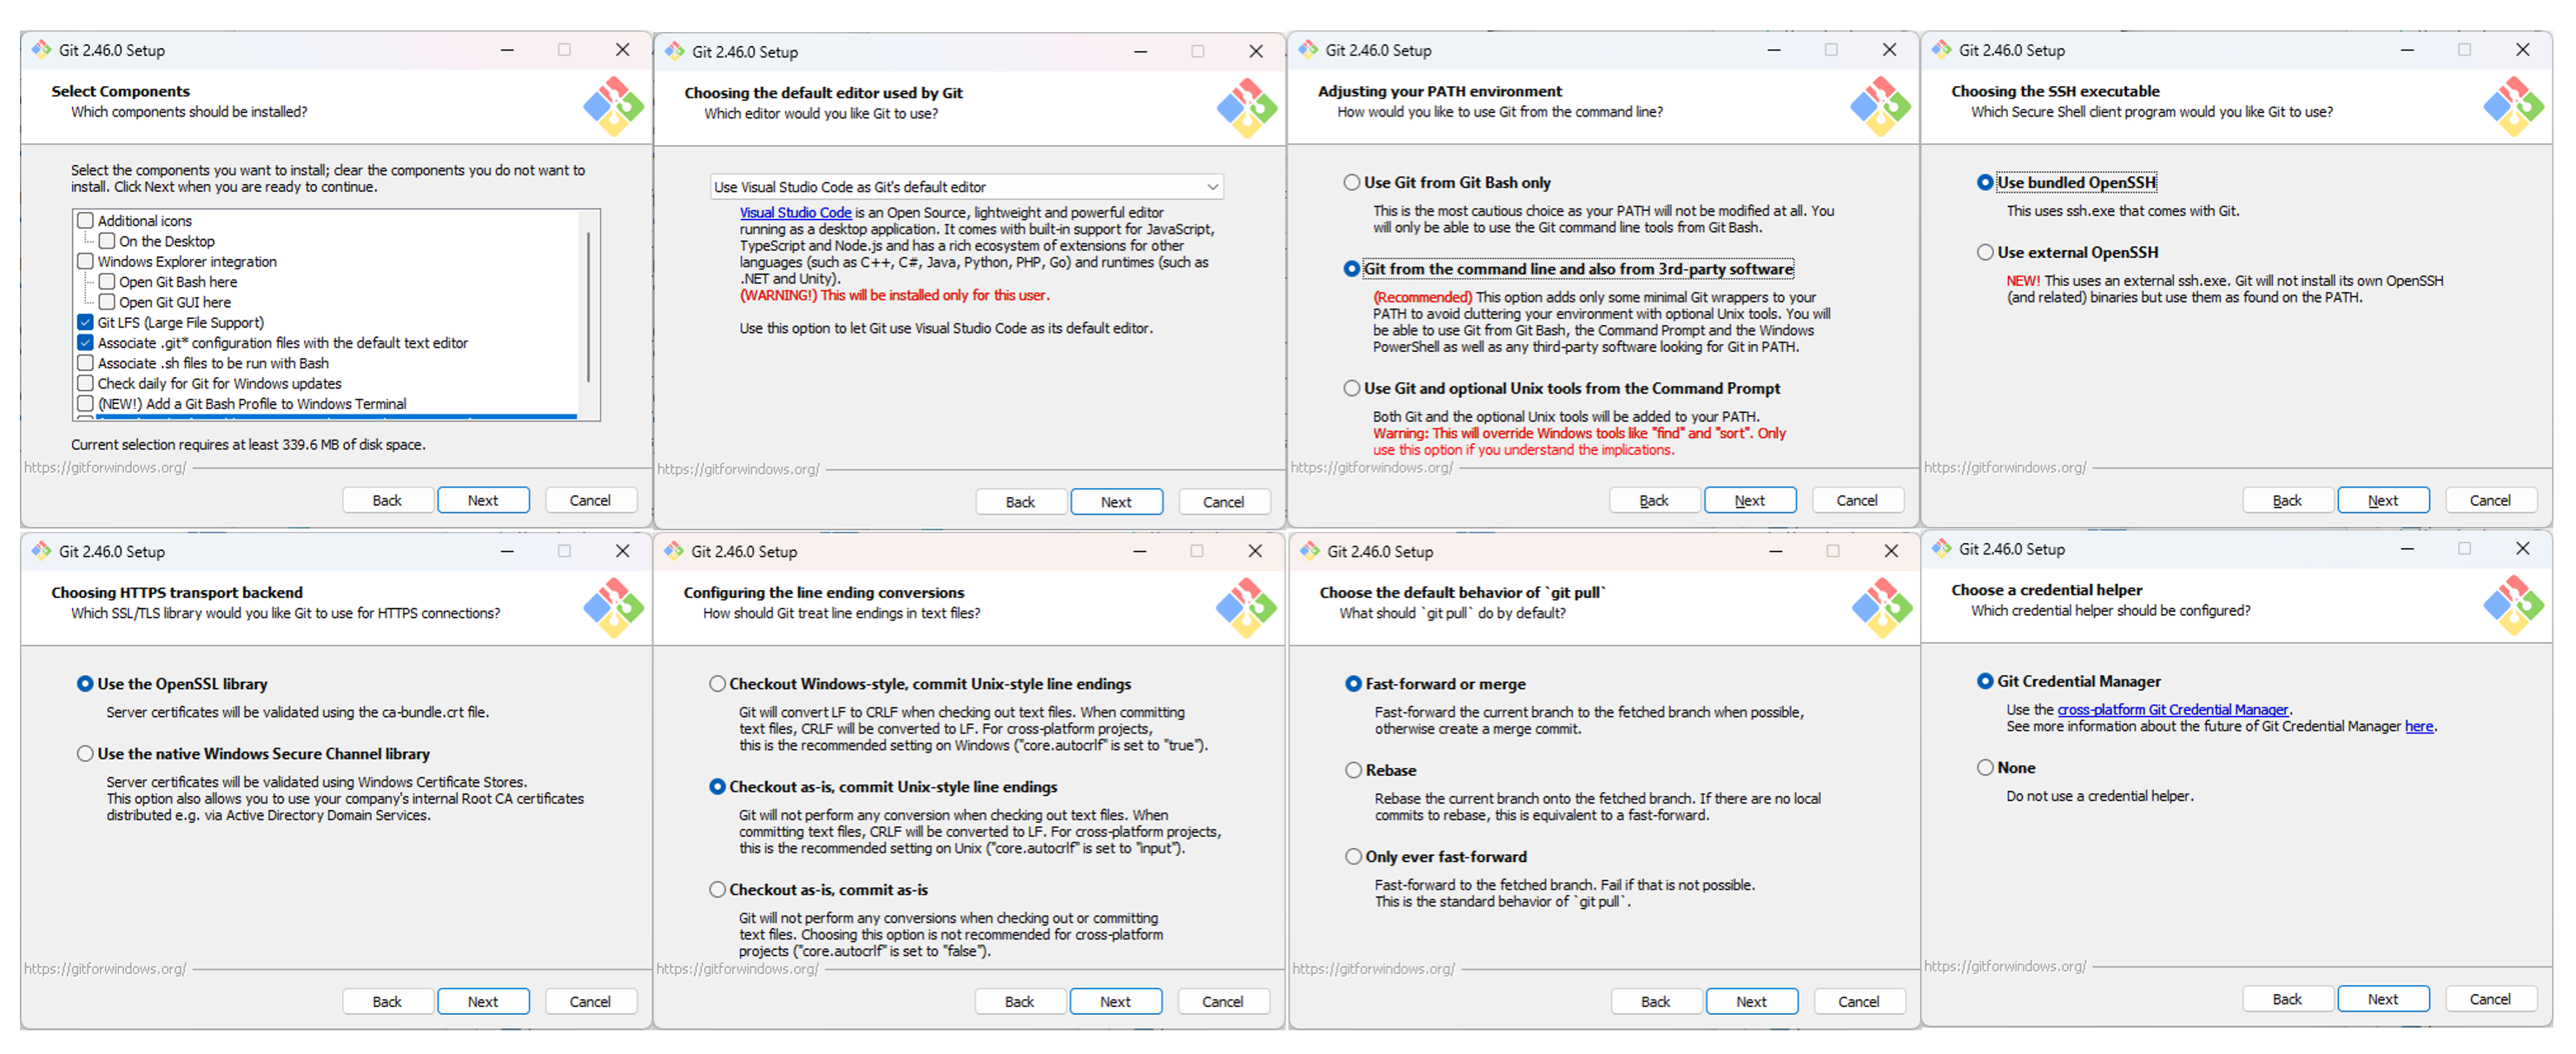
Choices I make during the install:
- Bundled OpenSSH & OpenSSL: select Use the bundled OpenSSH and bundle OpenSSL to isolate Git from the system’s SSH version.
- Handling of CRLF: select Checkout as-is, commit Unix-style line endings. See CRLF vs LF.
- PATH (Git Bash): select Git from the command line and also from 3rd-party software and manually add the paths to the system PATH (below).
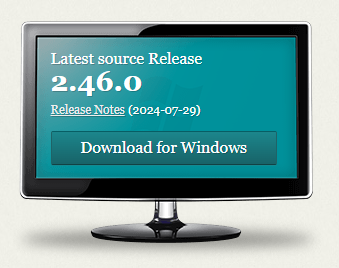
Example with Git-2.46.0-64-bit.exe:
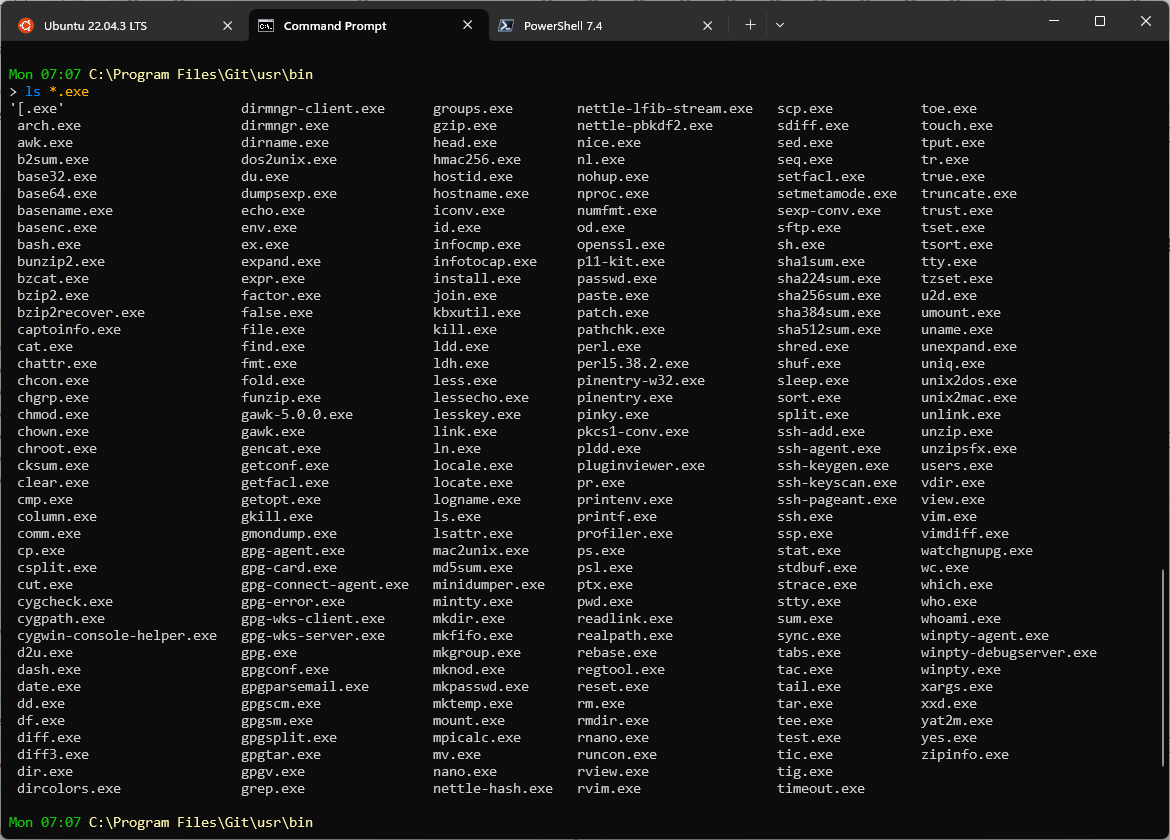
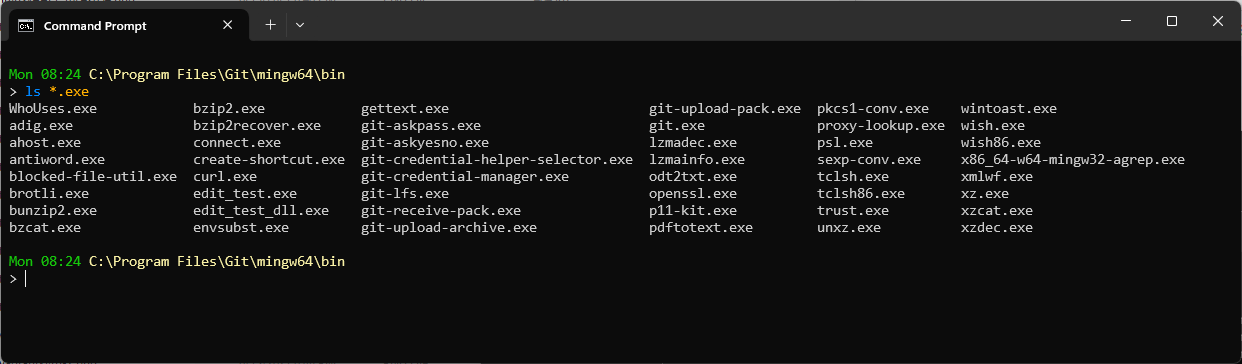
Even though I don’t use Git Bash as a shell, I do take advantage of its “Linux-style” executables from CMD/PowerShell. I add C:\Program Files\Git\mingw64\bin and C:\Program Files\Git\usr\bin to the system PATH:
Git for Windows also installs MinGW-w64, a fork of MinGW (Minimalist GNU for Windows) that provides a toolchain and development environment for compiling and running open-source software — mostly C and C++ — on Windows. Crucial when you’re building Windows apps with traditional GNU/Linux tooling.
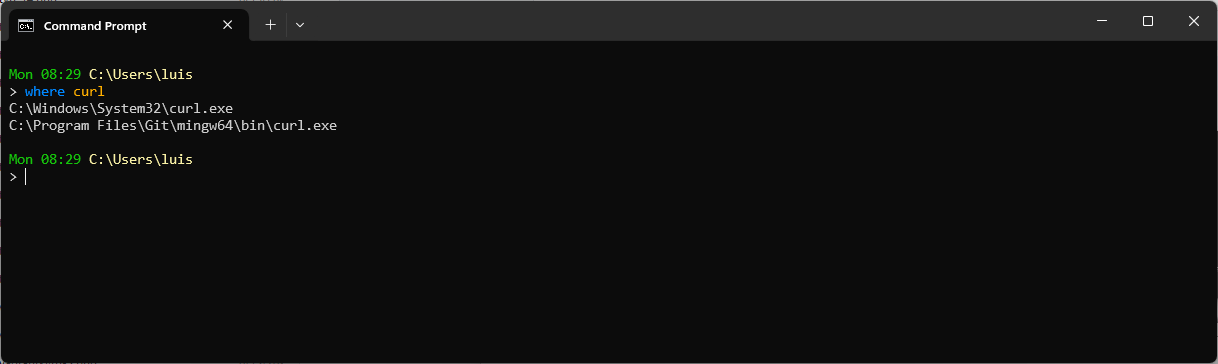
By the way, when you don’t know where an executable is…
Other tools
Cmder: console based on ConEmu + Clink. Reasonable alternative if you prefer an all-in-one emulator over Windows Terminal.
Starship: cross-platform prompt, fast and minimalist, alternative to Oh-My-Posh. Requires a Nerd Font. Install: winget install starship. Then add the init to your shell:
- PowerShell:
Invoke-Expression (&starship init powershell)in$PROFILE. - CMD (with Clink): create
C:\Users\<user>\AppData\Local\clink\starship.luawithload(io.popen('starship init cmd'):read("*a"))()and removeprompt_filters.luaif it existed.
fzf — Fuzzy Finder: interactive finder, a must-have for CLI. Combined with bat, fd, and ripgrep, it takes you to another level. Install on Windows:
luis@kymeraw:~ ❯ winget install fzf
Found fzf [junegunn.fzf] Version 0.59.0
This application is licensed to you by its owner.
Microsoft is not responsible for, nor does it grant any licenses to, third-party packages.
Downloading https://github.com/junegunn/fzf/releases/download/v0.59.0/fzf-0.59.0-windows_amd64.zip
  ██████████████████████████████  1.73 MB / 1.73 MB
:
Command line alias added: "fzf"
Successfully installed
WSL 2
Deserves a whole section. Windows Subsystem for Linux (WSL 2) runs a Linux environment directly on Windows without needing a VM. You can install Linux distros (Ubuntu, Debian, etc.) and use whichever shell you like natively, with excellent performance, fully integrated with the Windows file system (except permissions).
luis@kymeraw:/mnt/c/Users/luis$ ls -al
WSL2 uses a lightweight VM with a full real Linux kernel, has very high performance, is deeply Windows-integrated (Linux files and scripts can be run from Windows Explorer and vice versa), and crucially has Docker support — WSL2 is the preferred backend for Docker Desktop on Windows (installed later).
Heads up: one gotcha with WSL2 — when accessing
/mnt/c (C:)in a directory with thousands of files (e.g., a large Git repo), things get very slow. So far this has only bitten me with Git; in those cases it’s better to work from CMD or PowerShell.
My WSL2 use cases:
- Have Shell + tools with native access to
C:\(via/mnt/c). - Have a Linux distro with access to all the open-source Linux tooling.
- Match what I use on macOS or Linux for software development.
- Install Docker Desktop on Windows.
- Develop “server” apps in Linux directly (e.g., Go services) from my Windows machine.
Install process:
- Open “Windows Features” — Win + R,
optionalfeatures. Check:- Virtual Machine Platform.
- Windows Subsystem for Linux.
- Hyper-V (recommended for Docker with WSL2).
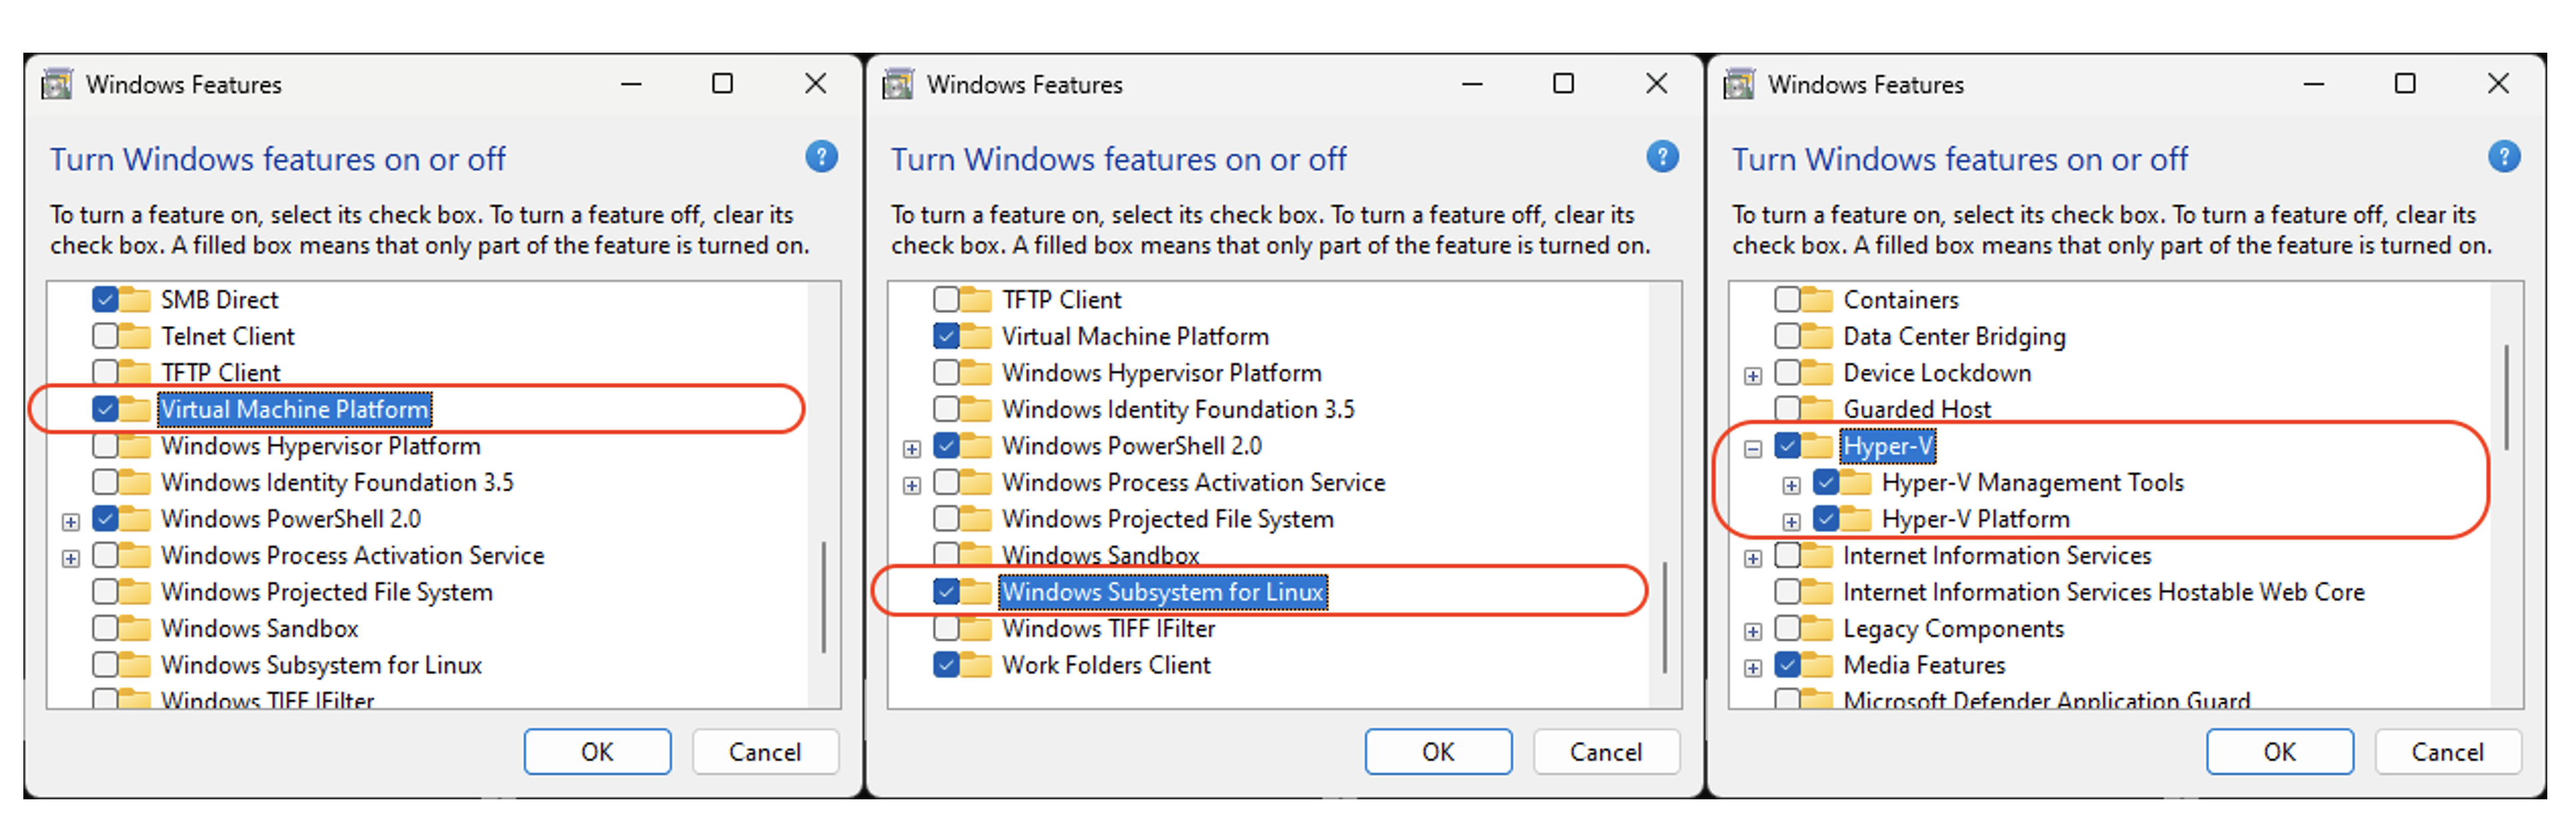
Reboot.
Install WSL from PowerShell as administrator:
wsl --installList available distros:
wsl --list --onlineInstall a distro — Ubuntu 24.04 in my case (you could pick another like Debian, Kali, Suse, …). PowerShell as Administrator:
wsl --install -d Ubuntu-24.04During install it required a Linux kernel update:
- I downloaded the Linux kernel update package for WSL 2 on x64.
- Ran it, rebooted, re-ran the distro install, created the Linux user (
luis) and set a password.
wsl --install -d Ubuntu-24.04When it finishes, it drops into a
bashshell. Exit withexit; we’ll come back.
Open PowerShell as Administrator, list what you have, and make sure it’s always version 2 (no-op in my case, only needed if a different version is set):
wsl --list --verbose
wsl --set-default-version 2
Update:
wsl --update
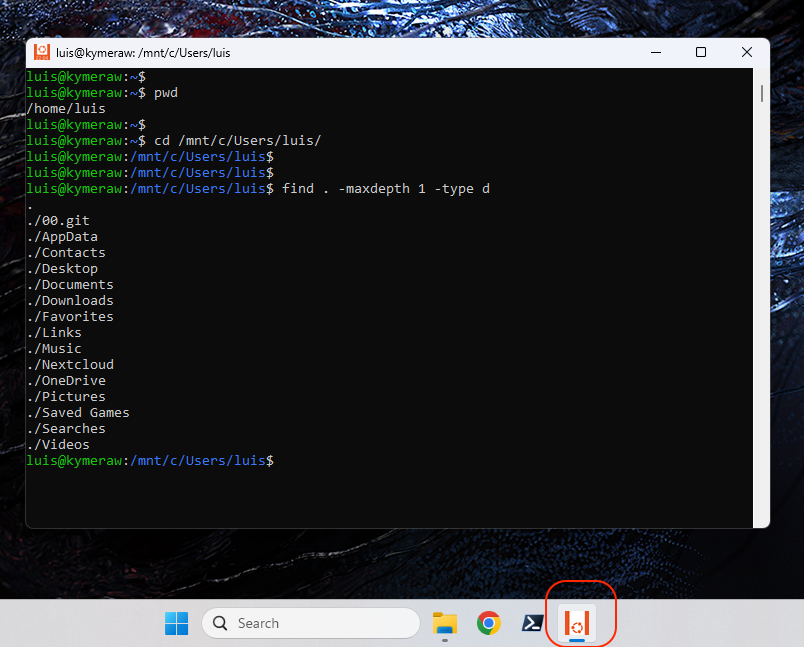
Optionally, pin Ubuntu to the Taskbar. Look for it in the apps list: Start > All > "Ubuntu 24.04", right-click → Pin to taskbar to have quick access to bash (Ubuntu 24.04 under WSL2). Note: I later unpinned it once I had “Windows Terminal”.
We’re effectively on a Ubuntu VM, so I can install whatever I want. Next important thing is updating it.
luis@kymeraw:~$ sudo apt update && sudo apt upgrade -y
- Change HOME to /mnt/c/Users: I don’t recommend it, but here’s how.
The only reason you’d want this is so that cd with no args takes you to /mnt/c/Users/<user>, unifying HOME across CMD, PowerShell, and WSL2 sessions. I don’t recommend it because some apps and tools (Docker Desktop) break. Some apps hard-code $HOME to its standard location inside WSL2 (/home/<user>), and changing it will cause them to misbehave or outright fail.
In my case, I create an alias to jump to the Windows HOME quickly in .bashrc or .zshrc: alias c="cd /mnt/c/Users/<user>".
Still, if you need to change it, here’s how:
- From PowerShell, have WSL start as
root:
PS C:\Users\luis> ubuntu2404.exe config --default-user root
- Open a new shell and change
luis’s HOME:
C:\Users\luis> ubuntu2404.exe
root@kymeraw:~# usermod --home /mnt/c/Users/luis/ luis
- Restore the default login user to
luis:
PS C:\Users\luis> ubuntu2404.exe config --default-user luis
Configuration: /etc/wsl.conf
I mention it in several places in this post. Here’s the final copy I use on my machine — edit it inside WSL2 as root.
[boot]
systemd=true
[automount]
options = "metadata,uid=1000,gid=1000,umask=022,fmask=11,case=off"
[interop]
enabled=true
appendWindowsPath=false
Important: after editing this file, exit WSL, shut it down, wait for it to report nothing running, and start it again. Example from a WSL2 root shell session:
root@kymeraw:~# exit
logout
luis@kymeraw:~$ exit
logout
PS C:\Users\luis> wsl --shutdown
:
PS C:\Users\luis> wsl --list --running
There are no running distributions.
The options line under [automount] sets file permissions properly. Linux file permissions on NTFS are interpreted in a specific way. Files and directories created on NTFS (under /mnt/c/Users/<user>) default to 777.
I don’t like that. I want WSL to behave consistently, and some programs don’t like such open permissions — SSH for example. The OpenSSH client requires specific permissions on ~/.ssh and its contents.
The fix is enabling metadata in the advanced WSL configuration, in /etc/wsl.conf under [automount].
When I reopen the shell, I make sure my files are mine (if you switched distros, they may belong to another user, e.g. ubuntu:lxd):
PS C:\Users\luis>  ubuntu2404.exe
luis@kymeraw:~$ pwd
/mnt/c/Users/luis
luis@kymeraw:~$ sudo chown -R luis:luis /mnt/c/Users/luis
[sudo] password for luis:
Configuration: .wslconfig
Optional, but I always do this. I can’t be bothered with WSL2’s NAT. I optimize WSL2’s network stack by enabling Mirrored mode, which removes the traditional NAT architecture so the Linux instance shares the host Windows interface and IP identity directly, letting apps running in WSL be reachable from the LAN without port forwarding. It also enables dnsTunneling for better name-resolution stability (especially under VPNs) and firewall sync, so Windows Defender Firewall rules automatically apply to the Linux instance’s traffic for integrated protection.
I create C:\Users\luis\.wslconfig at the root of my Windows user.
[wsl2]
networkingMode=mirrored
dnsTunneling=true
firewall=true
Important: fully exit and shut down WSL2 before reopening.
root@kymeraw:~# exit
logout
PS C:\Users\luis> wsl --shutdown
PS C:\Users\luis> net stop wslservice
PS C:\Users\luis> net start wslservice
If the WSL2 session errors out on reopen, a full reboot usually fixes it.
ZSH and tmux
The default shell in Ubuntu for WSL2 is bash, but as I explained in Goodbye Bash, hello Zsh!, I switch to zsh (a related post). I also install tmux, an optional but very powerful terminal multiplexer.
First, zsh:
luis@kymeraw:~$ sudo apt update && sudo apt upgrade -y
luis@kymeraw:~$ sudo apt install zsh
Check the available shells:
luis@kymeraw:~$ cat /etc/shells
:
/bin/zsh
/usr/bin/zsh
Change the default shell:
luis@kymeraw:~$ chsh -s $(which zsh)
Password:
Log out and back in. The first time you enter zsh it offers help creating .zshrc. I already have one because I reuse the same file across macOS, Linux, and now Windows. I download ~/.zshrc and copy it to /mnt/c/Users/luis.
Install tmux, which I use regularly:
sudo apt install tmux
I have a ~/.tmux.conf, also copied to /mnt/c/Users/luis.
Useful scripts
I install the scripts I use on all my Linux/macOS setups:
- Script /usr/bin/e.
- File /etc/nanorc customized for
nano. Create the backup directories:sudo mkdir /root/.nanoandmkdir ~/.nano. - Script /usr/bin/confcat: a
catthat strips comment lines. - Script /usr/bin/s to quickly switch to root. Add your user to sudoers:
echo 'luis ALL=(ALL) NOPASSWD:ALL' > /etc/sudoers.d/90-mi-usuario. - Permissions:
sudo chmod 755 /usr/bin/e /usr/bin/confcat /usr/bin/s.
CRLF vs LF
When working in software development, one of the subtler but crucial aspects to keep in mind is the difference between line endings in text files on Windows vs. Linux.
In this post CRLF vs LF you can find how I handle this topic.
Oh-My-Posh on WSL
See the Oh My Posh section under Improved terminal above. For WSL2 I use my devcli tool.
Change UID/GID
During install I ran into an issue: the first time it installed Ubuntu 22.04 and gave my user luis UID/GID 1000:1000. I enabled the metadata flag as mentioned above for permission handling, and everything under /mnt/c ended up owned by 1000:1000. So far so good.
The problem came when installing Ubuntu 24.04 and removing 22.04. It turns out 24.04 creates by default a user ubuntu and group lxc with UID/GID 1000, and my user luis was assigned 1002. That caused a huge permission mess.
Here’s what I did to fix it:
PS > wsl --install Ubuntu24-04
PS > ubuntu2404.exe config --default-user root
PS > wsl --shutdown
PS > ubuntu2404.exe

nano /etc/group changed the gids
lxc 1000 -> 1001
ubuntu 1001 -> 1002
luis 1002 -> 1000

nano /etc/passwd changed the uids
ubuntu 1000 -> 1002
luis 1002 -> 1000

cd /home
chown -R luis:luis luis
chown -R ubuntu:ubuntu ubuntu
Review the config file. Here’s a copy: /etc/wsl.conf.
PS > ubuntu2404.exe config --default-user luis
PS > wsl --shutdown
PS > ubuntu2404.exe
Note: to search for permissions without the lookup crawling into /mnt/c:
cd /
find . -not \( -path "./mnt*" -type d -prune \) -user ubuntu
Modify the PATH
Windows PATH (for CMD, PowerShell):
See the PATH note at the top of this post.
WSL2:
I prefer WSL2 not to inject every entry of the Windows PATH into the Linux one. Edit /etc/wsl.conf and add:
[interop]
appendWindowsPath=false
Here’s a copy: /etc/wsl.conf.
- Exit WSL, shut it down (
wsl --shutdown), reopen, and edit~/.bashrcor.zshrc. Example of how mine ends up (I’m selective about what I want from the Windows PATH in my WSL2 session):
⚡ luis@kymeraw:~ % echo $PATH
/mnt/c/Users/luis/.gems/bin:.:/mnt/c/Users/luis/Nextcloud/priv/bin:/usr/local/bin:/usr/local/sbin:/usr/local/go/bin:/usr/local/sbin:/usr/local/bin:/usr/sbin:/usr/bin:/sbin:/bin:/usr/games:/usr/local/games:/usr/lib/wsl/lib:/mnt/c/Windows/System32:/mnt/c/Windows:/mnt/c/Windows/System32/wbem:/mnt/c/Windows/System32/WindowsPowerShell/v1.0:/mnt/c/Program Files/PowerShell/7
SSH on Windows 11
OpenSSH on Windows 11 is a native OS feature, nothing to do with WSL2. The sshd service runs on Windows, uses your Windows credentials, and its config lives at C:\ProgramData\ssh\. The only optional integration with WSL (or Git Bash) is deciding which shell receives inbound connections — I leave that to the end.
SSH client
To connect from CMD, PowerShell, Git Bash, or WSL2 to remote machines.
- Verify the OpenSSH client is installed (PowerShell as Administrator):
Get-WindowsCapability -Online | ? Name -like 'OpenSSH*'
- Create a public/private key pair in the Windows HOME (I usually use the Windows SSH client):
# PowerShell
ssh-keygen.exe -t ed25519 -a 200 -C "luis@kymeraw" -f $env:USERPROFILE\.ssh\id_ed25519_luispa

# CMD
ssh-keygen.exe -t ed25519 -a 200 -C "luis@kymeraw" -f %USERPROFILE%\.ssh\id_ed25519_luispa

# WSL2 (pointing to the same Windows path)
ssh-keygen -t ed25519 -a 200 -C "luis@kymeraw" -f /mnt/c/Users/luis/.ssh/id_ed25519_luispa
Worth a look: another interesting post, Git multi-account, where I cover SSH as an alternative.
SSH server
Add the OpenSSH server (if it’s not there already):
Get-WindowsCapability -Online | ? Name -like 'OpenSSH*'
:
Add-WindowsCapability -Online -Name OpenSSH.Server~~~~0.0.1.0
Start the service, check it, and set it to auto-start:
Start-Service sshd
Get-Service sshd
Set-Service -Name sshd -StartupType 'Automatic'
The SSH Server runs on Windows (not on WSL2/Ubuntu), so credentials are Windows ones — my LOCAL user luis (I don’t use a Microsoft Account) and its Windows password. The sshd_config file lives at C:\ProgramData\ssh\sshd_config.
I disable administrators_authorized_keys because I prefer it to use the one in my user’s HOME at C:\Users\luis\.ssh\authorized_keys:
AuthorizedKeysFile .ssh/authorized_keys
AcceptEnv LANG LC_*
Subsystem sftp sftp-server.exe
#Match Group administrators
# AuthorizedKeysFile __PROGRAMDATA__/ssh/administrators_authorized_keys
Edit and restart the service:
notepad C:\ProgramData\ssh\sshd_config
Restart-Service sshd
Edit the accepted keys in authorized_keys:
notepad C:\Users\luis\.ssh\authorized_keys
Check whether port 22 is open. Helper script: VerificarPuertoFirewall.ps1. If you need to open the port in the firewall:
New-NetFirewallRule -DisplayName "Allow SSH Port 22" -Direction Inbound -Protocol TCP -LocalPort 22 -Action Allow
From here I can SSH in from any machine on the network. By default I’ll get dropped into cmd.exe.

Default shell on connect (optional)
By default, OpenSSH hands the client a cmd.exe session. I can change the shell incoming SSH connections receive by writing the DefaultShell value to the HKLM:\SOFTWARE\OpenSSH registry key. Important detail: that registry key doesn’t always exist after installing OpenSSH (it’s bitten me with winget Git installs), so I create it first with New-Item -Force, which is idempotent — it’s a no-op if the key already exists.
Common prep step (PowerShell as Administrator):
# Create the registry key if it doesn't exist (idempotent)
New-Item -Path "HKLM:\SOFTWARE\OpenSSH" -Force | Out-Null
From here I pick one of the two options depending on which shell I want.
Option A — WSL 2 as default shell:
Incoming connections land directly in my WSL2 distro. Important to use C:\Windows\System32\wsl.exe and not C:\Users\luis\AppData\Local\Microsoft\WindowsApps\wsl.exe (the latter takes several seconds to produce a prompt).
New-ItemProperty -Path "HKLM:\SOFTWARE\OpenSSH" -Name DefaultShell `
  -Value "C:\Windows\System32\wsl.exe" -PropertyType String -Force | Out-Null
Option B — Git Bash as default shell:
Incoming connections land in Git for Windows’ bash.exe (native Windows, no WSL). Useful so remote scripts drop into Bash instead of cmd.exe:
New-ItemProperty -Path "HKLM:\SOFTWARE\OpenSSH" -Name DefaultShell `
  -Value "C:\Program Files\Git\bin\bash.exe" -PropertyType String -Force | Out-Null
Final common step — reload the PATH in this session and restart sshd so the change applies to new SSH connections:
$env:Path = [System.Environment]::GetEnvironmentVariable("Path","Machine") + ";" + [System.Environment]::GetEnvironmentVariable("Path","User")
Restart-Service sshd
Development tools
With the shell and WSL2 covered, on to the cross-platform tools (I install them on every machine, whether Windows, Linux, or macOS), then the programming languages, leaving .NET and Visual Studio for the end.
VSCode
Install from the official Visual Studio Code site. A powerful editor, with hundreds of useful extensions, integrated terminals (CMD, PowerShell, Git Bash, WSL), support for many languages, and remote development.
Settings and sync: see the VSCode settings and extensions post for how I manage my configuration.
I create a kind of alias — on Linux and macOS I like to alias my preferred editor as “e” (for editor). From an Administrator session I edit the script c:\windows\e.cmd. With that alias I can call it from both cmd and PowerShell:
@echo off
"C:\Users\luis\AppData\Local\Programs\Microsoft VS Code\bin\code.cmd" %*
Docker Desktop
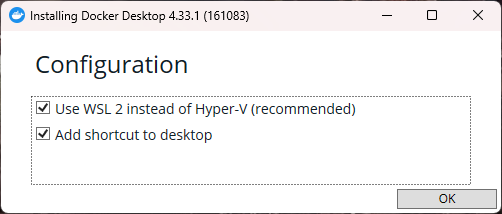
Essential for development in isolated environments: running containerized processes (databases, etc.), dockerizing your own services (Go, Node.js), CI tests, microservice labs. Install from the official Docker site. WSL2 integration is the key piece, which is why WSL2 was set up earlier.
During install I pick WSL2 instead of Hyper-V.
WSL2 integration
The WSL2 integration is instant — almost nothing to do. Well, almost. There’s one important topic: “the context”.
When entering a WSL2 session you need the right Docker context. With the wrong one you may hit Failed to initialize: protocol not available.
PS > ubuntu2404.exe

$ docker ps -a
Failed to initialize: protocol not available

$ docker context ls
NAME              DESCRIPTION                               DOCKER ENDPOINT                             ERROR
default           Current DOCKER_HOST based configuration   unix:///var/run/docker.sock
desktop-linux *   Docker Desktop                            npipe:////./pipe/dockerDesktopLinuxEngine
Here we’re on the desktop-linux context, which prevents WSL2 from talking to Docker properly. You can switch with docker context use default, but it won’t persist. Better to edit ~/.docker/config.json:
notepad.exe C:\Users\<your-user>\.docker\config.json
:
        "currentContext": "default",
:
From then on it works correctly:
PS > ubuntu2404.exe

$ docker context ls
NAME            DESCRIPTION                               DOCKER ENDPOINT                             ERROR
default *       Current DOCKER_HOST based configuration   unix:///var/run/docker.sock
desktop-linux   Docker Desktop                            npipe:////./pipe/dockerDesktopLinuxEngine

$ docker ps -a
CONTAINER ID   IMAGE     COMMAND   CREATED   STATUS    PORTS     NAMES
:
Watch out: if you changed WSL2’s HOME to
/mnt/c/Users/<user>, Docker overwrites.docker\config.jsonat startup, so editing it is useless. Fix: appenddocker context use defaultto the end of your.bashrc/.zshrc.
Postman
Install from the official Postman site. A well-known tool for testing and documenting APIs, very useful if you work with web services. I keep it in reserve for now, may install it later.
HTTPie
Postman alternative for testing and debugging APIs, with CLI and GUI. I prefer HTTPie for its CLI. Install from the official HTTPie site.
On Windows, the official installer goes through Chocolatey.
Programming languages
Python, pip, pipx, venv
python is an interpreted, versatile, easy-to-learn programming language; what I like most is its readability and support for multiple paradigms like OO, functional, and imperative. Many tools need it and it has many use cases. I rarely use it directly, but I always install it.
pip is the fundamental tool for managing Python packages — the system to install and manage third-party libraries from the Python Package Index (PyPI), Python’s official repo.
pipx is the recommended option for installing CLI applications you want available anywhere. It automatically creates an isolated virtualenv per app, installs it along with its dependencies there, and adds the executable to your PATH.
venv is a Python-bundled module for creating virtual environments. A virtualenv is an isolated space where you can install packages and libraries independently, without affecting or being affected by other Python installs on the system.
Install directly from python.org. Always pick a stable version. Personally I prefer whichever has the most precompiled “wheels” so I avoid compiling packages (when you run pip install ...). For example, when 3.14 came out, I’m still on stable 3.13.
Before running the installer: important to disable the aliases Windows 11 ships by default for python.exe and python3.exe. From Search > “Manage app execution aliases”, disable both “python” and “python3”.

During install I select these options so py.exe and python.exe are available from any terminal.
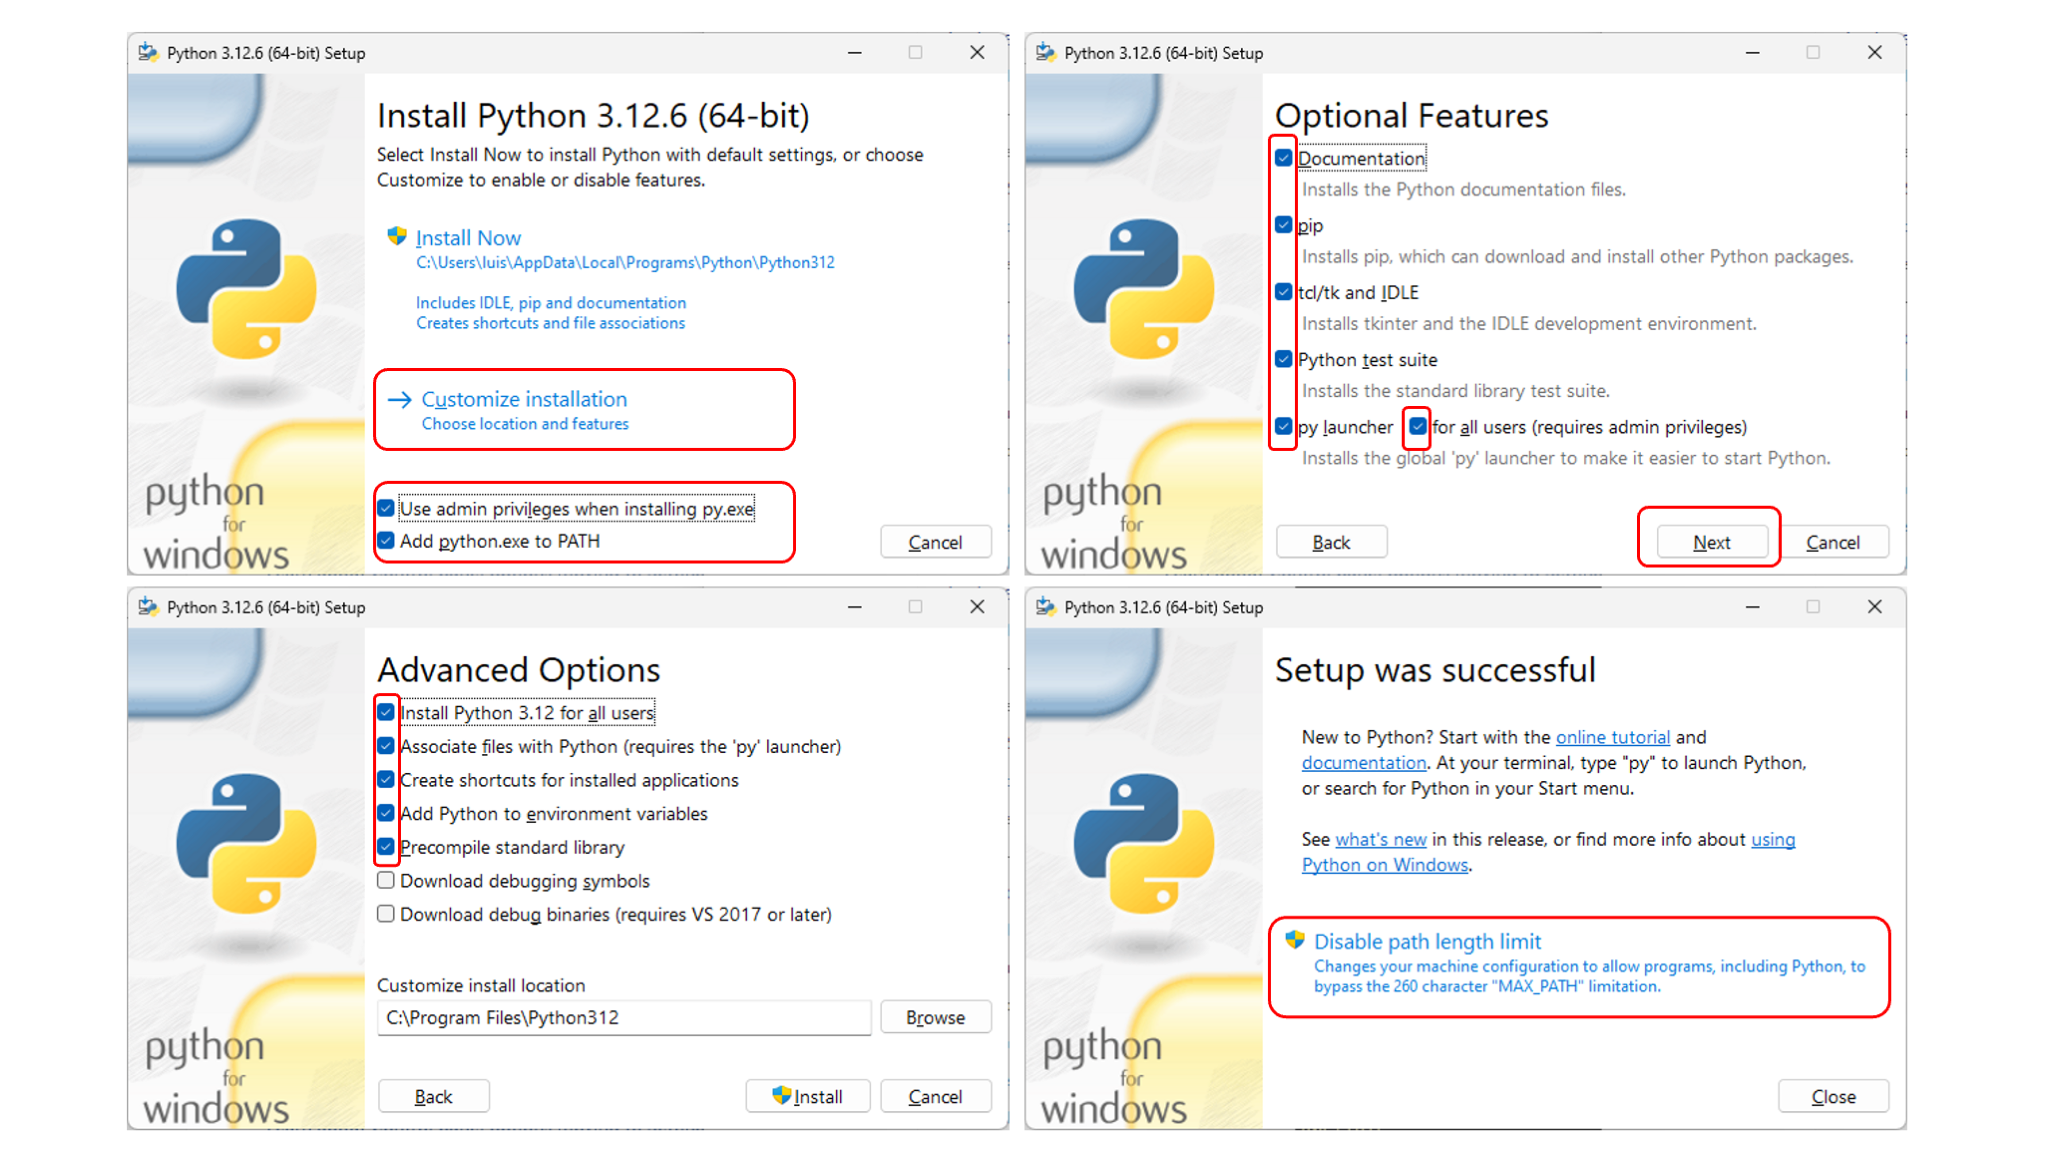
I also create an alias to python3 via the script c:\windows\python3.cmd:
@echo off
"C:\Program Files\Python312\python.exe" %*
Install pip:
C:> py get-pip.py
Install pipx:
scoop install pipx
pipx ensurepath
Install a global app with pipx:
This isn’t for development — it’s for the case of needing to install a Python CLI app you want to use anywhere. pipx makes life easy: it automatically creates an isolated virtualenv, installs the app with its deps there, and adds the executable to your PATH.
- Each app has its own isolated dependencies.
- No conflicts between different apps.
- Use the app from any terminal without activating any environment.
- Cleaner and safer than installing globally with
pip.
Example. I’ll install pdfly on Windows. By the way, here’s a post about pdfly, the Swiss-army knife for PDFs.
What pipx does is create .local\bin\pdfly.exe, a small wrapper (also called a shim) that acts as a bridge. When I run it, it locates its virtualenv (<home>\pipx\venvs), finds the Python interpreter inside it, and hands it the pdfly entrypoint script to execute.
[🪟] luis@kymeraw:~ ❯ pipx install pdfly

# Add .local\bin to my PATH
[🪟] luis@kymeraw:~ ❯ pipx ensurepath

# Exit and reopen the terminal
[🪟] luis@kymeraw:~ ❯ where pdfly
c:\Users\luis\.local\bin\pdfly.exe
Working in a virtualenv with venv:
This is the normal thing you’ll want most of the time — as a developer it’s better to keep a virtualenv per app.
venv lets you create a virtualenv, but what is it for?
- Dependency isolation: avoids conflicts between packages across projects. For example, one project may need Django 3.2 while another needs Django 4.0.
- Project management: each project can have its own environment with the specific package versions it requires.
- Avoids global-system issues: doesn’t modify or depend on the global Python install or its packages.
Preparing the Python environment:
- Create the environment:
python -m venv myenv. - Activate:
- Windows:
.\myenv\Scripts\Activate.ps1(or.bat). - macOS/Linux:
source myenv/Scripts/activate.
- Windows:
- Install packages:
pip install idna. - Create
requirements.txt:pip freeze > requirements.txt. - Future installs:
pip install -r requirements.txt. - Deactivate:
- Windows:
.\myenv\Scripts\deactivate.bat. - macOS/Linux:
deactivate.
- Windows:
Example of the first time on Windows:
python -m venv myenv
.\myenv\Scripts\Activate.ps1
pip install requests idna
pip freeze > requirements.txt
VSCode: I enter a project directory, activate the environment, launch VSCode, and select the interpreter:
.\myenv\Scripts\Activate.ps1
code .
Select the correct interpreter. Command Palette (Ctrl+Shift+P) > Python: Select Interpreter. I pick the Global C:\Program Files\Python312\python.exe.
Proof of concept: mini project with a single source file main.py inside the virtualenv, with a single library, requests.
luis@kymeraw:tmp ❯ cd prueba
luis@kymeraw:prueba ❯ python -m venv myenv
luis@kymeraw:prueba ❯ .\myenv\Scripts\Activate.ps1
luis@kymeraw:prueba via 🐍 v3.12.8 (myenv) ❯
Create the source with notepad main.py:
import requests
response = requests.get('https://httpbin.org/ip')
print('Your IP address is: {0}'.format(response.json()['origin']))
Install dependencies:
luis@kymeraw:prueba via 🐍 v3.12.8 (myenv) ❯ notepad main.py
luis@kymeraw:prueba via 🐍 v3.12.8 (myenv) ❯ cat .\main.py
import requests
response = requests.get('https://httpbin.org/ip')
print('Your IP address is: {0}'.format(response.json()['origin']))

luis@kymeraw:prueba via 🐍 v3.12.8 (myenv) ❯ pip install requests
Collecting requests
:
Successfully installed certifi-2024.12.14 charset-normalizer-3.4.1 idna-3.10 requests-2.32.3 urllib3-2.3.0
luis@kymeraw:prueba via 🐍 v3.12.8 (myenv) ❯
Run the proof of concept with python main.py:
luis@kymeraw:prueba via 🐍 v3.12.8 (myenv) ❯ python.exe .\main.py
Your IP address is: 12.138.199.230
Update
To update:
- Python — download the latest version from python.org and run the installer.
- Pip:
py -m ensurepip --upgrade. - Pipx:
scoop update pipx. - CLI programs installed with
pipx:pipx upgrade-all.
C/C++
Since this is a cross-platform post, for C/C++ I pick the Clang compiler, part of the LLVM (Low-Level Virtual Machine) project. A compiler for C, C++, and Objective-C. Modular, fast, and genuinely cross-platform.
In the C++ Support in Clang table you can see which ISO C++ standard version Clang supports and, more importantly, the implementation status of the language standard (C++98, C++11, …, C++2x).
For a cross-platform Clang project example, see git-repo-eol-analyzer — works on Windows, Linux, and macOS.
To install, download and install LLVM X.X.X from the official Releases. As an example, a direct link to LLVM 64-bit 21.1.2 for Windows.
CMake
Tightly tied to C/C++, CMake is an open-source tool that manages configuration and generation of build scripts for cross-platform projects. It abstracts platform-specific configuration, simplifying the creation of build artifacts (Makefiles, Visual Studio projects, etc.). For C++ projects on Windows, CMake integrates smoothly with VSCode, auto-generates projects, and so on.
To install on Windows: from the official site, download the Windows x64 Installer. I also recommend installing Ninja (generator) from its official repo and saving it in a directory already on your PATH.
The basic CMake flow has two steps:
Configure: parses
CMakeLists.txtand creates all the scripts and system-specific files so the project can later be generated (compiled). Configuration output lives in the ./build subdirectory.Build: based on the previous step, CMake compiles for the current development environment and system, for example a project with a
Makefileor more complex setups.
CMake follows a declarative approach: you define what the project needs (sources, libraries, dependencies) in CMakeLists.txt. Check the one I created in the project mentioned above: git-repo-eol-analyzer.
Golang
Golang is a language that combines the simplicity and efficiency of older languages like C with the modern features needed for concurrent, high-performance software development. Especially popular in distributed systems, cloud services, and networking tools thanks to its focus on concurrency and scalability.
- To install on Windows, head to Go downloads, download the latest MSI for windows-amd64; it installs by default at
C:\Program Files\Go\bin, which is added to the PATH. - To integrate with VSCode install the
golang.goextension.
Some variables critical for an efficient Go dev environment:
$GOROOT: install path (defaultC:\Program Files\Go).$GOPATH: default workspaceC:\Users\<user>\go.- The installer adds
$GOROOT\binand$GOPATH\binto the PATH.
As of Go 1.11, Go Modules manages dependencies more efficiently. I enable it with go env -w GO111MODULE=on and write a small program to sanity-check everything.
Initialize the project module:
go mod init hola
Create main.go:
package main

import "fmt"

func main() {
    fmt.Println("Hello, world")
}
Run and then build the hola.exe binary:
go run main.go

go build
.NET
Today two lines coexist:
- .NET Framework 4.8 (Windows-only, no longer evolving): needed for compatibility with existing apps and tools that still require the classic runtime.
- .NET 5+ (cross-platform: Windows, Linux, macOS): unifies .NET Core, .NET Framework, and Xamarin. Version 9 shipped in November 2024.
.NET Framework
Windows-only, latest version 4.8. Useful today for:
- Compatibility: legacy apps and modern tools that still require the runtime.
- Legacy development: maintaining .NET Framework-based apps (install the Developer Pack as well).
To install .NET Framework 4.8, go to Programs and Features in the Control Panel or download from Microsoft’s website. If I use the first method, I verify what’s installed first and then install.
- Open Control Panel > Programs > Programs and Features > Turn Windows features on or off.
- Here you can see the installed .NET Framework versions.
- In the features list, look for the available .NET Framework versions (e.g., .NET Framework 3.5 or .NET Framework 4.8).
- Tick the box for the version you want to install.
- Click OK and wait for Windows to finish.
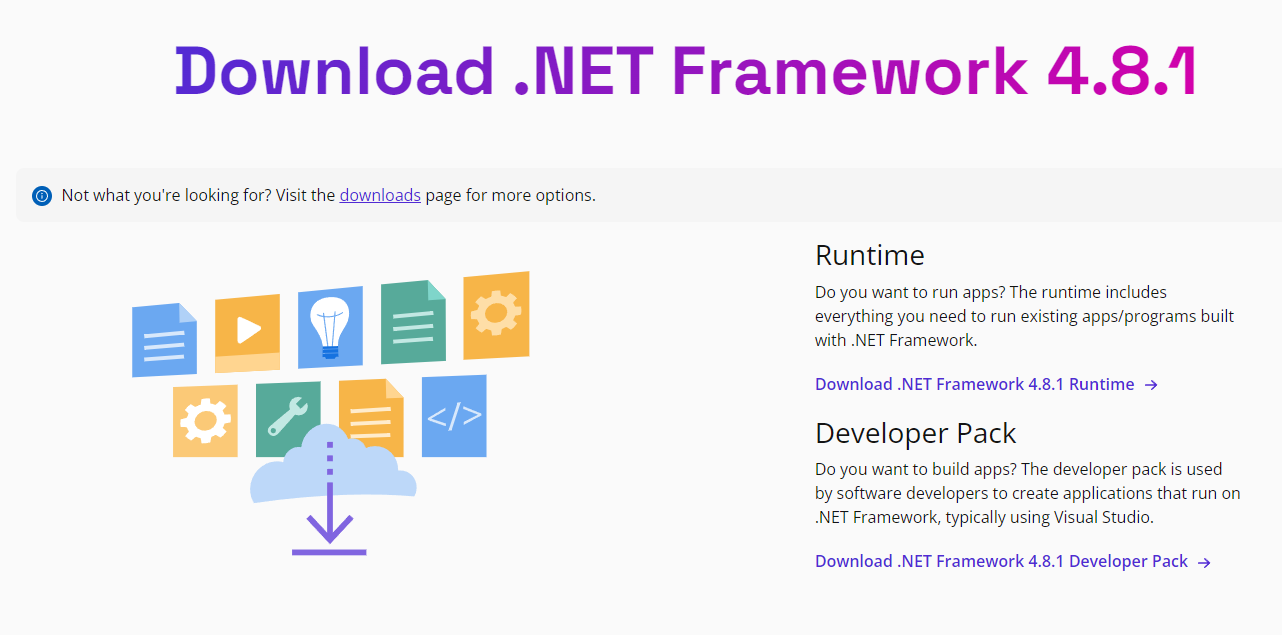
If the version isn’t listed, go to Microsoft’s site (4.8.1 example). If you’ll be developing, install the Developer Pack.
You can check which version you have installed against the number shown on the .NET Framework versions and dependencies page:
Get-ChildItem 'HKLM:\SOFTWARE\Microsoft\NET Framework Setup\NDP\v4\Full' | Get-ItemPropertyValue -Name Release
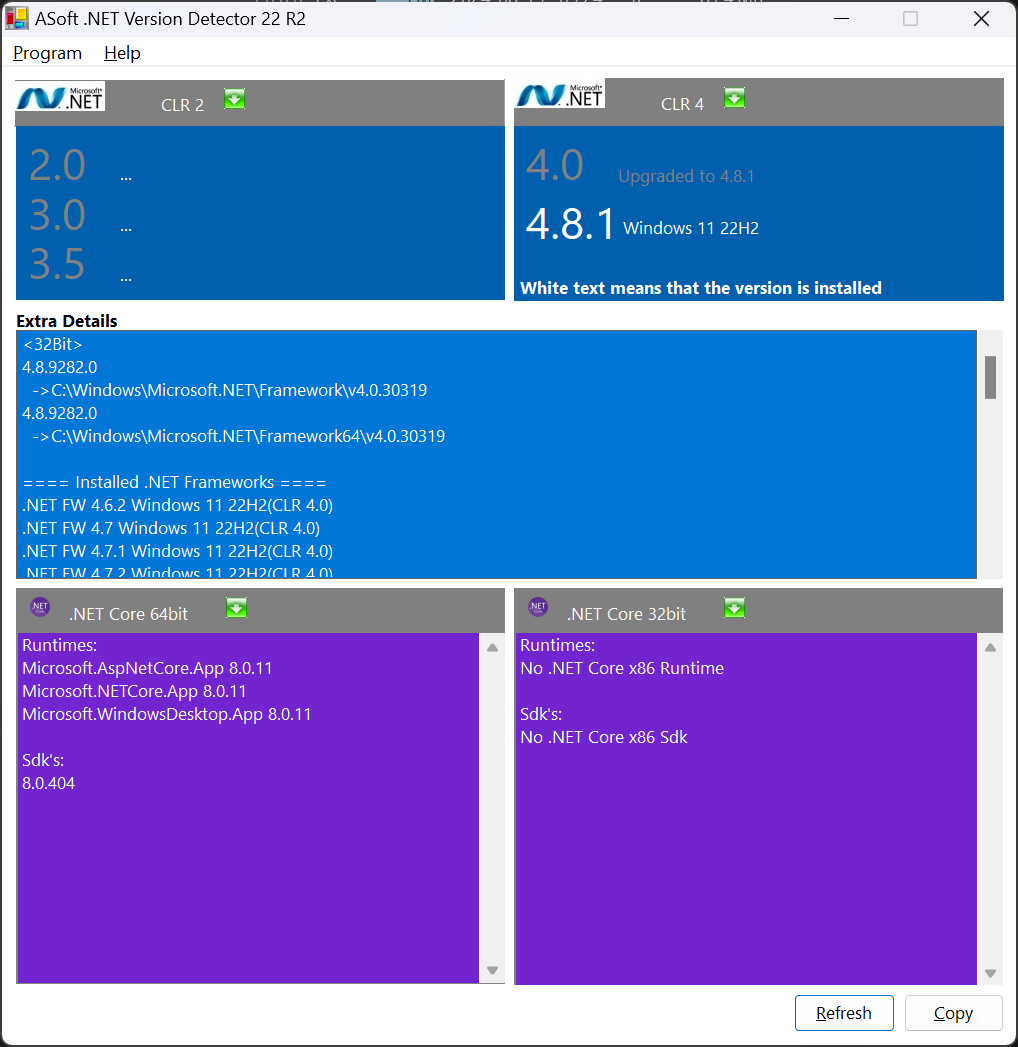
You can use .NET Version Detector, a lightweight tool that reports the different Microsoft .NET and .NET Core versions installed on a machine.
dotnetver.exe
.NET 5+
Modern cross-platform platform (Windows, Linux, macOS) that unifies .NET Core, .NET Framework, and Xamarin under a single model. The Core name disappears and the version number jumps from 3.1 to 5 to mark the new cycle.
Before installing, I disable telemetry (opt-out): I add the environment variable DOTNET_CLI_TELEMETRY_OPTOUT=1 in System variables (see A note on PATH for how to open the variables editor).
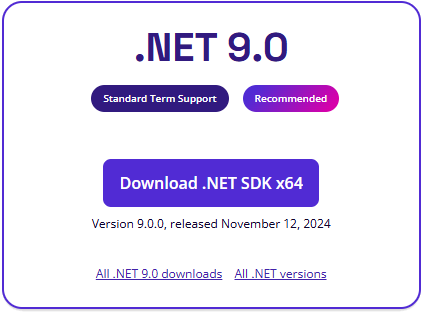
Download the latest version and start the install:
From the official downloads page:
- dotnet.microsoft.com/download.
- Pick the .NET version you want (Runtime or SDK). In my case SDK, since I’ll be building apps.
Download the installer:
- Pick the option matching your OS (Windows x64 for most users).
Run the installer:
- Follow the on-screen instructions to complete the install. If updating, I pick “Repair”.
- In my case the following products were installed (Apr'25 update):
- .NET SDK 9.0.203.
- .NET Runtime 9.0.4.
- ASP.NET Core Runtime 9.0.4.
- .NET Windows Desktop Runtime 9.0.4.
Resource links:
- .NET documentation: https://aka.ms/dotnet-docs.
- SDK documentation: https://aka.ms/dotnet-sdk-docs.
- Release notes: https://aka.ms/dotnet9-release-notes.
- Tutorials: https://aka.ms/dotnet-tutorials.
Verify the install — by the way, it’s installed at C:\Program Files\dotnet:
luis@kymeraw:~ ❯ dotnet --version
9.0.203
With .NET installed, you can create your first C# program easily via the .NET CLI.
- Open a terminal (CMD, PowerShell, or a terminal in your code editor).
- Navigate to the directory where you want to create the project:
luis@kymeraw:tmp ❯ dotnet new console -n HolaMundo
The template "Console App" was created successfully.

Processing post-creation actions...
Restoring C:\Users\luis\tmp\HolaMundo\HolaMundo.csproj:
Restore succeeded.
luis@kymeraw:tmp ❯ cd .\HolaMundo\
This is the program it generates:
// See https://aka.ms/new-console-template for more information
Console.WriteLine("Hello, World!");
luis@kymeraw:HolaMundo ❯ dotnet run
Hello, World!
To build an executable:
luis@kymeraw:HolaMundo ❯ dotnet build
Restore complete (0,1s)
  HolaMundo succeeded (0,1s) → bin\Debug\net9.0\HolaMundo.dll

Build succeeded in 0,5s
luis@kymeraw:HolaMundo ❯ .\bin\Debug\net9.0\HolaMundo.exe
Hello, World!
Remove SDK/Runtime versions
When working with .NET on Windows, especially in active development environments, it’s common to accumulate many SDK and runtime versions. Here’s how to see what’s installed and how to uninstall what you no longer need. From the terminal, to view SDKs and Runtimes:
luis@kymeraw:~ ❯ dotnet --list-sdks
8.0.408 [C:\Program Files\dotnet\sdk]
9.0.105 [C:\Program Files\dotnet\sdk]
9.0.203 [C:\Program Files\dotnet\sdk]

luis@kymeraw:~ ❯ dotnet --list-runtimes
Microsoft.AspNetCore.App 8.0.15 [C:\Program Files\dotnet\shared\Microsoft.AspNetCore.App]
Microsoft.AspNetCore.App 9.0.4 [C:\Program Files\dotnet\shared\Microsoft.AspNetCore.App]
Microsoft.NETCore.App 8.0.15 [C:\Program Files\dotnet\shared\Microsoft.NETCore.App]
Microsoft.NETCore.App 9.0.4 [C:\Program Files\dotnet\shared\Microsoft.NETCore.App]
Microsoft.WindowsDesktop.App 8.0.15 [C:\Program Files\dotnet\shared\Microsoft.WindowsDesktop.App]
Microsoft.WindowsDesktop.App 9.0.4 [C:\Program Files\dotnet\shared\Microsoft.WindowsDesktop.App]
Unlike other environments, .NET has no CLI command to uninstall versions. You have to uninstall them manually from Control Panel or the new Settings UI:
- Win + I to open Settings.
- Apps → Installed apps.
- Search for .NET.
- Look for entries like:
- Microsoft .NET SDK 8.0.408.
- Microsoft .NET SDK 9.0.105.
- Microsoft .NET Runtime 8.0.15.
From the three-dot menu (⋮) → Uninstall.
You can also use winget if they were installed through it:
luis@kymeraw:~ ❯ winget list "Microsoft .NET"
Name                                              Id                                                Version     Source
-----------------------------------------------------------------------------------------------------------------------
:
Microsoft Windows Desktop Runtime - 8.0.15 (x64)  Microsoft.DotNet.DesktopRuntime.8                 8.0.15      winget
:
luis@kymeraw:~ ❯ winget uninstall "Microsoft.DotNet.DesktopRuntime.8"
Found Microsoft Windows Desktop Runtime - 8.0.15 (x64) [Microsoft.DotNet.DesktopRuntime.8]
Starting package uninstall...
Successfully uninstalled
Ruby
Windows doesn’t ship Ruby, so I install it. Not that I program in it, but I need it to run Bundler and Jekyll for working on my blog locally (more info here). Ruby is an interpreted, reflective, object-oriented programming language created by Japanese programmer Yukihiro “Matz” Matsumoto, who began work on Ruby in 1993 and presented it publicly in 1995.
Install: follow Jekyll’s documentation.
Node.js
Node.js is a server-side JavaScript runtime for building fast, scalable, asynchronous server apps. I use it for backend projects, microservices, or command-line tools written in JS/TS.
- Download from https://nodejs.org.
- Install the LTS (Long Term Support) version for stability.
- The installer bundles
npm, Node’s package manager.
Verify the install:
node -v
npm -v
npm install -g yarn            # Alternative to npm
npm install -g typescript      # TS compiler
npm install -g eslint          # Linter
npm install -g http-server     # Static server
I use npx to run binaries without a global install:
npx create-react-app myapp
VSCode auto-detects node and npm. I install the recommended extensions: ESLint, Prettier, JavaScript / TypeScript Snippets.
Java JDK
I don’t program in Java, but I need it to run some tools (Android SDKs or third-party tools requiring a JVM). In those cases I install the JDK from Adoptium (Temurin), an open-source version without telemetry. Alternatively you can use the official JDK from Oracle.
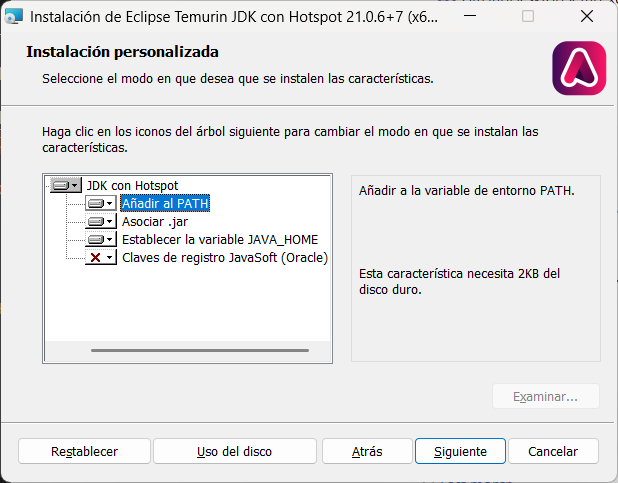
I downloaded the latest Adoptium version (OpenJDK21U-jdk_x64_windows_hotspot_21.0.6_7.msi) and ran the installer.
During install I made sure to:
- Add
JAVA_HOME\binto thePATH. - Configure the
JAVA_HOMEenvironment variable.
Once done:
PowerShell 7.5.0
C:\Users\luis>
luis@kymeraw:~ ❯ echo $env:JAVA_HOME
C:\Program Files\Eclipse Adoptium\jdk-21.0.6.7-hotspot\
luis@kymeraw:~ ❯
luis@kymeraw:~ ❯ java --version
openjdk 21.0.6 2025-01-21 LTS
OpenJDK Runtime Environment Temurin-21.0.6+7 (build 21.0.6+7-LTS)
OpenJDK 64-Bit Server VM Temurin-21.0.6+7 (build 21.0.6+7-LTS, mixed mode, sharing)
luis@kymeraw:~ ❯
luis@kymeraw:~ ❯
Optionally I can install Maven or Gradle depending on the project:
winget install Apache.Maven
winget install Gradle.Gradle
When working on medium to large Java projects, managing dependencies and the build process manually isn’t viable. That’s what tools like Maven and Gradle are for: automating compilation, testing, packaging, and third-party library management.
Apache Maven is a project management and software build tool based on a central configuration file (pom.xml). It defines dependencies, plugins, lifecycle phases, etc.
Main features:
- XML-based configuration (
pom.xml). - Convention over configuration.
- Large library repository (Maven Central).
- Widely used in enterprise projects.
<project>
  <modelVersion>4.0.0</modelVersion>
  <groupId>com.miempresa</groupId>
  <artifactId>miproyecto</artifactId>
  <version>1.0.0</version>
</project>
Gradle is a more modern and flexible tool than Maven, based on a declarative-imperative approach. Uses a Groovy or Kotlin DSL (build.gradle or build.gradle.kts).
Main features:
- Faster (build cache, parallel execution).
- Cleaner, more expressive syntax.
- Compatible with Maven and other systems.
- Widely used in Android projects.
plugins {
    id 'java'
}

group 'com.miempresa'
version '1.0.0'

repositories {
    mavenCentral()
}

dependencies {
    implementation 'com.google.guava:guava:32.1.2-jre'
    testImplementation 'junit:junit:4.13.2'
}
Local databases
I like to have several local databases available for testing or development without depending on external servers. I manage them via Docker or a direct install.
MySQL / MariaDB:
- Install Docker Desktop.
- Run a container:
docker run --name mysql-dev -e MYSQL_ROOT_PASSWORD=admin -p 3306:3306 -d mysql:8
Recommended GUI client: DBeaver.
PostgreSQL:
docker run --name pg-dev -e POSTGRES_PASSWORD=admin -p 5432:5432 -d postgres
GUI client: DBeaver or pgAdmin.
SQLite:
No server required. I use SQLite for scripts, small projects, or tests.
- Install from https://sqlite.org.
- Also available via
winget install SQLite.sqlite. - Query from the command line:
sqlite3 database.db.
VSCode has extensions for browsing .db files.
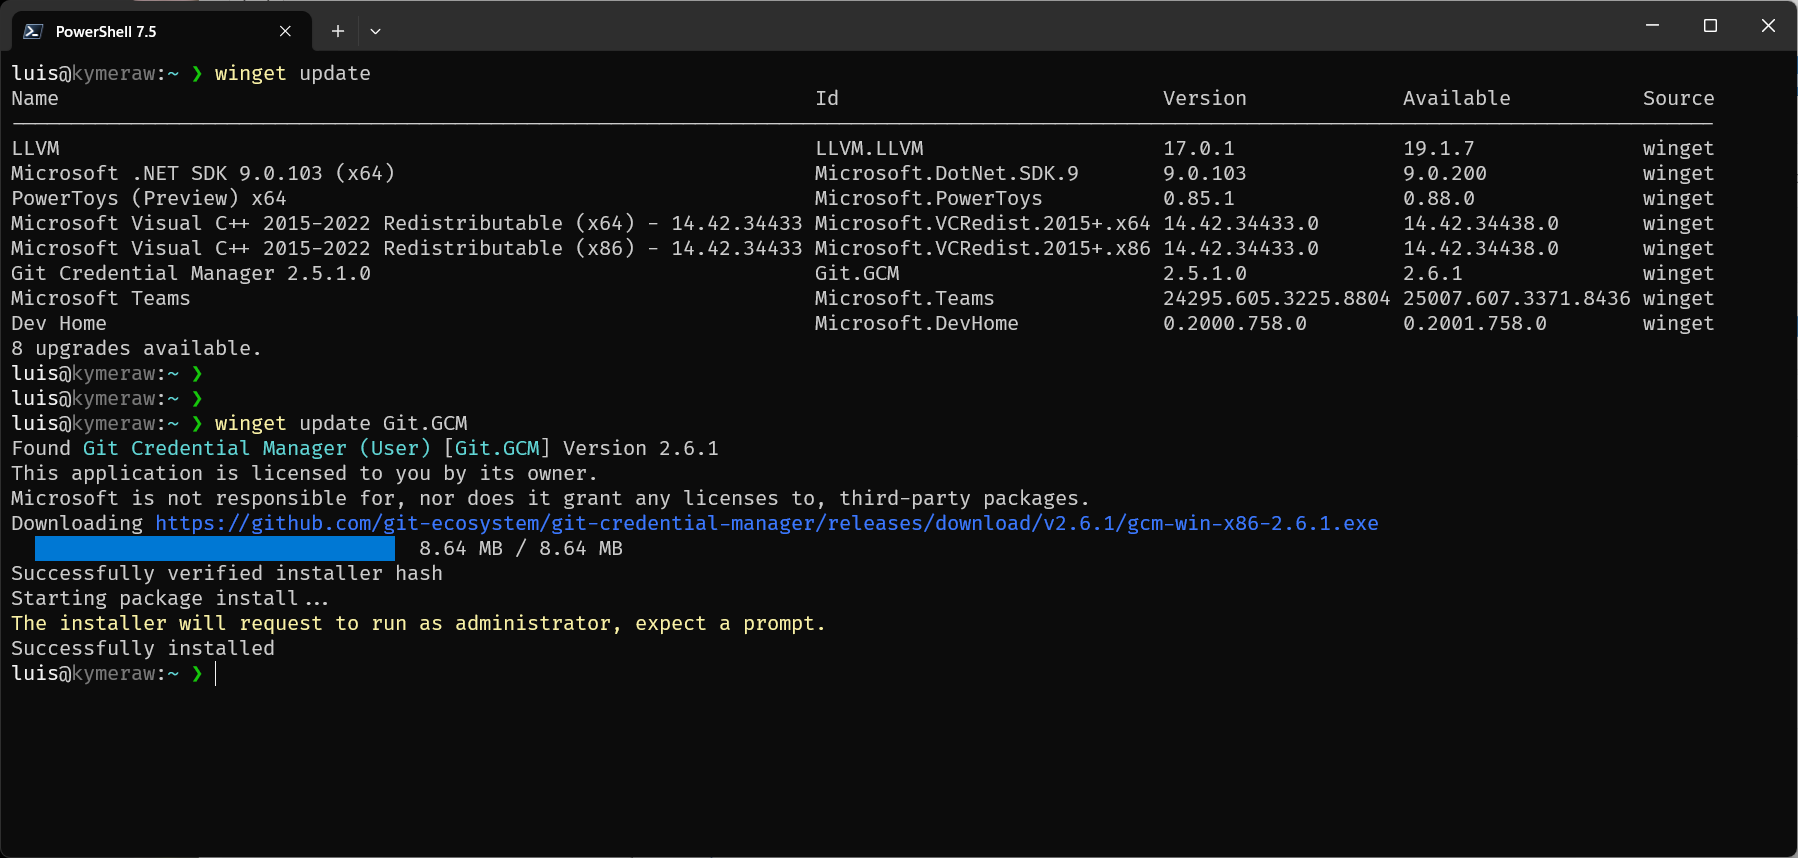
Updates
Operating system: Start > Settings > Windows Update > Check for updates.
Applications (depends on each app owner — still a pain to stay on top of):
- Manual: open each app and check version + update options.
- Installed with
winget:winget update <Id>to update a specific one.winget update --allto update everything.
- Installed with
scoop:scoop updateupdates scoop itself.scoop update *updates all apps installed with scoop.
Continuous learning
To wrap up, a bit more on Shell and Linux. If you’re coming from Windows, I recommend learning to use the Shell — it’s a fundamental skill for any software developer. The Shell lets you automate tasks, run commands, and manage the system more efficiently and quickly than via GUIs. There are plenty of resources to learn the Shell, both bash and zsh — here are some references:
- Spanish course: Curso de Introducción a la Terminal y Comandos Básicos.
- English course: Command Line Basics (Udemy).
- Bash commands: GNU Bash Reference Manual.
- Zsh commands: Zsh Users Guide.
I also recommend looking at a course on the Unix working philosophy — fundamental for understanding Linux. How and why Unix/Linux commands and programs are designed the way they are. The core idea is that a program ‘should do one thing and do it well’. This philosophy also covers concepts like I/O, the file system, the directory layout, and the ’everything is a file’ idea in Unix. A few short, didactic courses that cover these topics:
- Spanish course: Introducción a Unix y Linux - Filosofía y Conceptos Básicos — directory structure, file management, and the Unix program-design philosophy.
- English course: The Unix Workbench (Coursera), an introductory course covering the Unix philosophy, including I/O and interacting with the file system.
- English course: Linux Command Line Basics - Learn the Shell, Philosophy, and More (Udemy), covering both essential commands and Unix/Linux philosophical principles.
- English course: Understanding the Unix Philosophy (LinkedIn Learning), a short course with an overview of the Unix philosophy and its practical application.
Finally, I’ve picked 50 commands (there are many more) every cross-platform software developer should know. Essential for file-system navigation, process management, text manipulation, and other common software-development tasks. Each command links to its manpage in Ubuntu 24.04.
| Command | Description | Command | Description |
|---|---|---|---|
| ls | Lists files and directories in the current directory. | alias | Creates an alias for a command or series of commands. |
| cd | Changes the current working directory. | unalias | Removes a previously defined alias. |
| pwd | Shows the current working directory. | history | Shows the command history. |
| cp | Copies files and directories. | env | Shows or modifies environment variables. |
| mv | Moves or renames files and directories. | export | Defines environment variables for child processes. |
| rm | Removes files and directories. | source | Runs commands from a file in the current shell context. |
| mkdir | Creates new directories. | uname | Shows information about the operating system. |
| rmdir | Removes empty directories. | uptime | Shows how long the system has been running. |
| touch | Changes file timestamps or creates empty files. | whoami | Shows the current user’s name. |
| echo | Prints a line of text or a variable. | which | Locates a command and shows its full path. |
| cat | Concatenates and prints file contents. | head | Shows the first lines of a file. |
| grep | Searches for patterns in file contents. | tail | Shows the last lines of a file. |
| find | Finds files and directories in a hierarchy. | sort | Sorts text lines in a file or input. |
| chmod | Changes file access permissions. | uniq | Shows or filters consecutive duplicate lines in a file. |
| chown | Changes file and directory owner. | diff | Compares files line by line. |
| ps | Shows the state of current processes. | tee | Reads from stdin and writes to stdout and files. |
| kill | Sends signals to processes, e.g., to stop them. | xargs | Builds and executes command lines from stdin. |
| top | Shows running processes and resource usage. | jobs | Shows the state of background jobs. |
| df | Shows disk space usage of file systems. | bg | Resumes a suspended job in the background. |
| du | Estimates file and directory disk usage. | fg | Brings a suspended job to the foreground. |
| tar | Manipulates tar archives. | alias | Creates an alias for a command or series of commands. |
| zip | Compresses files into ZIP format. | unalias | Removes a previously defined alias. |
| unzip | Extracts files from ZIP format. | history | Shows the command history. |
| ssh | Securely connects to remote servers via SSH. | env | Shows or modifies environment variables. |
| scp | Securely copies files between servers. | export | Defines environment variables for child processes. |
| wget | Downloads files from the web. | source | Runs commands from a file in the current shell context. |
| curl | Transfers data to or from a server. | uname | Shows information about the operating system. |
| nano | Simple terminal text editor. | uptime | Shows how long the system has been running. |
| vim | Advanced terminal text editor. | whoami | Shows the current user’s name. |
| man | Shows the user manual for any command. | which | Locates a command and shows its full path. |