I install VMware Workstation Pro on top of a Windows 11 Pro host and create a Guest VM running Windows 11 Pro (optionally without TPM 2.0) as an isolated development environment.
Windows series
- Preparing a PC for Dualboot Linux / Windows and installing Windows 11 Pro.
- Configuring a decent Windows 11 by removing the cruft.
- Preparing Windows for software development: CLI, WSL2, and tools.
- Installing VMWare Workstation Pro on Windows 11 with a Windows 11 Pro VM.
- Installing a Windows 11 VM on Proxmox to run Windows 11 Pro on top of a Proxmox host.
Install VMware Workstation Pro
VMware Workstation Pro and VMware Fusion have been free for personal use since 2024. From the VMware site, go directly to Workstation Pro (Win/Linux) or Fusion Pro (Mac).
You must register as a Broadcom user. Once on the downloads page, first open the terms & conditions or it won’t let you accept them. Sign in before clicking Download. For updates: the in-app updater doesn’t work well — better to hit the website and grab the new version.
I used VMware-workstation-full-17.6.2-24409262.exe. Run it, accept terms, and customize the install (location, shortcuts, etc.).
Create a Windows 11 Pro VM
I download the Windows 11 ISO from Microsoft’s downloads — Windows 11 (multi-edition ISO for x64 devices). The file Win11_24H2_English_x64.iso is around 5.4 GB.
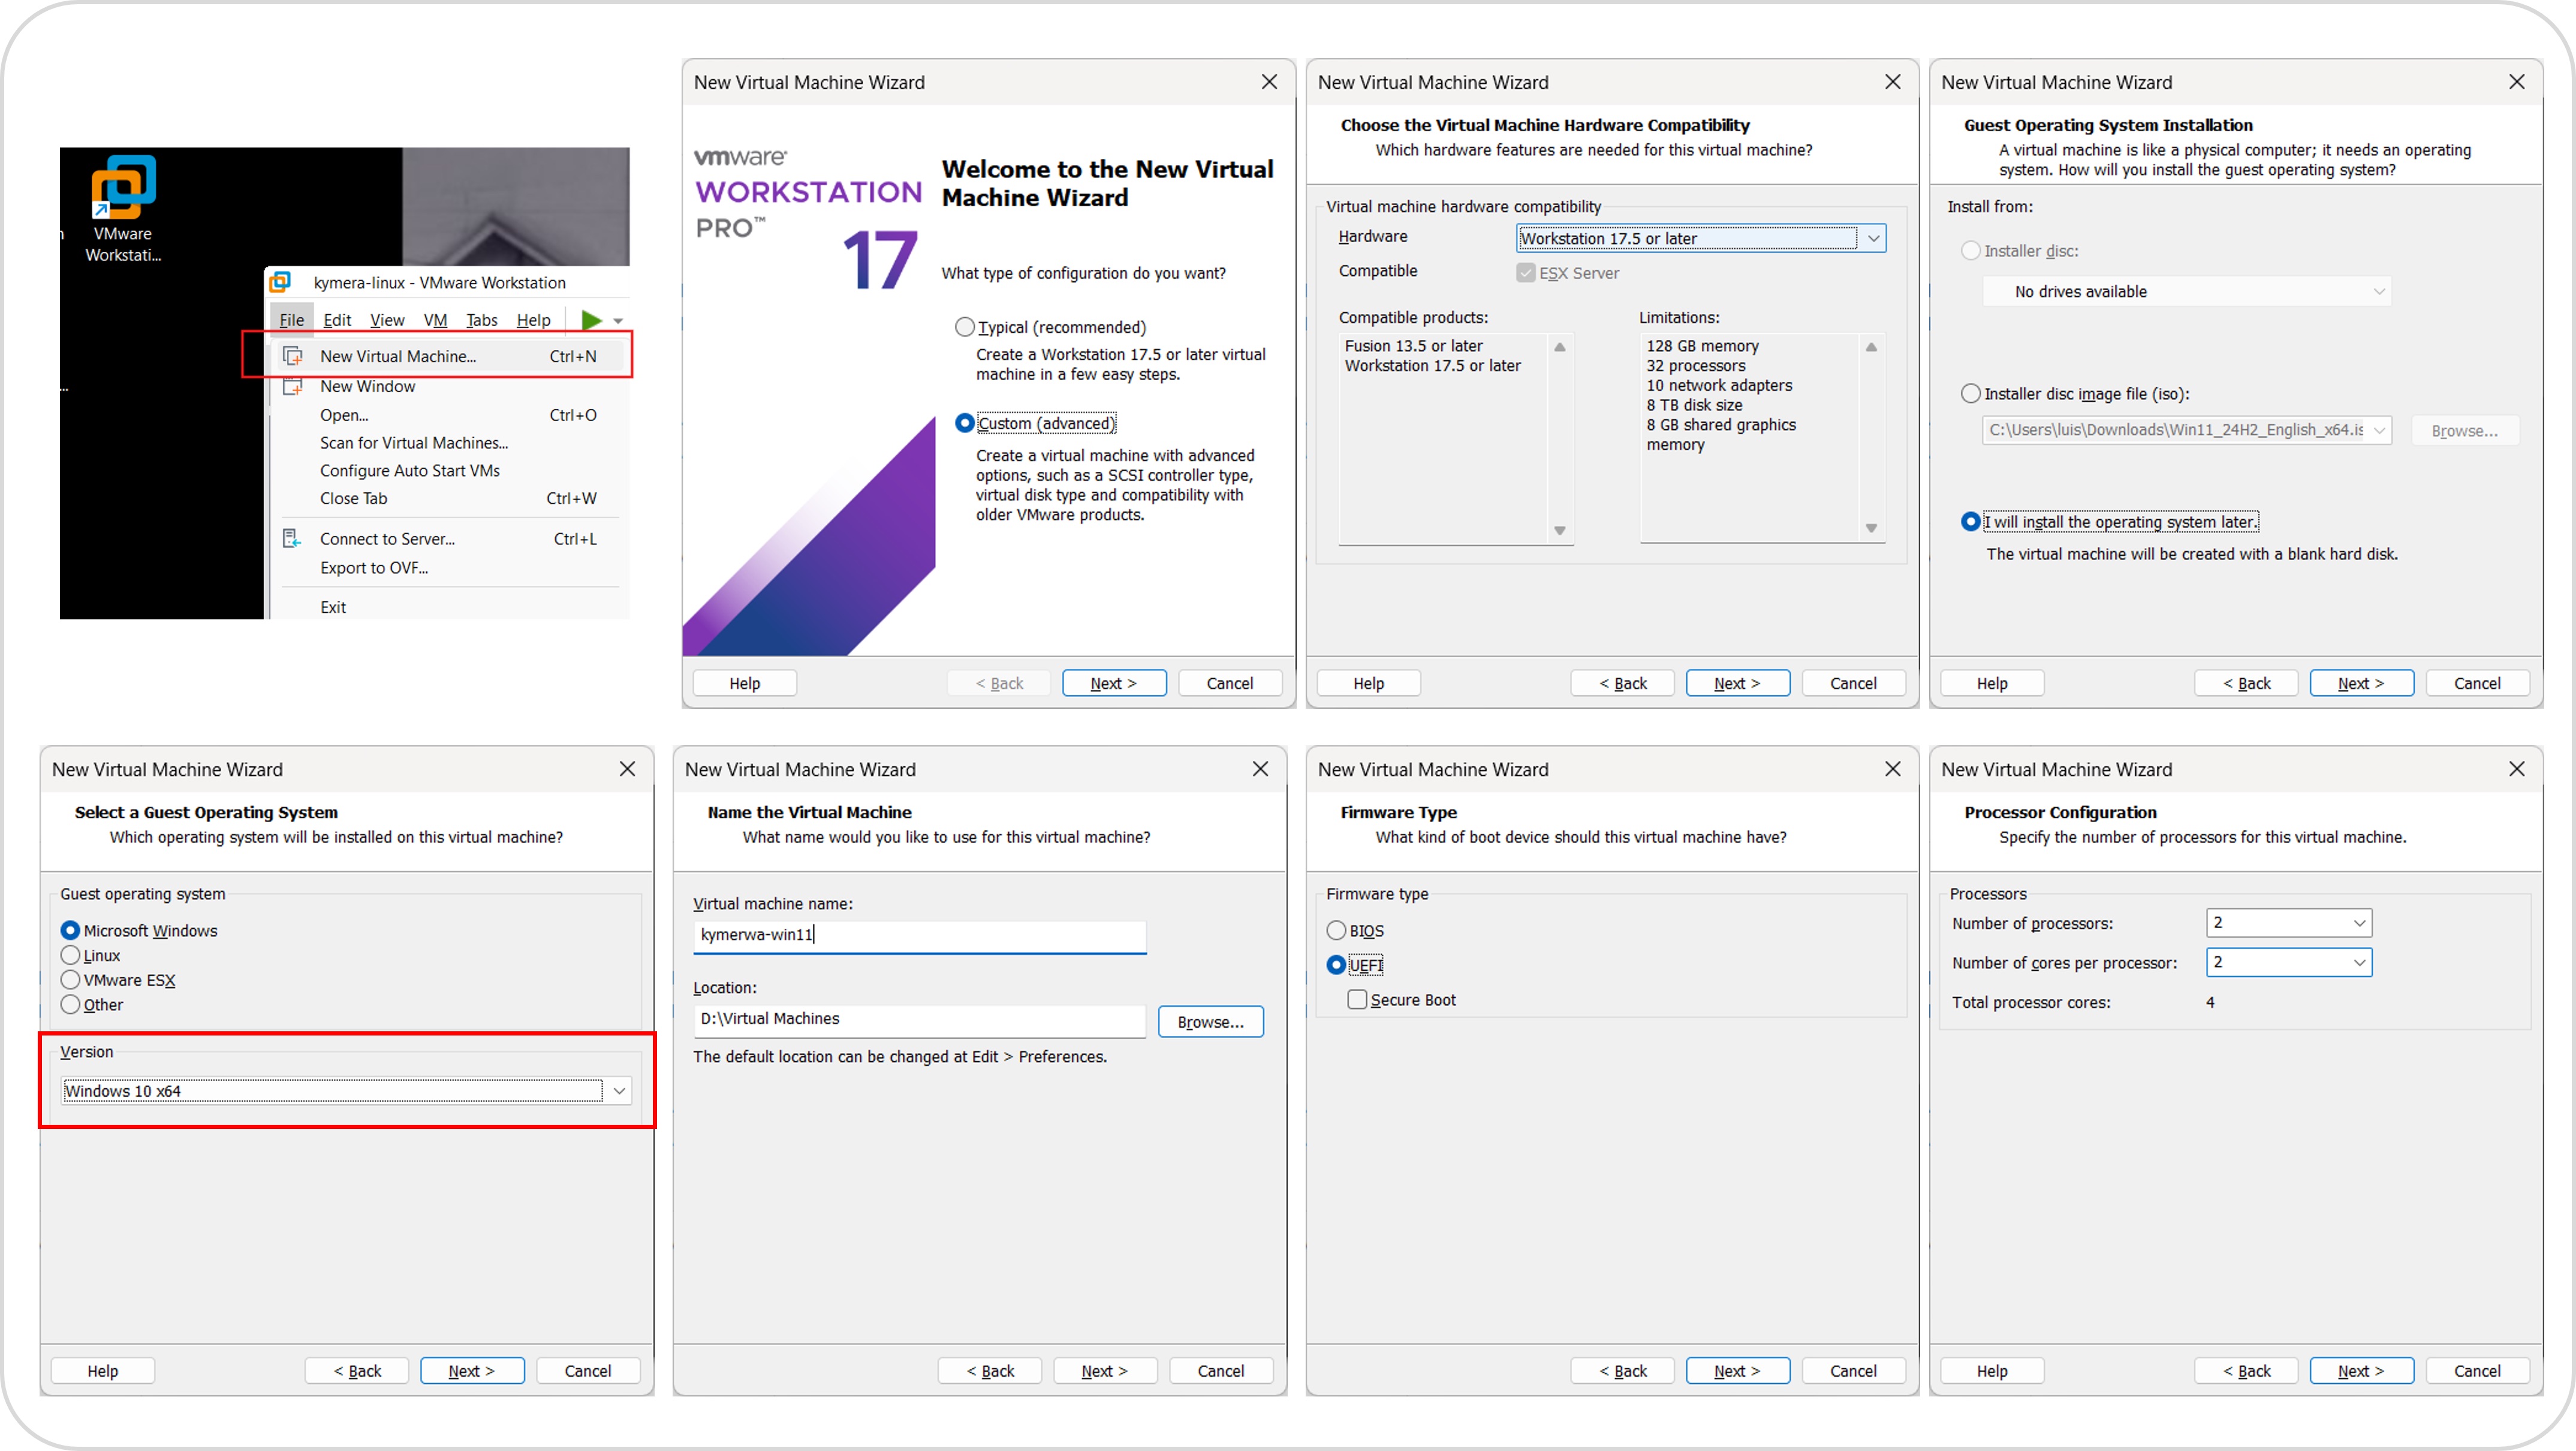
VM specs (reasonable minimum for development): 4 vCPU, 16 GB RAM, 120 GB max disk.
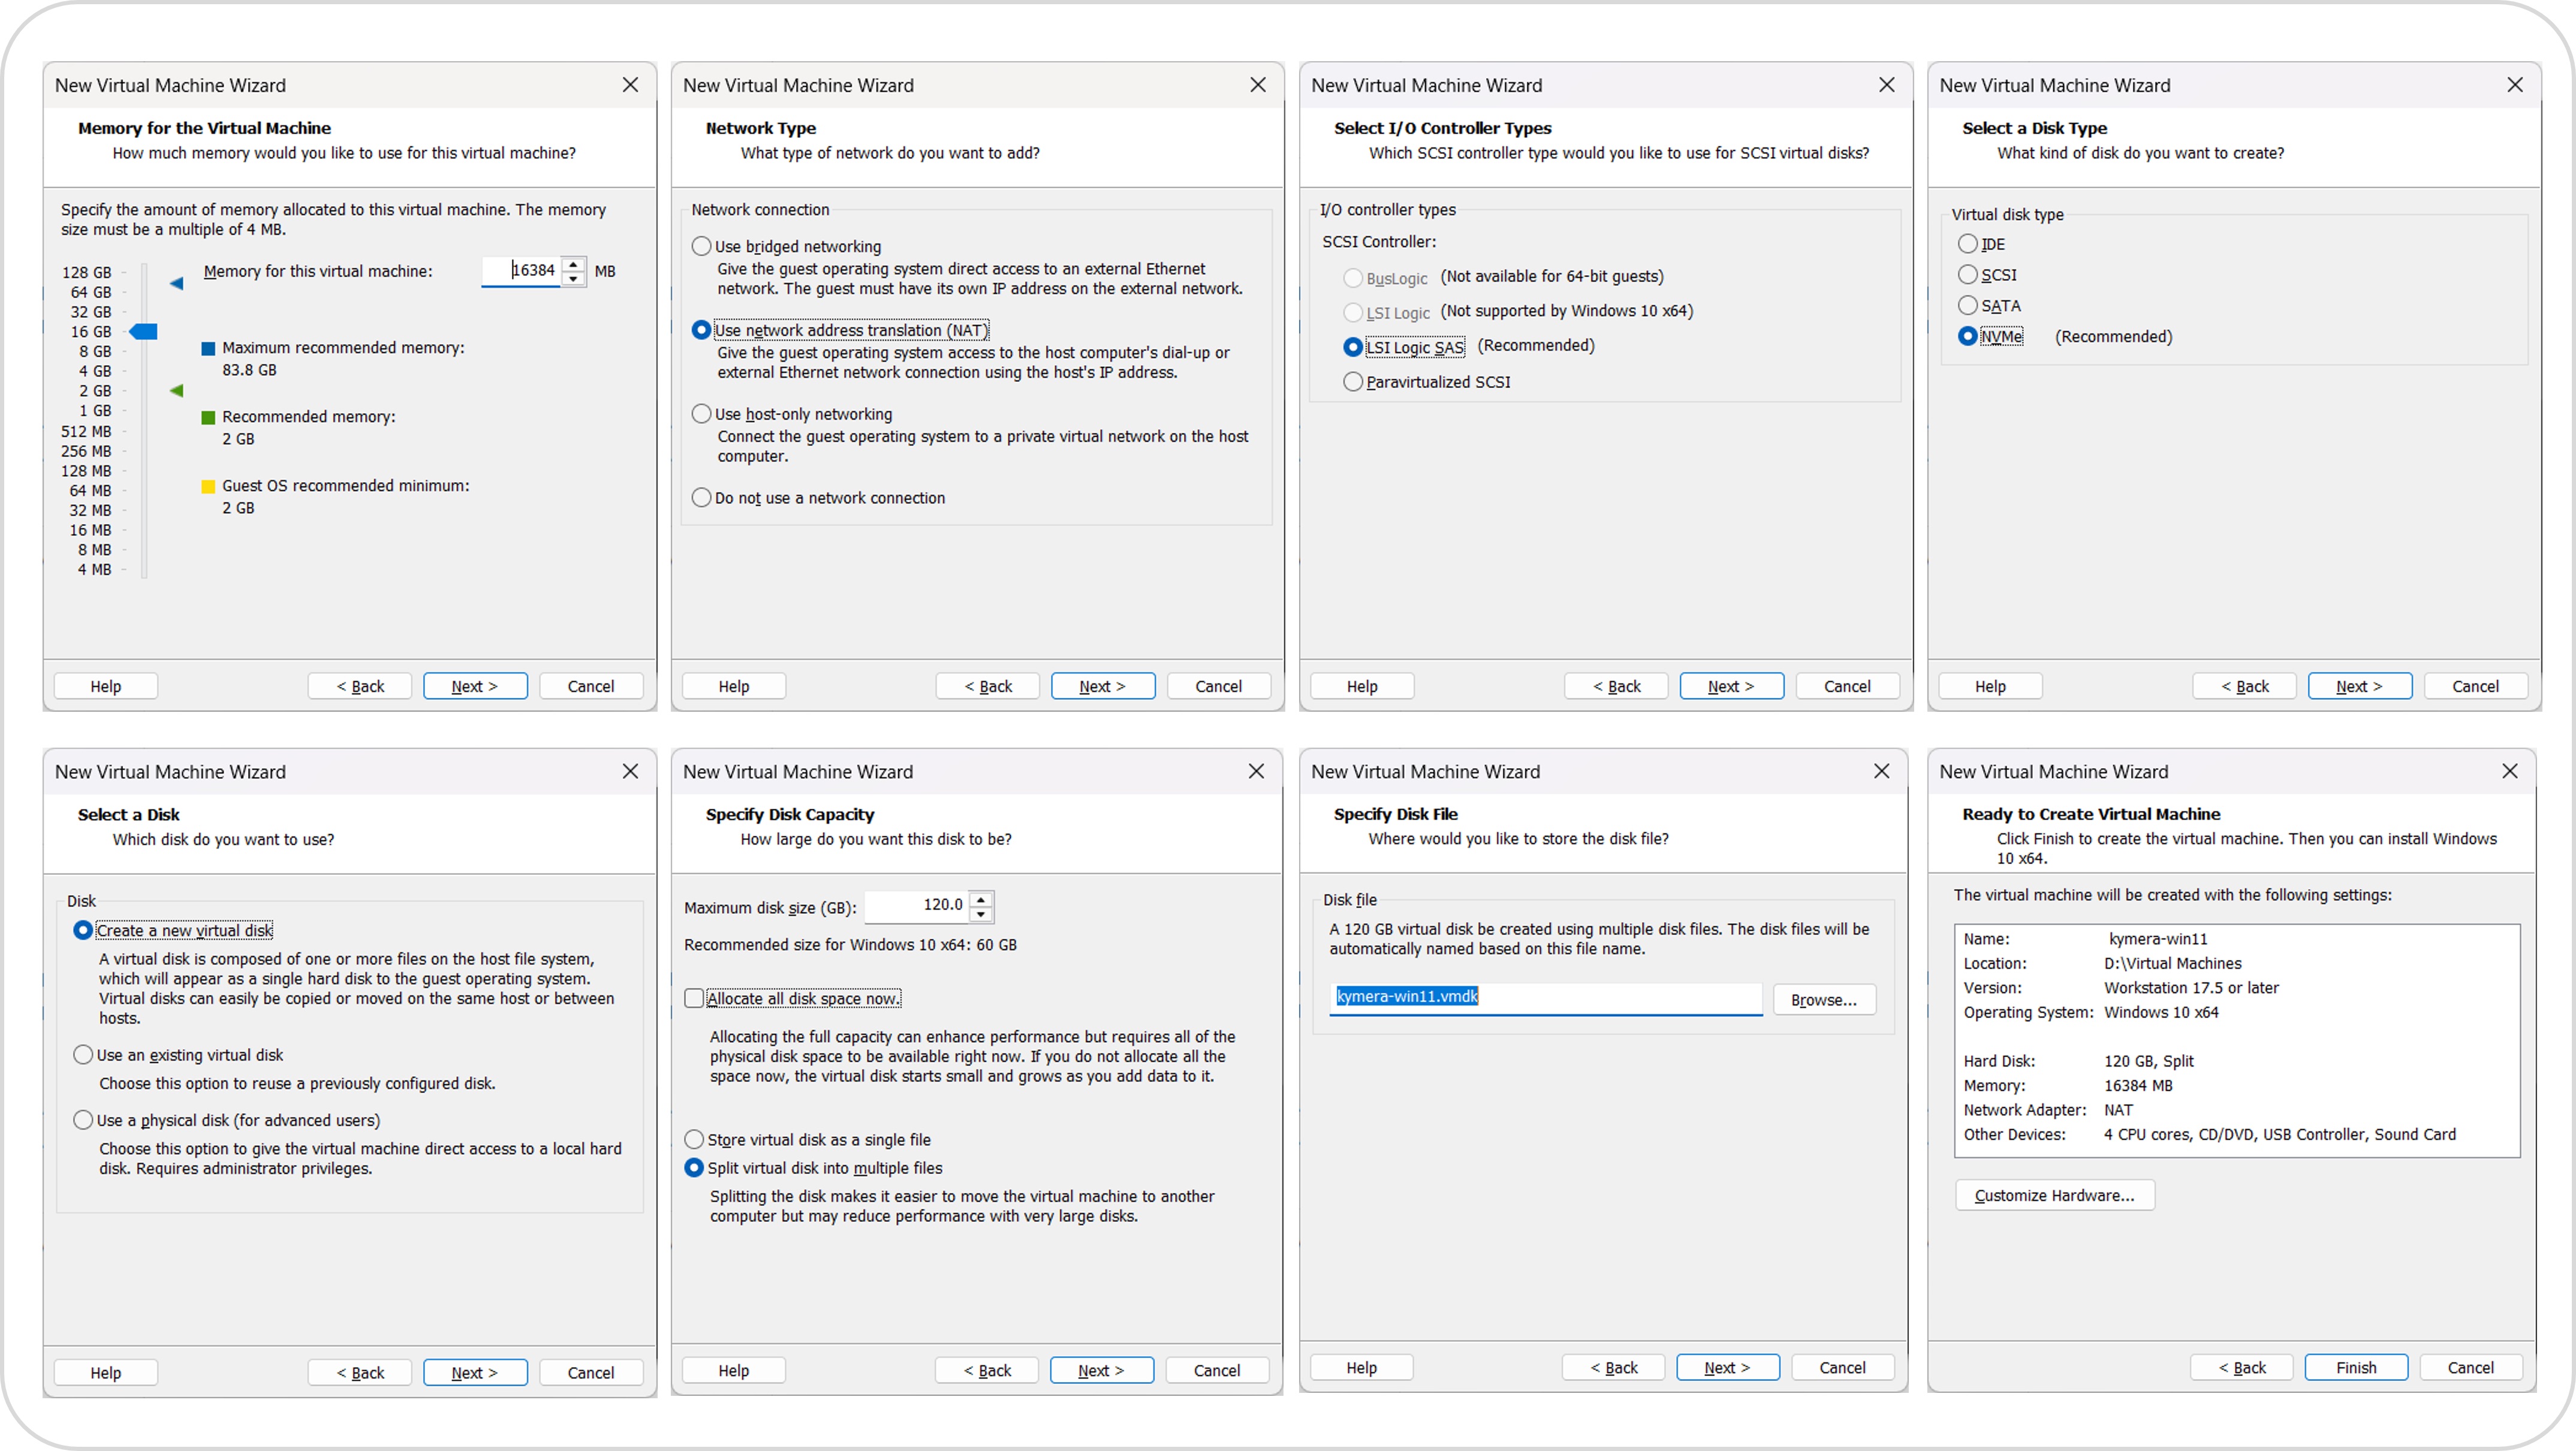
With the VM created, attach the official ISO to the CD/DVD from settings, boot, press a key/ESC to boot off the DVD, and proceed to the keyboard-layout screen.
Bypass TPM 2.0 and Secure Boot (optional)
If you want to skip the TPM and Secure Boot requirements (useful for lab work, discouraged in production), do it here, on the keyboard screen, before proceeding. Important: when creating the VM, tell VMware the guest is Windows 10 even though the ISO is Windows 11.
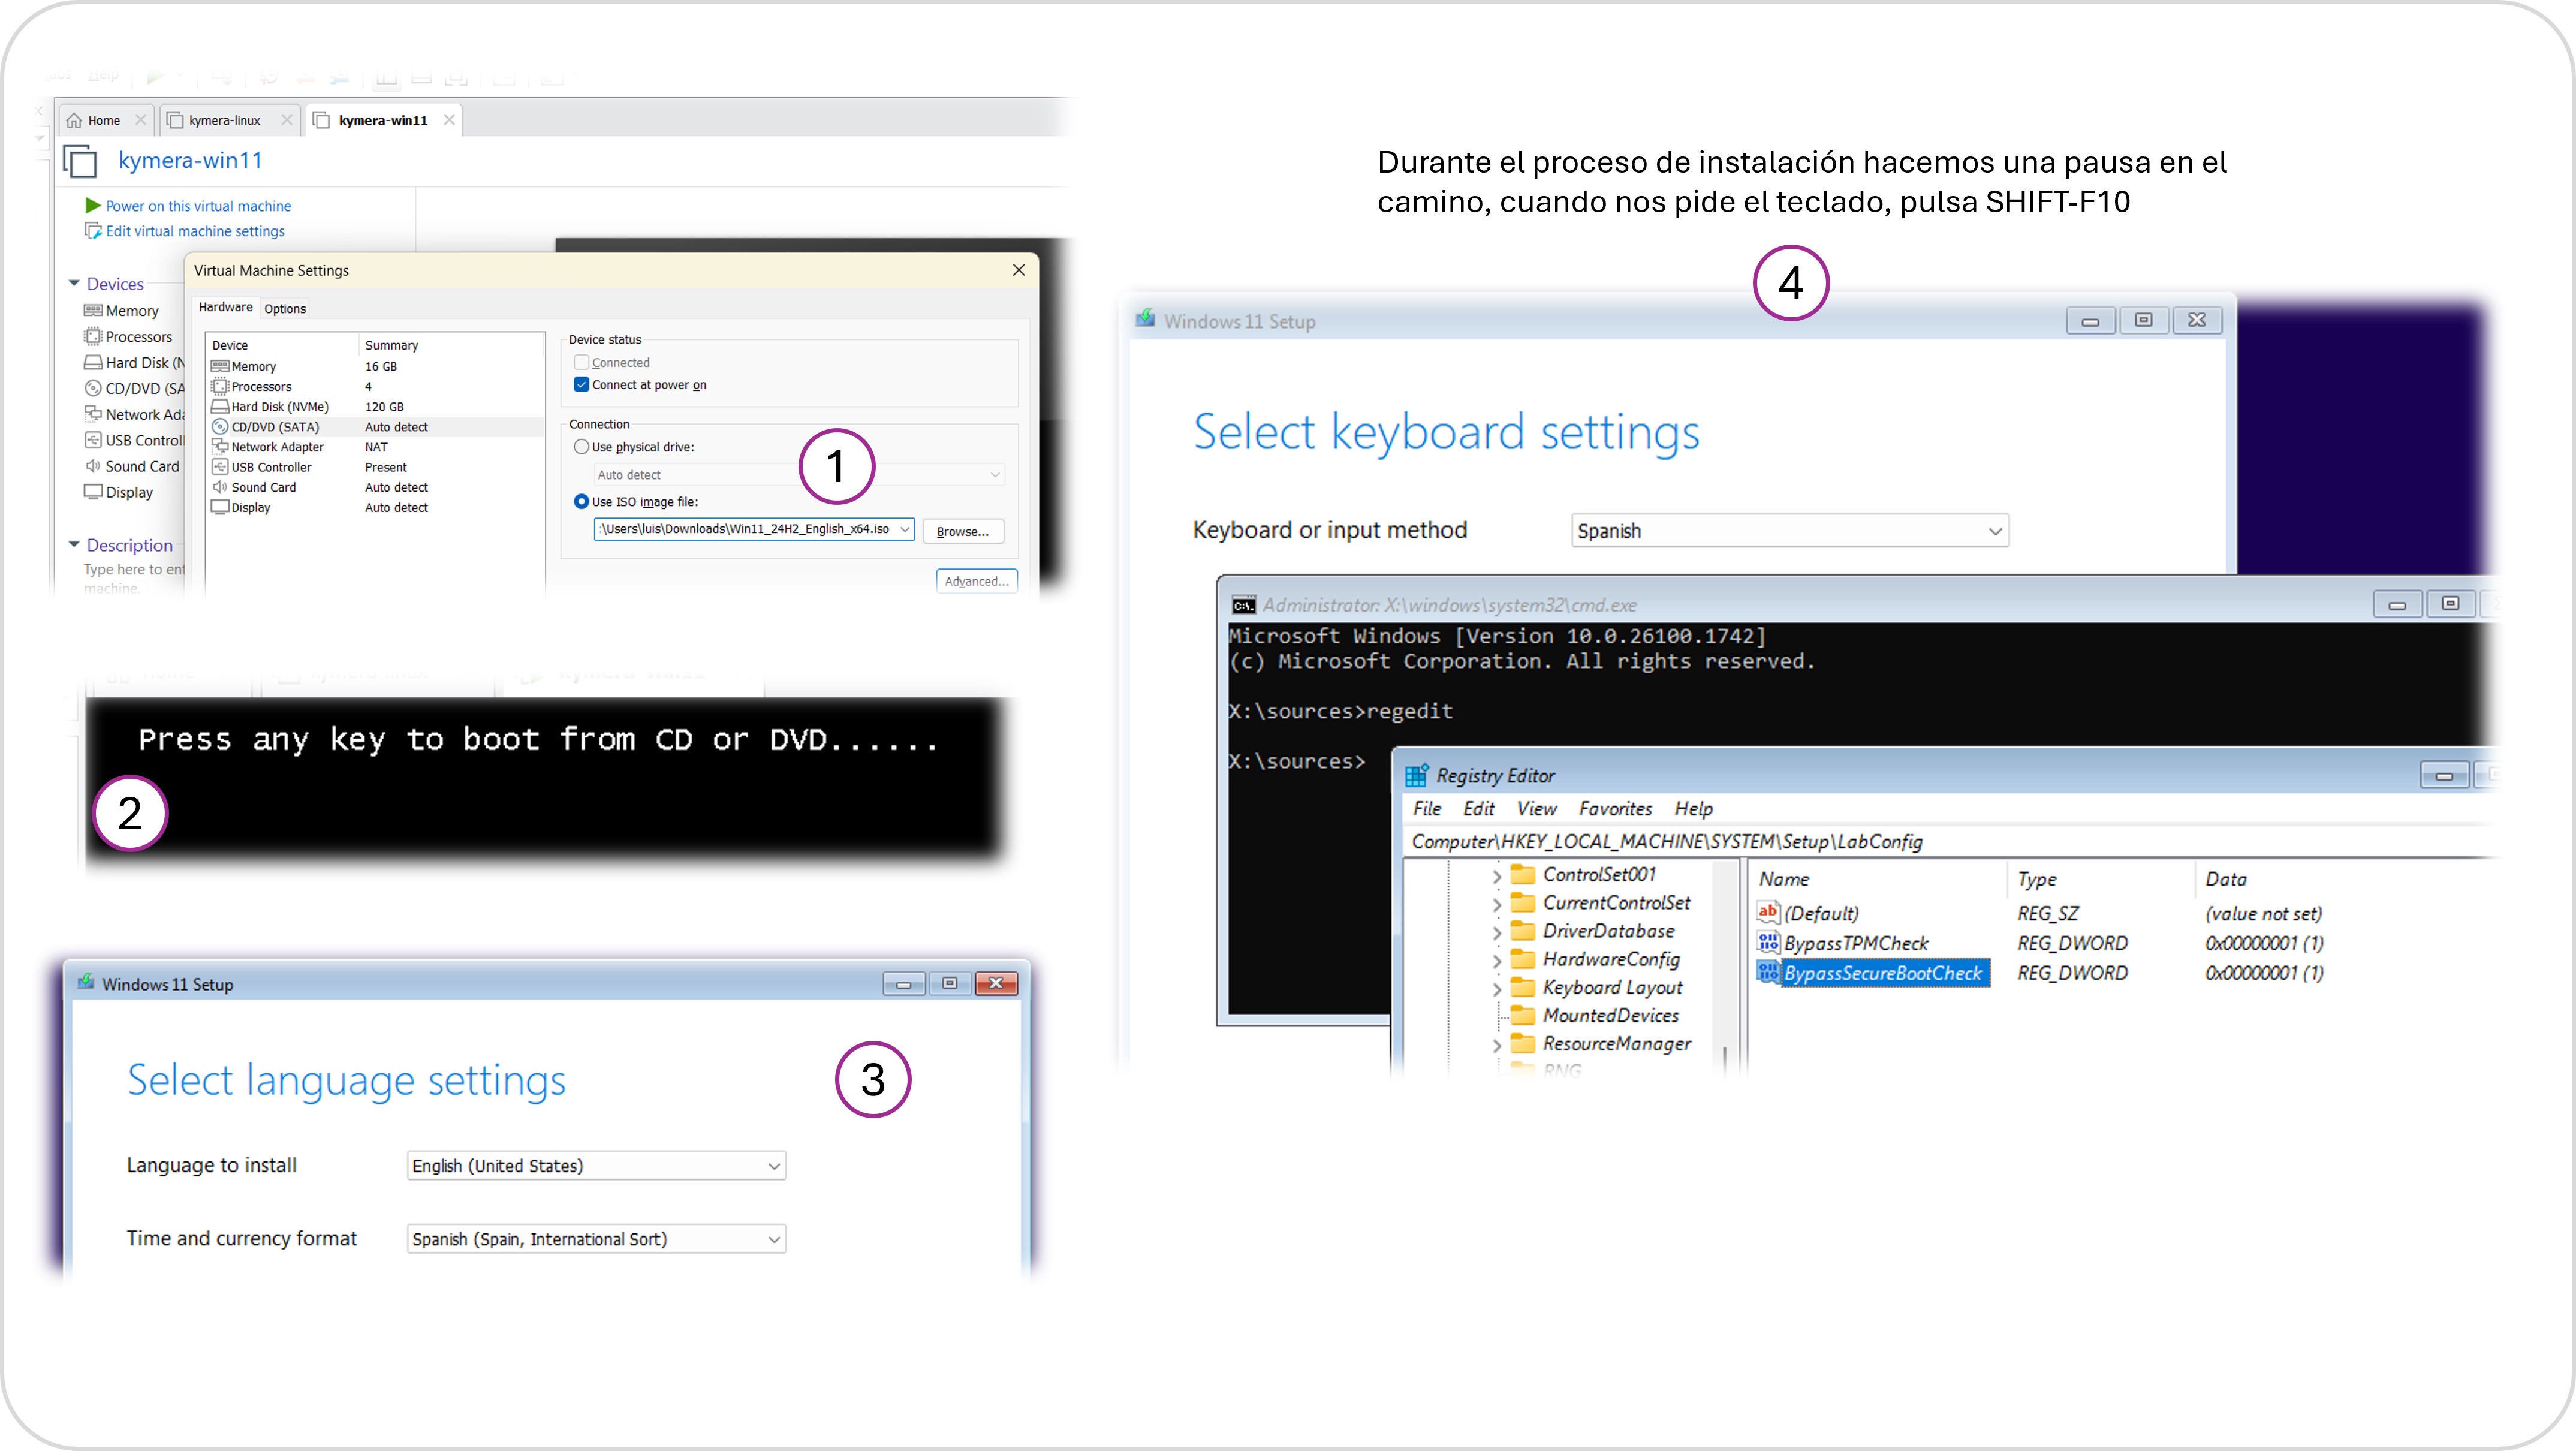
- Press Shift + F10 to open a CMD console.
- Run
regedit. - Navigate to
HKEY_LOCAL_MACHINE\SYSTEM\Setup. - Right-click on
Setup→ New > Key →LabConfig. - Inside
LabConfig, create two DWORD (32-bit) values with value1:BypassTPMCheckBypassSecureBootCheck
- Close regedit and the CMD. Back to the Windows wizard.
If you’re not going to bypass TPM, ignore this section and continue with the normal install.
Continue with the install
Continue through the Windows wizard. The OOBE steps (keyboard, region, local account, PIN, “no” to diagnostics/location, etc.) are identical to those in post 1: see Windows 11 OOBE.
VMware-specific configuration
Once inside Windows:
- Install the VMware Tools: menu
VM > Install VMware Tools, thenWin+R→D:\setup.exe. - Shut down the VM and disable the CD/DVD at boot.
VM > Options:- Enable Shared Folders (to access the host’s disk).
- Sync the guest time with the host.
- Power the VM back on, go to
Settings > Options > Autologinand enable it.
Customize the VM’s OS
I apply exactly the same steps to the Guest as to any Windows 11:
- A decent Windows 11 to strip the cruft.
- Windows for development to set up the dev environment.
When done, shut down the VM and keep the image as a base for future ones.
Clone the VM as a template
Once the VM is polished, it’s worth saving it as a base for spinning up new VMs quickly (tests, labs, etc.) or distributing it to other machines.
If you’re going to create template(s), delete SNAPSHOTS beforehand.
Option A — Generalize with Sysprep + Clone
If you want each clone to prompt for its own initial configuration:
- Run
C:\Windows\System32\Sysprep\sysprep.exe→ Generalize, Shutdown, Out-of-box experience. Next time the VM boots it’ll ask for region, keyboard, device name, PIN, etc. (all the “no"s again). - The VM shuts down.
VM > Manage > Clone→ Current state, Full clone, name it “Win11-Maestra”.- VMware saves it under
Documents/Virtual Machines/Win11-Maestra/. - Optional: ZIP that folder for distribution (takes a while).
To use the clone elsewhere:
- Copy the folder or extract the ZIP.
- Rename the
.vmxand the folder if you want. - Open the
.vmxfrom VMware. - When asked whether you moved or copied the VM → “I copied it” to regenerate UUID and MAC.
Option B — VMware OVF Tool
Useful for migrating to another platform (ESXi, VirtualBox) or for public distribution (educational or demo images).
Download and install the OVF Tool and add it to the PATH:
$ovfToolPath = "C:\Program Files\VMware\VMware OVF Tool"
[Environment]::SetEnvironmentVariable("Path", $env:Path + ";$ovfToolPath", [EnvironmentVariableTarget]::User)
From the CLI, inside the VM directory (takes a while):
ovftool.exe .\Win11-Maestra.vmx ..\Win11-Maestra.ova
Example: I moved the same VM (as a ZIP) to an Ubuntu 24.04 Linux host with VMware Workstation Pro and it just worked.
